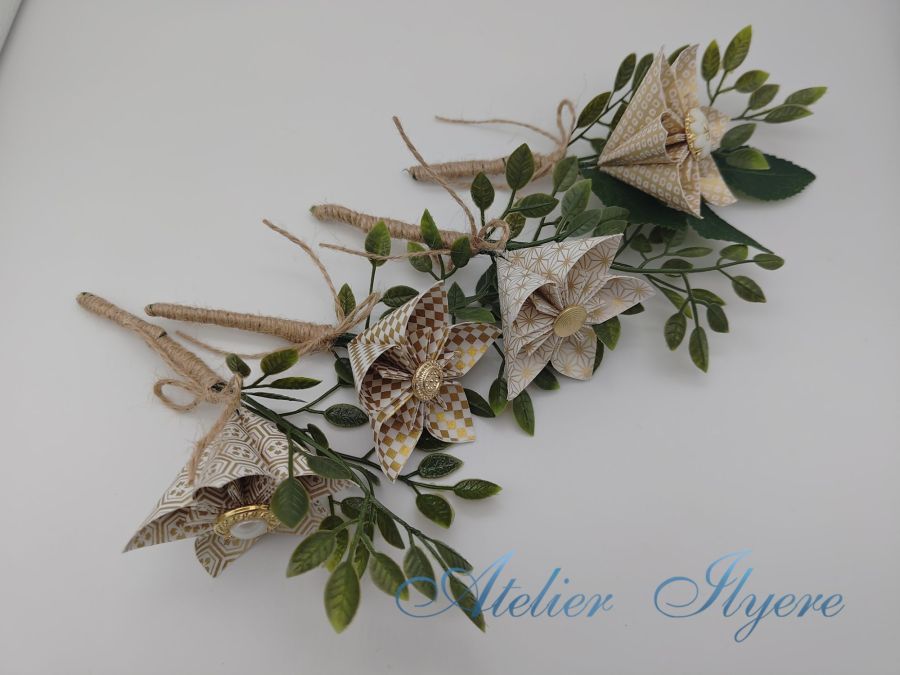
As a follow-on to my bridal bouquet and my bridesmaid bouquets posts, next in the natural order of floral things are the buttonholes for the groom and his groomsmen. In other countries they might be called boutonnières and they are small floral arrangements worn on the front left buttonhole of the suit jacket.
As you can imagine, for something to be worn, it needs to be rather small but also hardy enough to stay on. I also asked the groom for his opinion on the design by suggesting some materials, and the main takeaway I got was to not use ribbon. That saddened me a little because I wanted a few more matching parts for a cohesive design! At least jute twine was okay to use. I had to wait a little because I needed to order some extra as I ran out when doing the wedding favours!
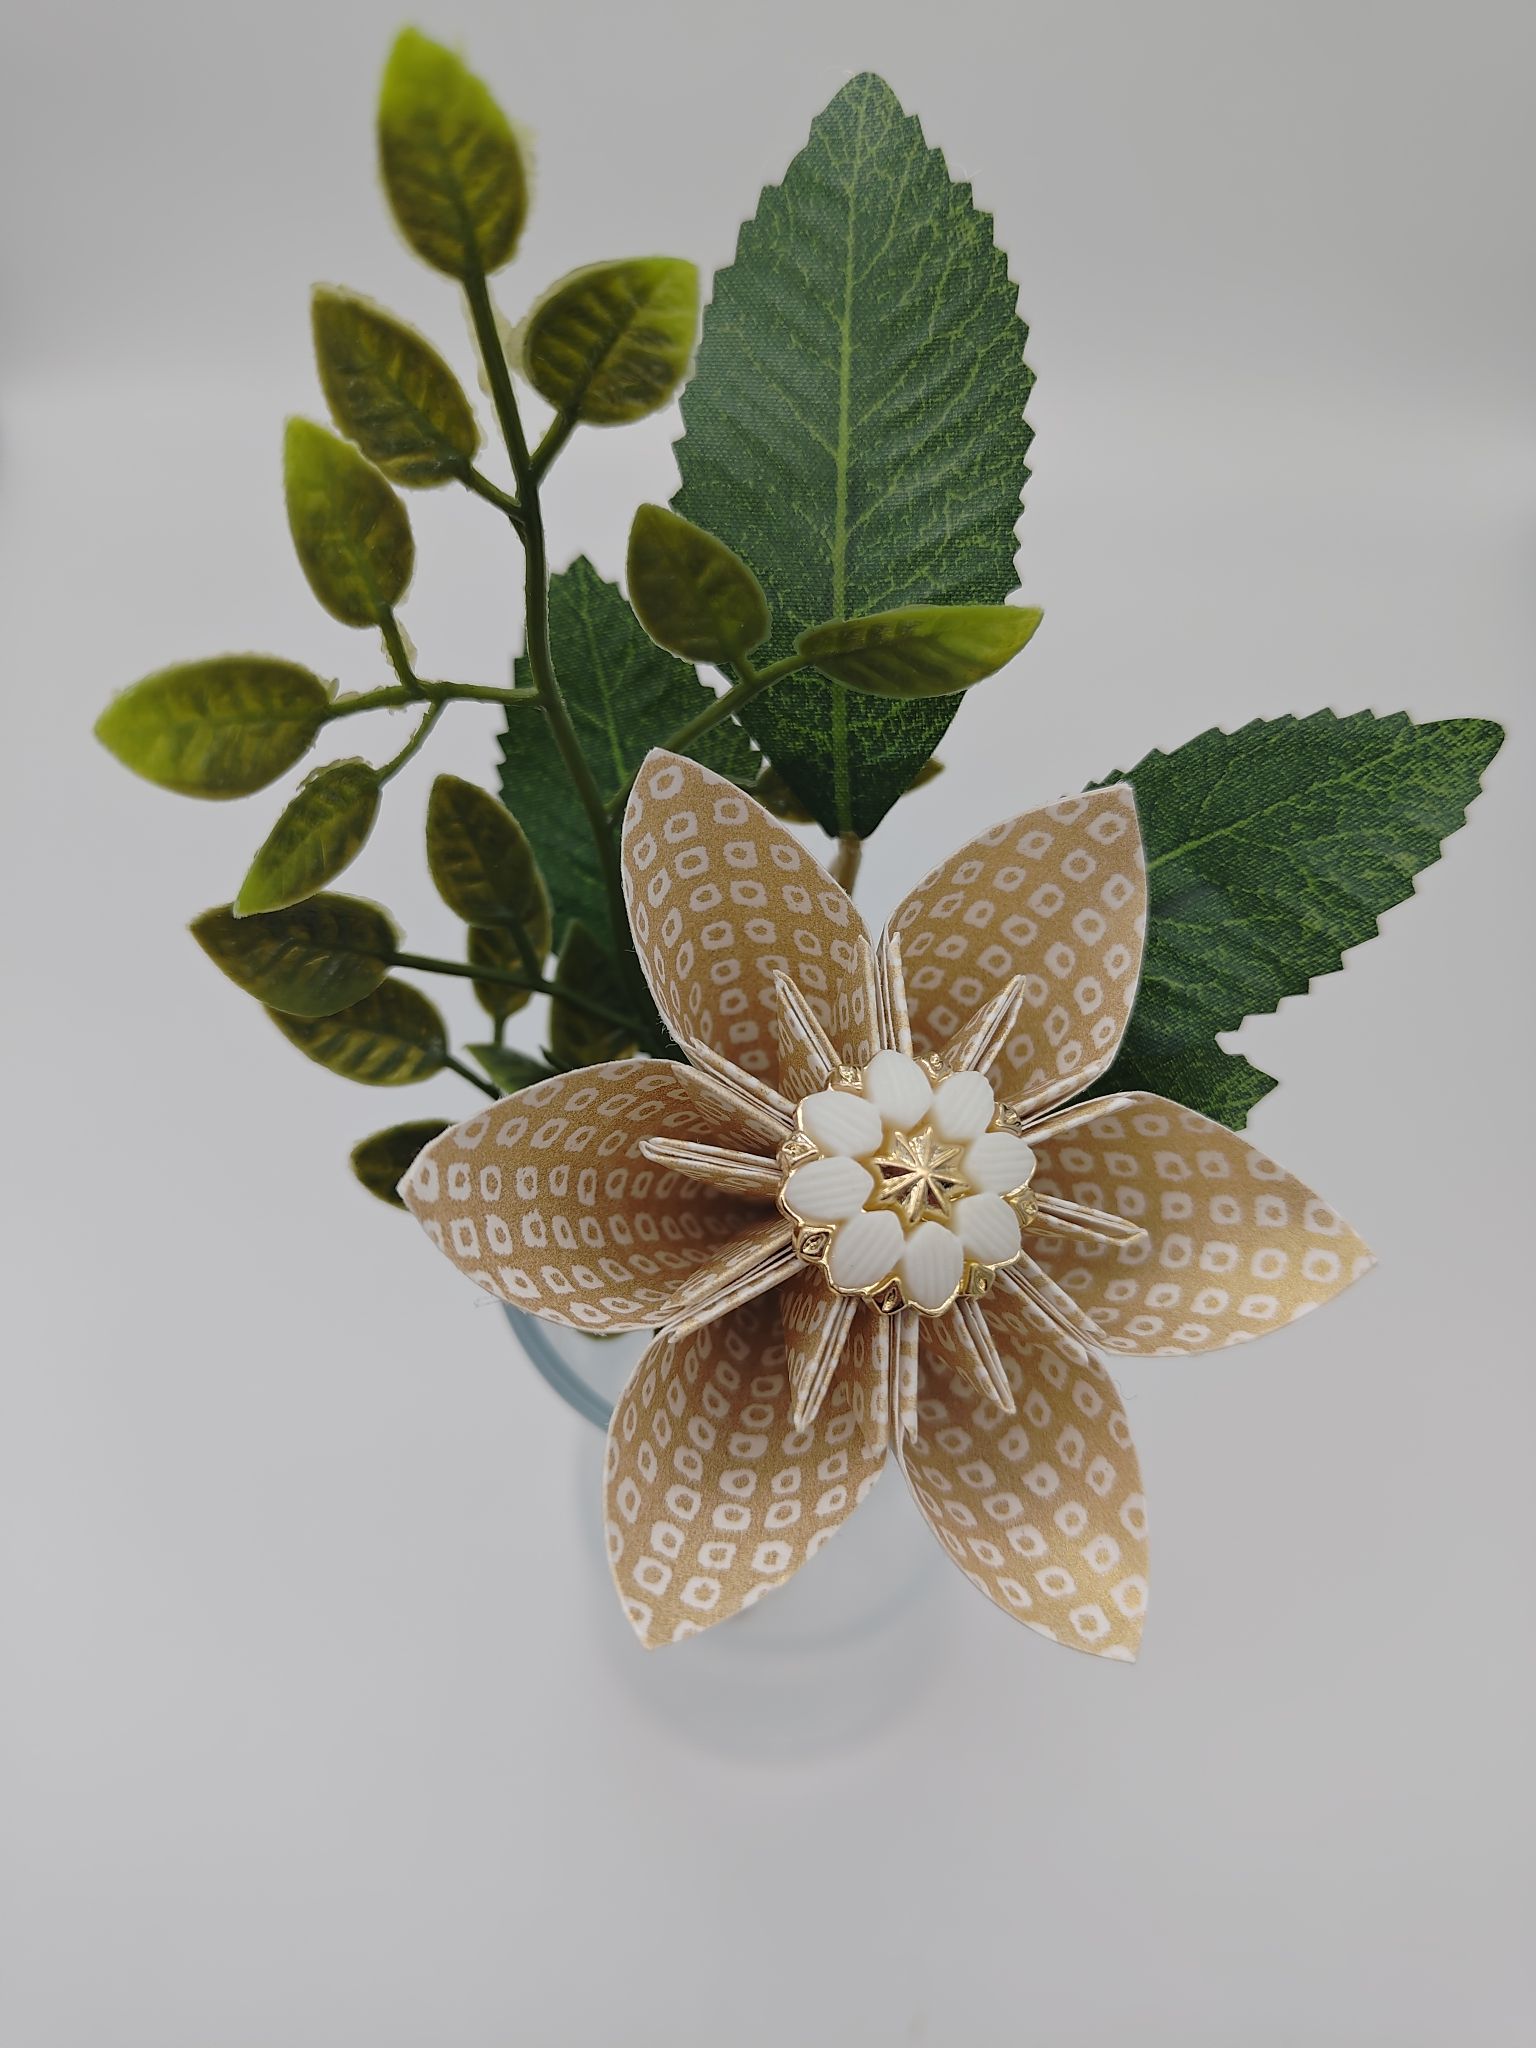
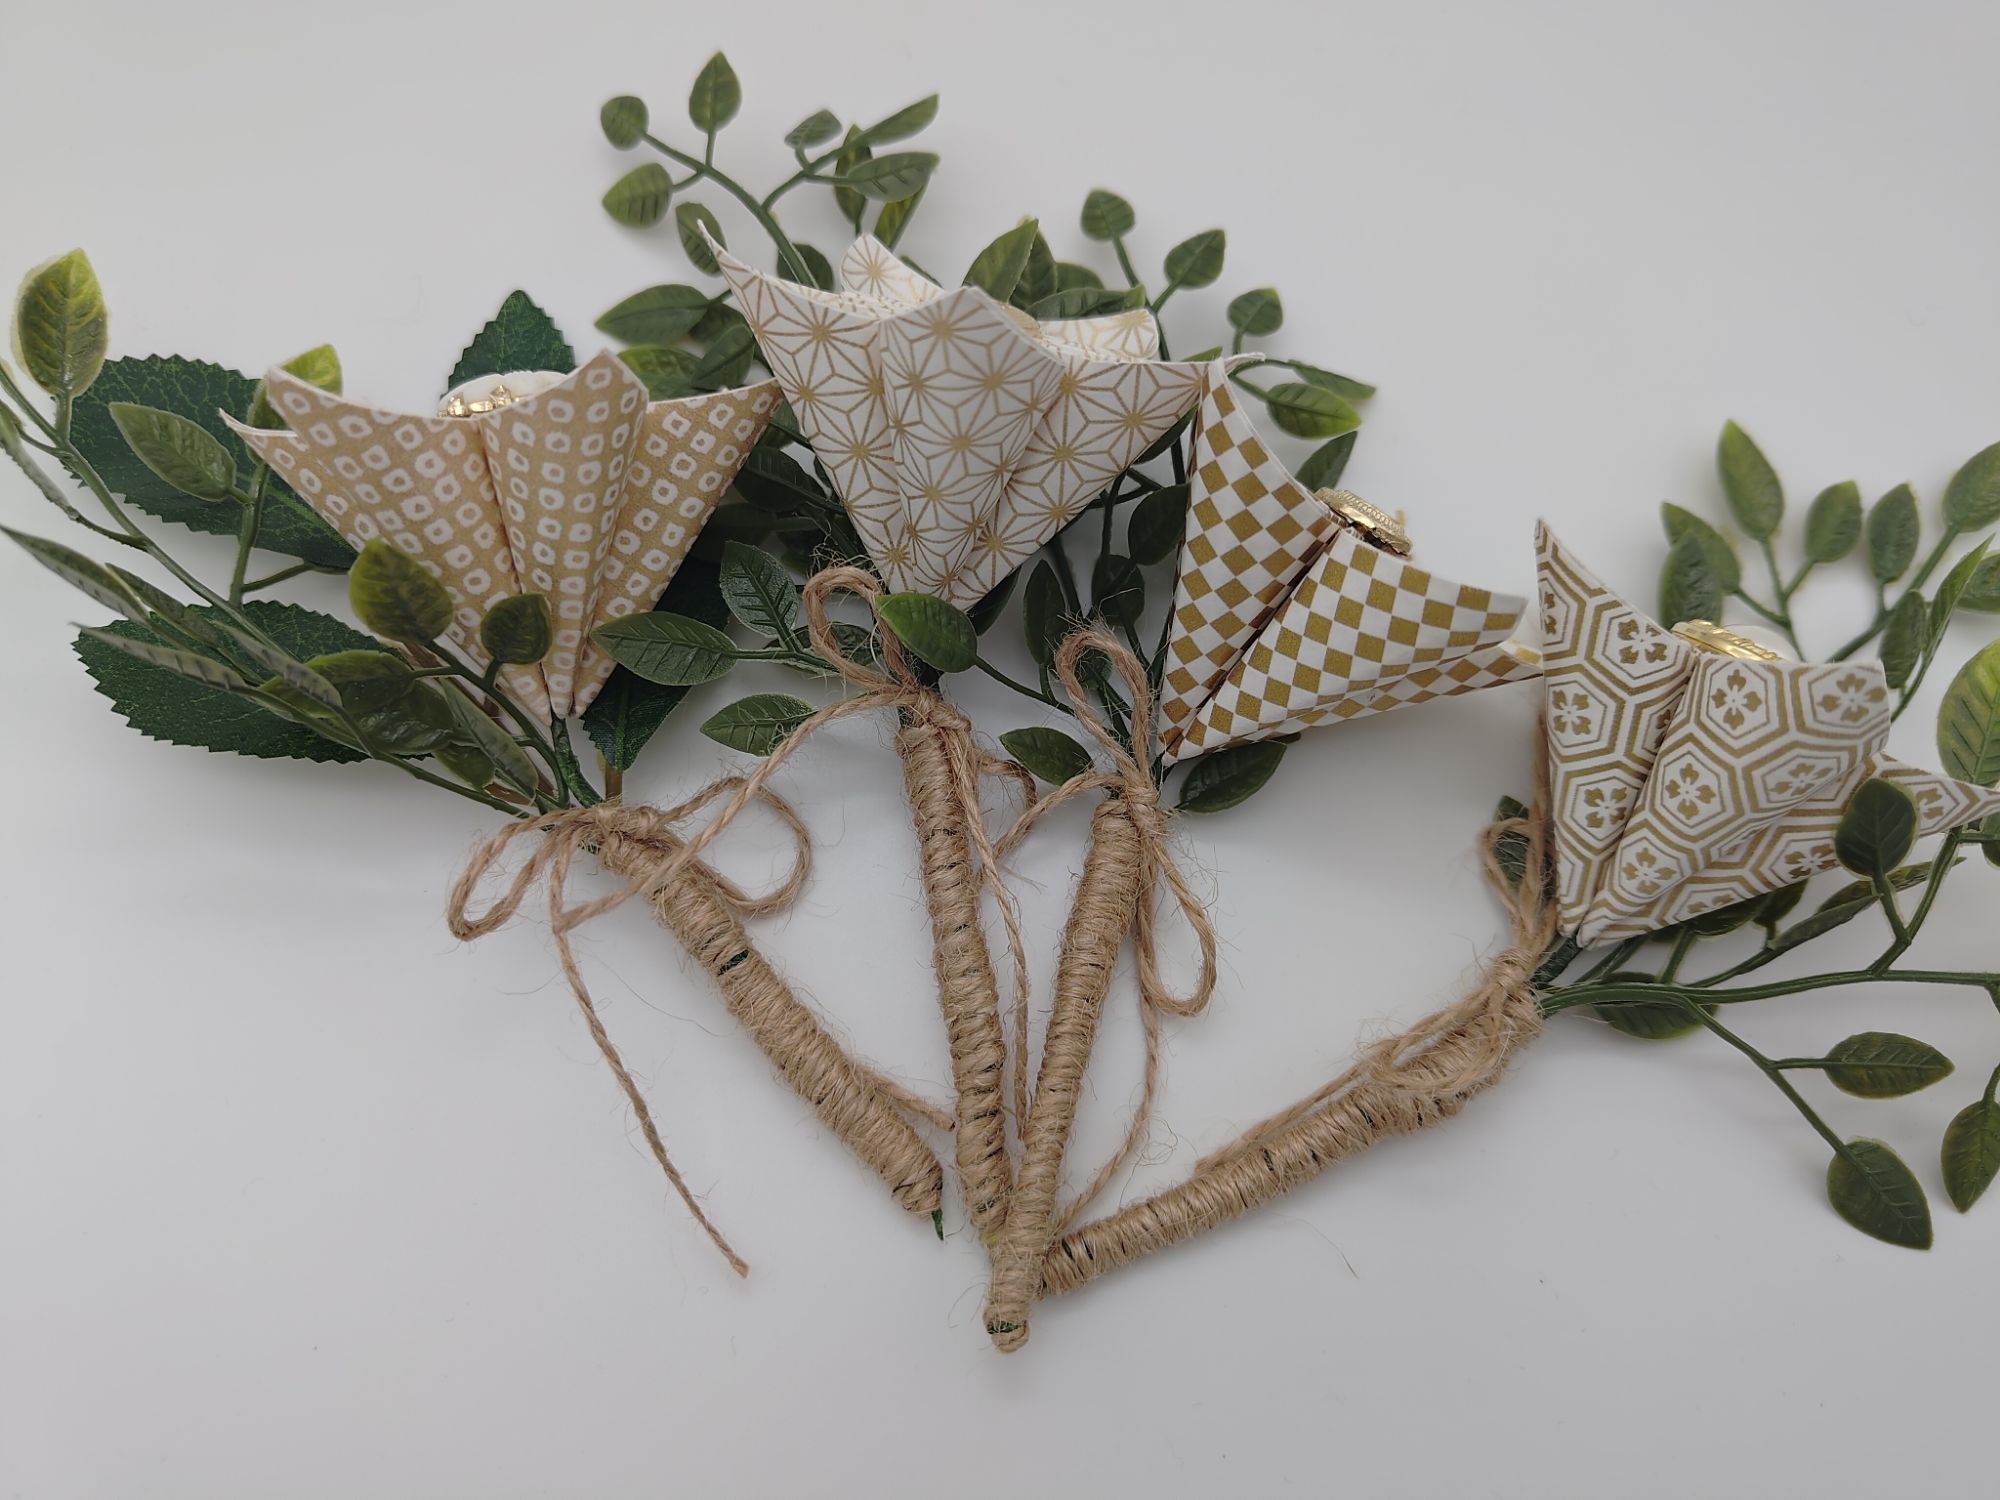
For each buttonhole, I used a single white and gold kusudama flower and one bundle of greenery. I have one groom and three groomsmen so that will be four total! For the groomsmen, the greenery type matched the bridesmaid bouquets. Incidentally I also learnt my lesson from that project – I meticulously measured the size of the stems before cutting to ensure every buttonhole was the same size!
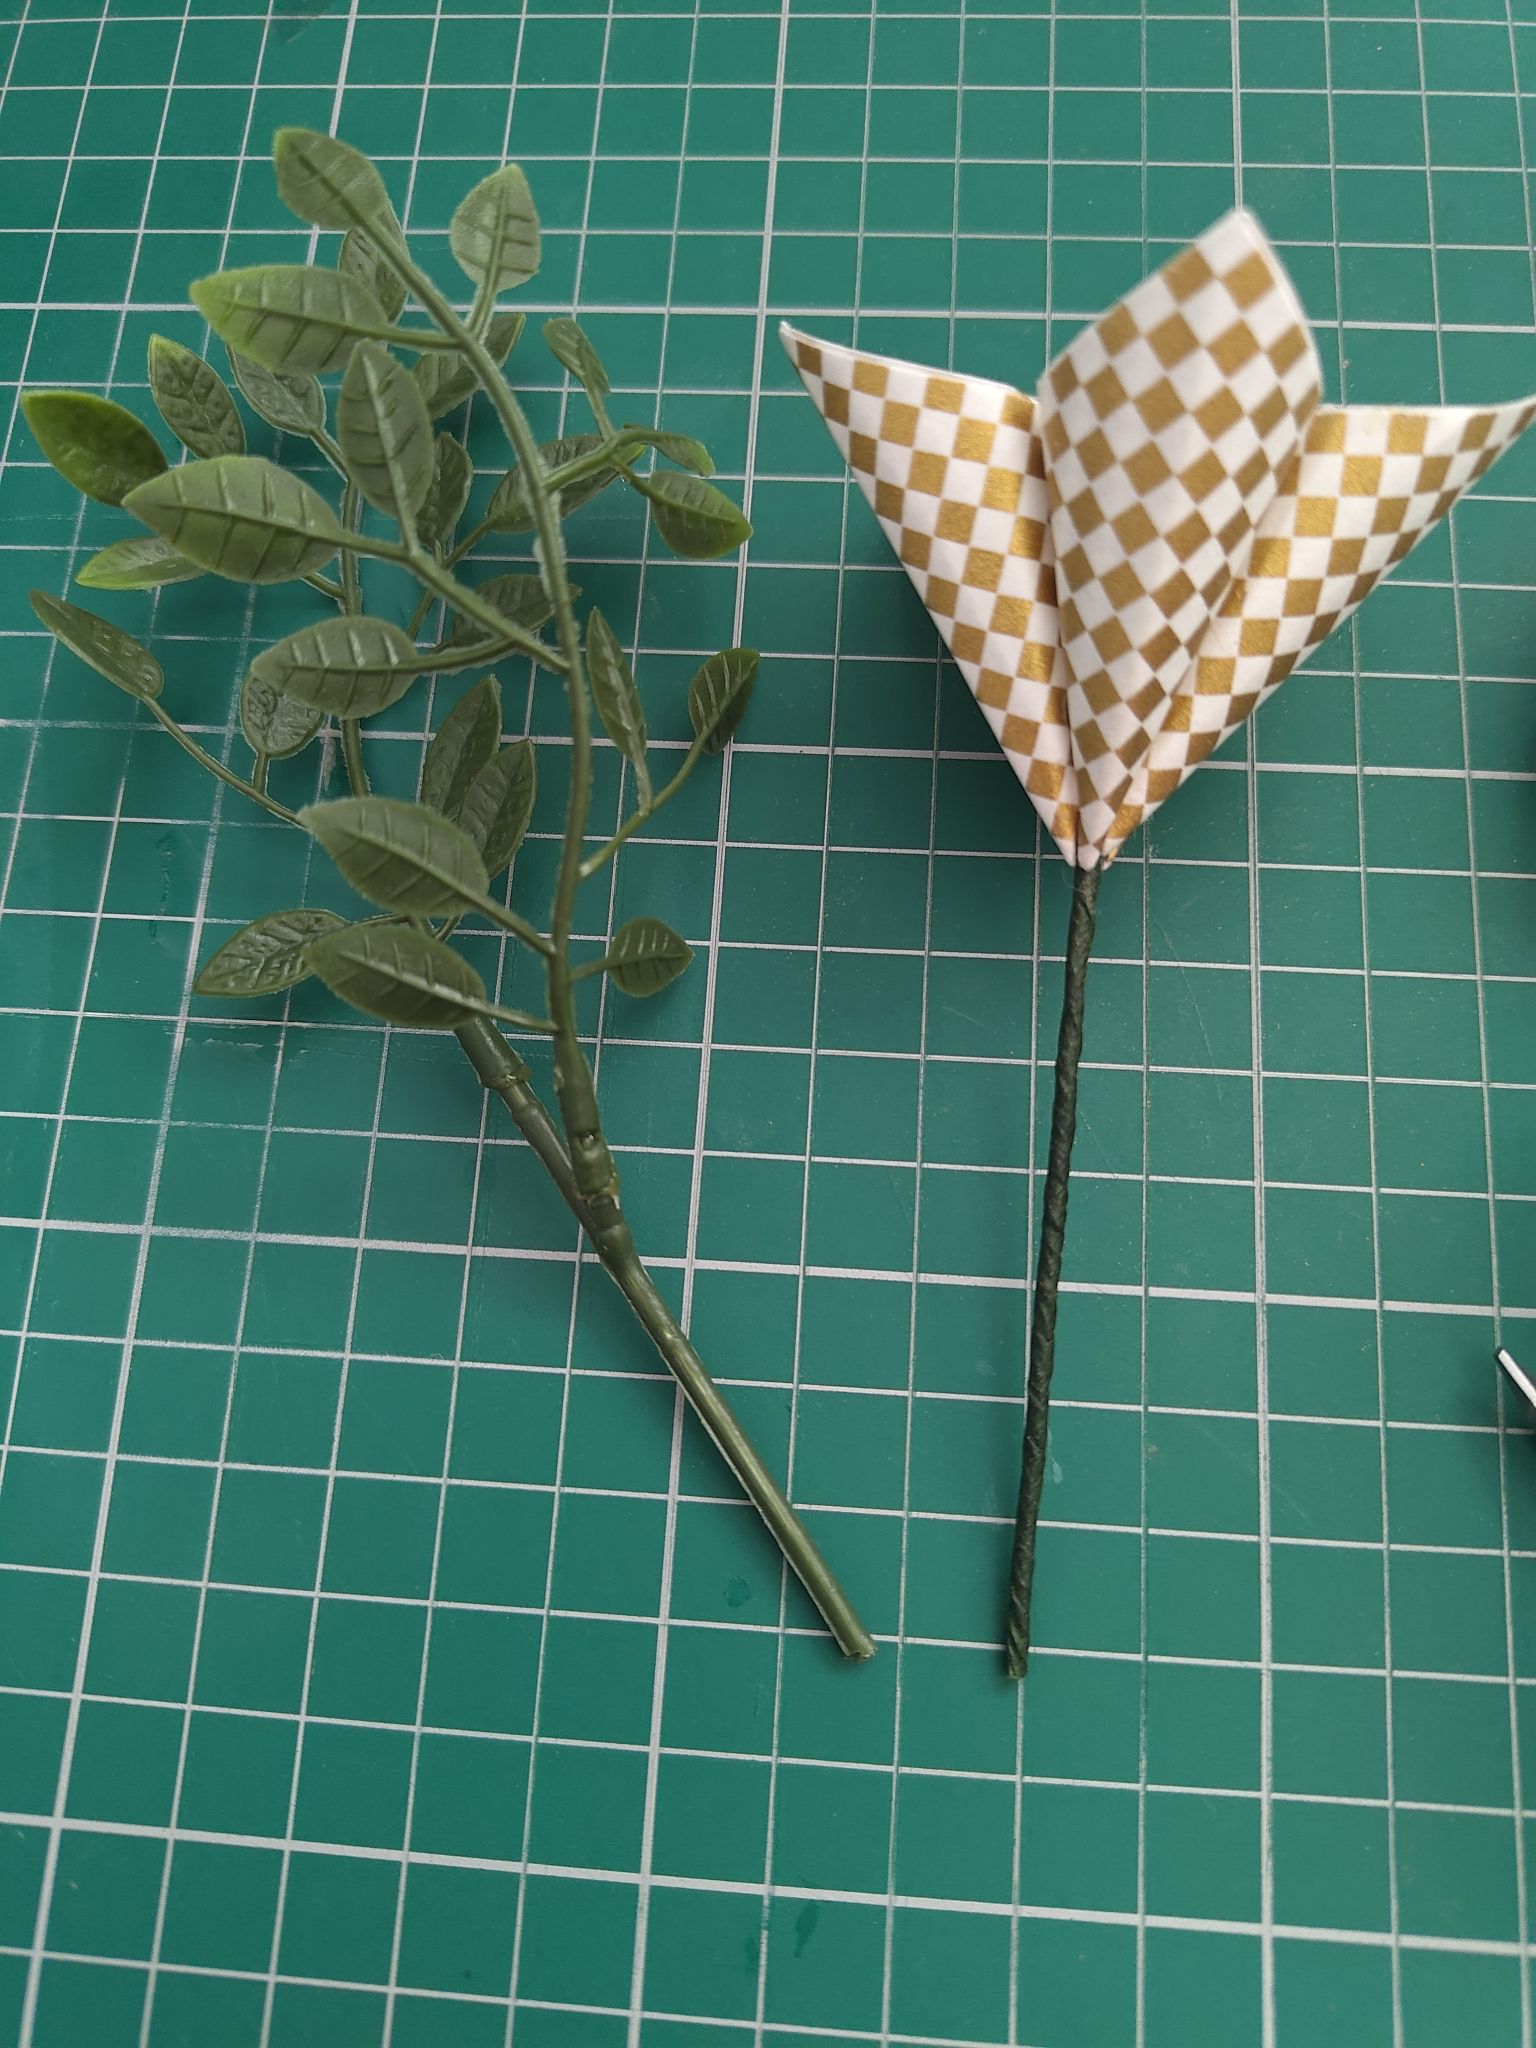
Again, please view how I made my flowers in the bridal bouquet post! I already have them wired and wrapped here so I will be skipping this step.
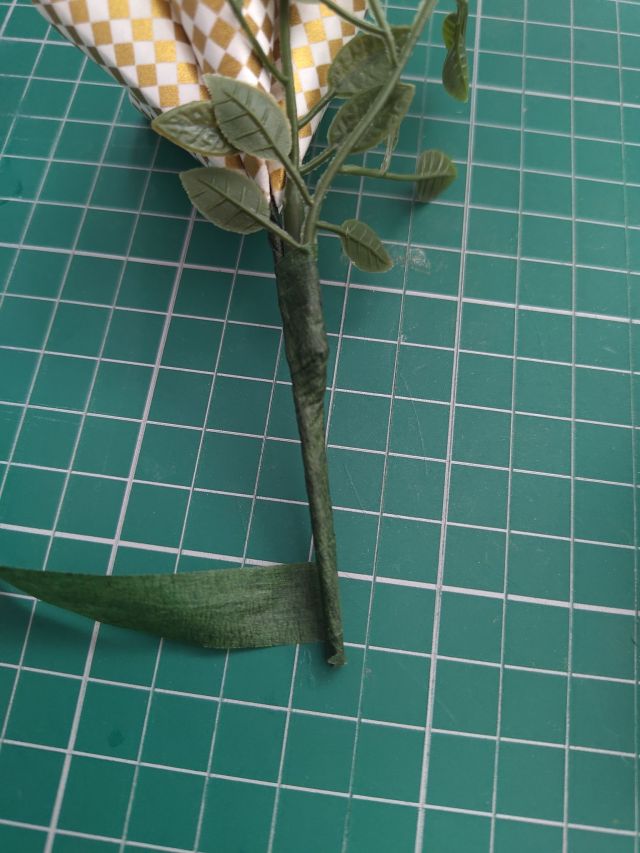
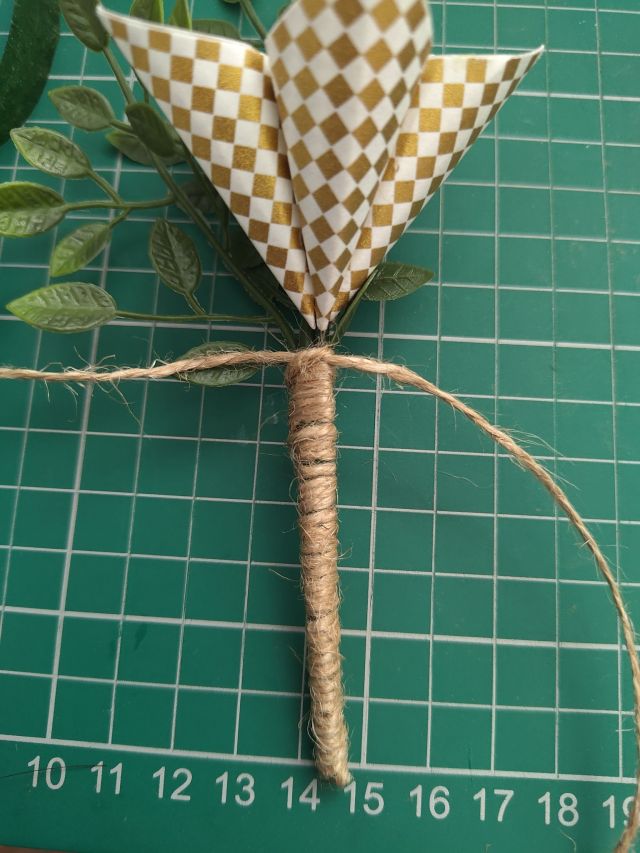
Step one was to wrap the stems together with dark green florist tape to form the main stem. Sometimes the greenery needed to be adjusted and I would cut off some leaves so that it would not get in the way of the tape, or cut off the branches and rearrange to be the same height. I wanted the greenery to sit behind the flower and slightly above.
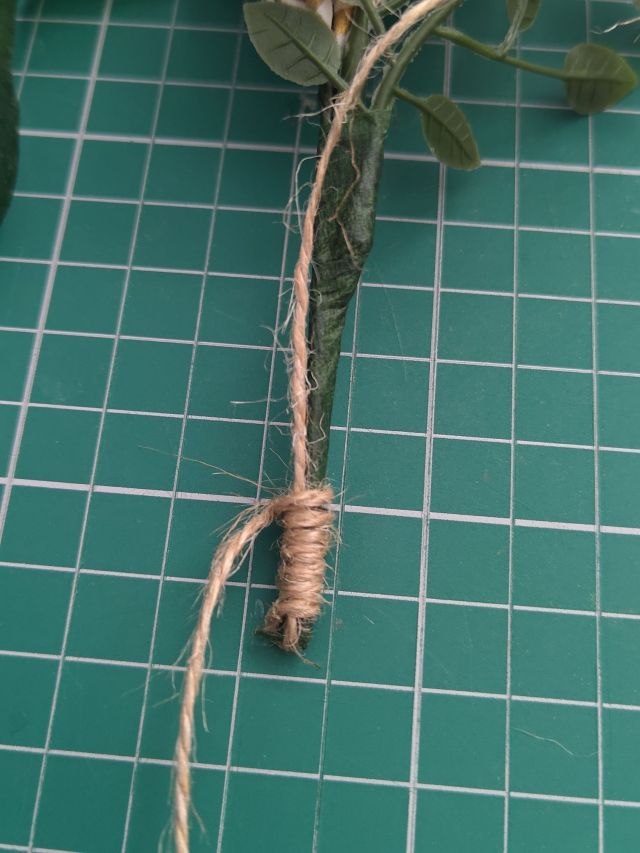
Step two was to cover the florist tape with jute twine. Starting with a long length of twine, run one length down the back of the stem and then begin wrapping the twine tightly and circling upwards from the end towards the flower. It is possible to cover the tape without any extra glue as the tackiness of the tape helps stick to the twine, however I added a dab of hot glue to the end before the circling step to ensure it would not unravel by itself.
Step three was to tie a knot near the base of the flower and then finish with a bow. The ends are trimmed to be about halfway down the stem. And that’s it! I did not want to add another flower as I wanted them to be very simple and easy to wear. Some people use safety pins or lapel pins to secure them; I haven’t added any pins as I don’t know how they will be worn yet.
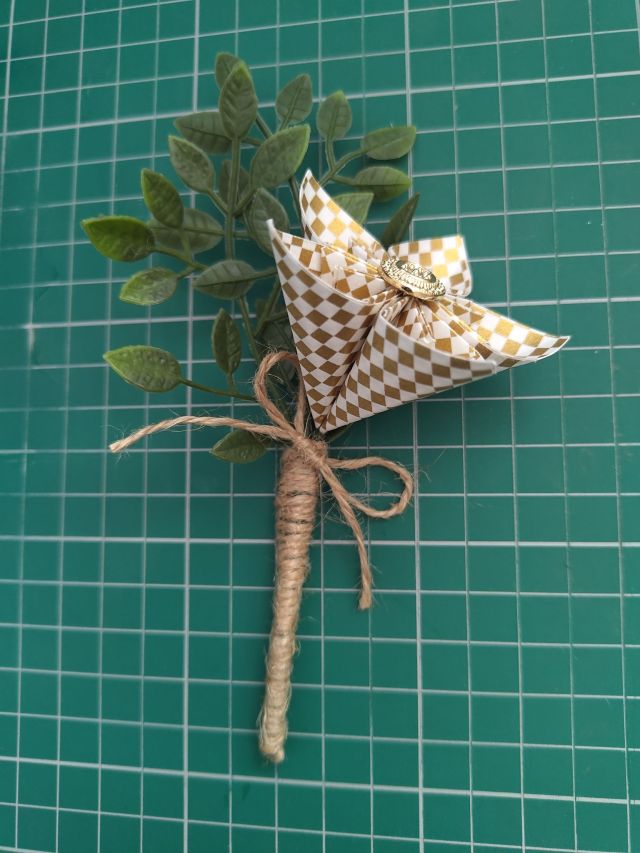
I have slightly angled the flower head but they will likely need more adjustment on the day. Also, each groomsmen has a flower with a different pattern and a different costume button centre.
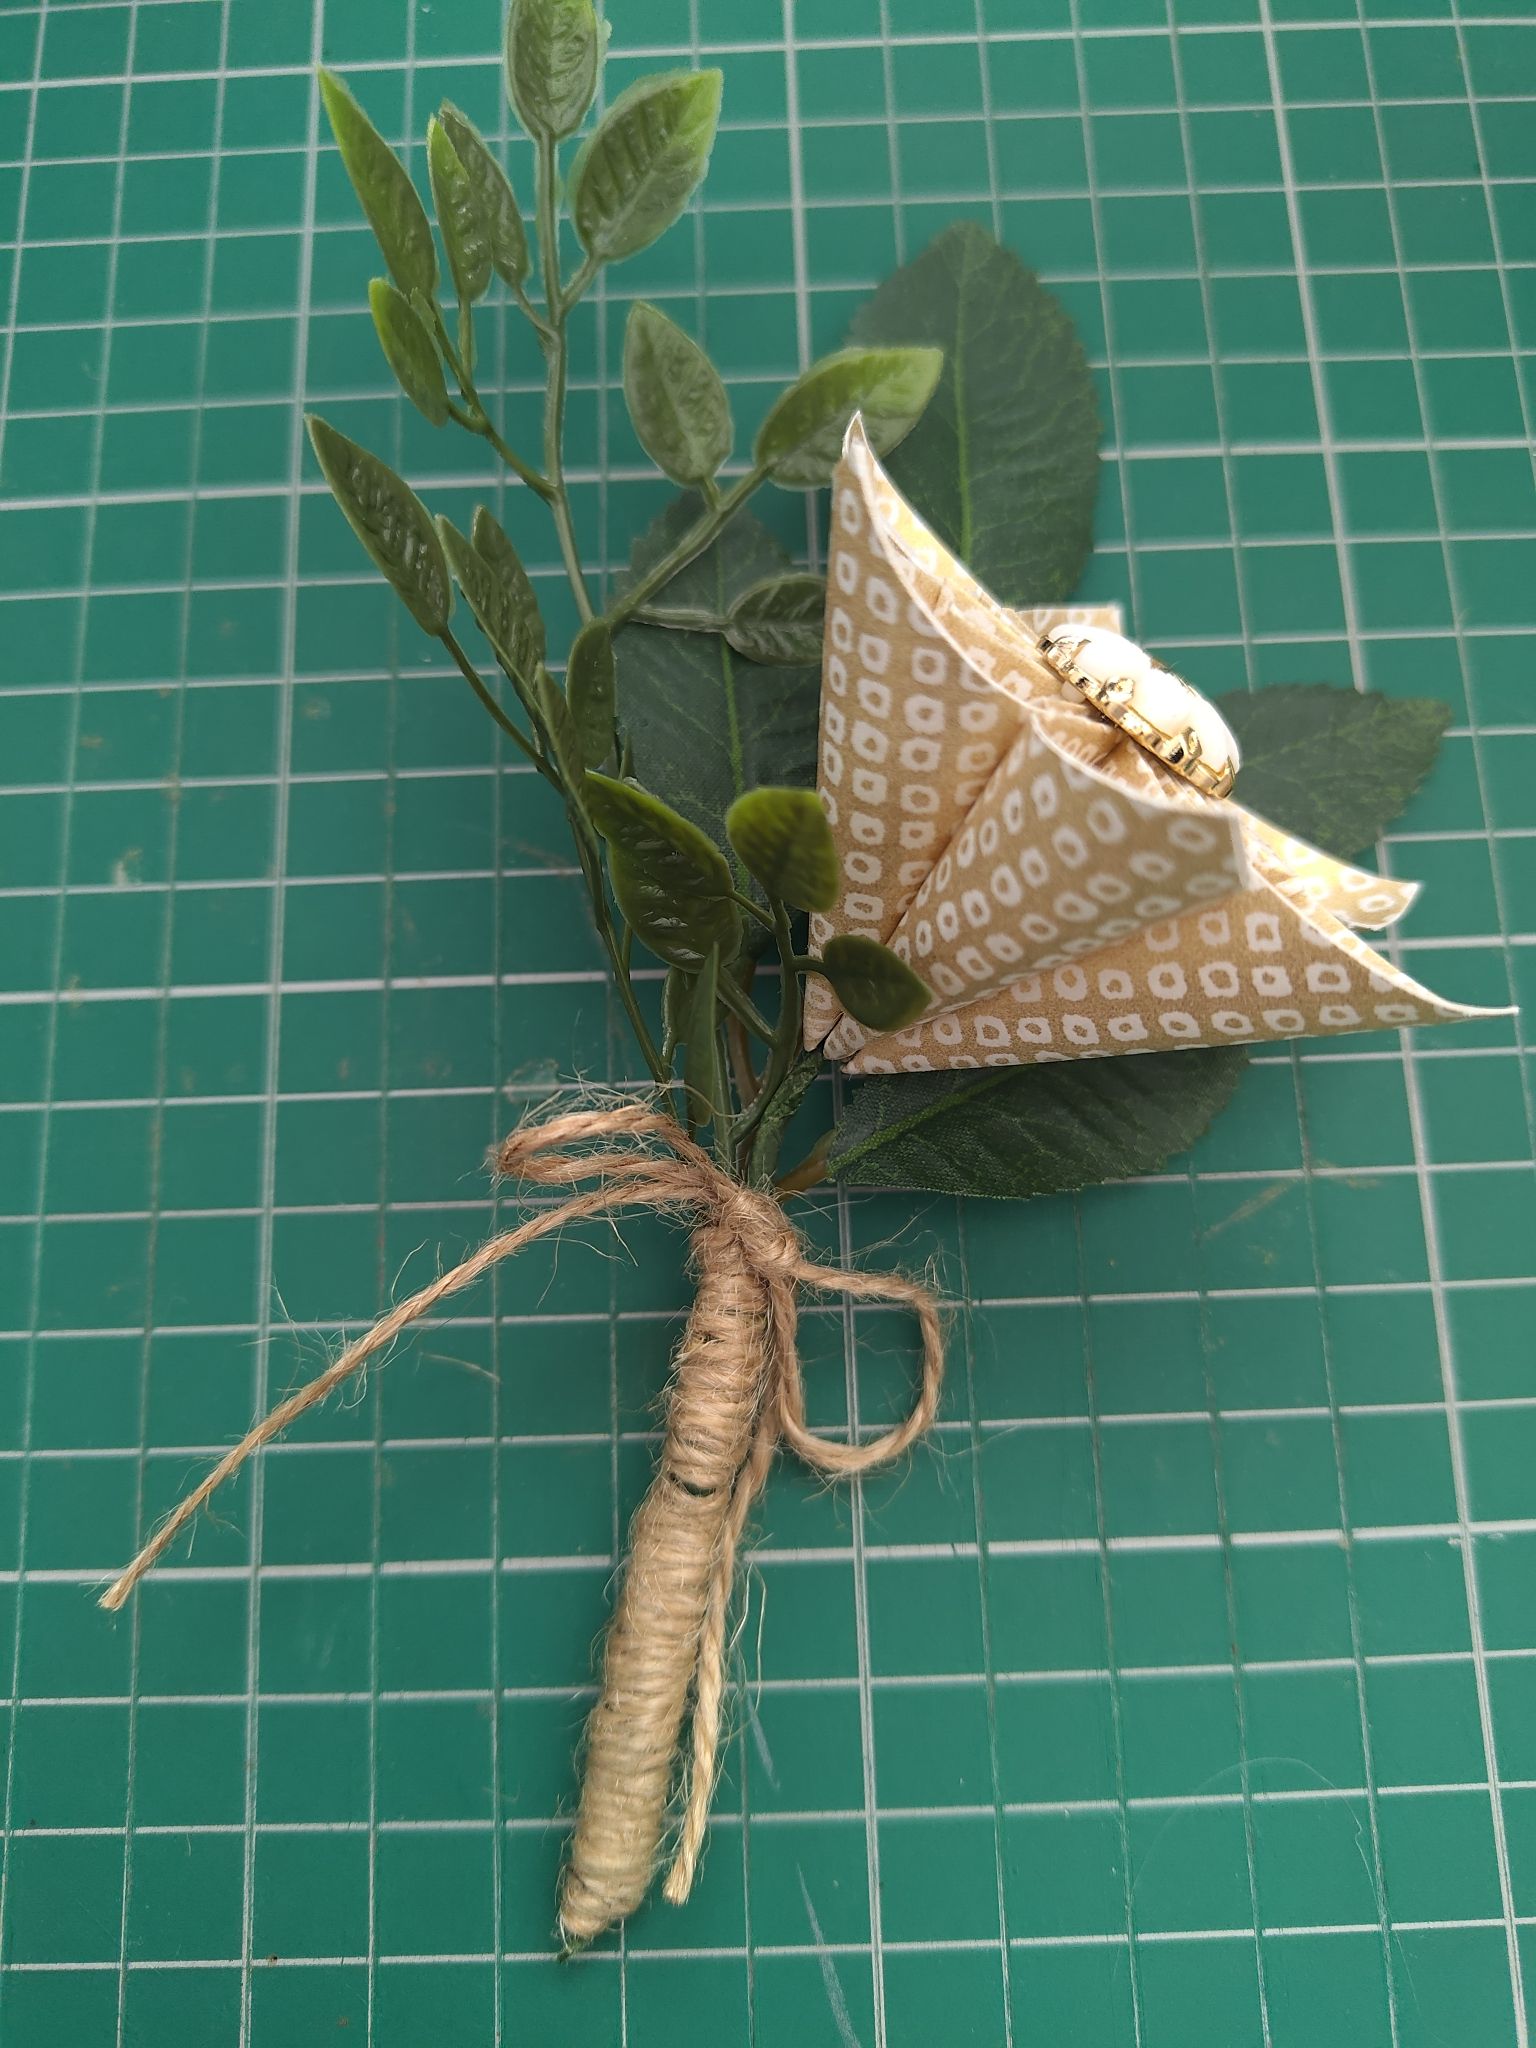
I made the groom’s buttonhole slightly different by using a six-petal kusudama flower and also adding a different bundle of greenery to match my bridal bouquet. Since he wouldn’t let me add match ribbon to it, I had to come up with a different way to make it stand out!
I made all these in less than a day, when I had a real burst of motivation!
Sometimes I get decision paralysis when I look up what other people have done for their weddings or what wonderful things you can buy from online shops, but the important thing to me is that I made them myself and can be proud of it.
The last thing I need to sort out for florals is the ceremony table arrangement. This might take a bit of time so watch this space!

Materials used:
– white and gold washi paper
– artificial green leaf branches
– gold and pearl costume buttons
– florist wire
– florist tape
– jute twine
Tools used:
– craft knife and cutting mat
– hot glue gun
– scissors
– wire cutting pliers
