I have a number of things on display on my desk in the office: a small pot of kusudama flowers, a vase of lilies, a star jar filled with regular stars, a star jar filled with straw jars, and a 3D origami peacock. Some of these things have been placed there since I started, over seven years ago now! It was time to refresh the decor in some way.
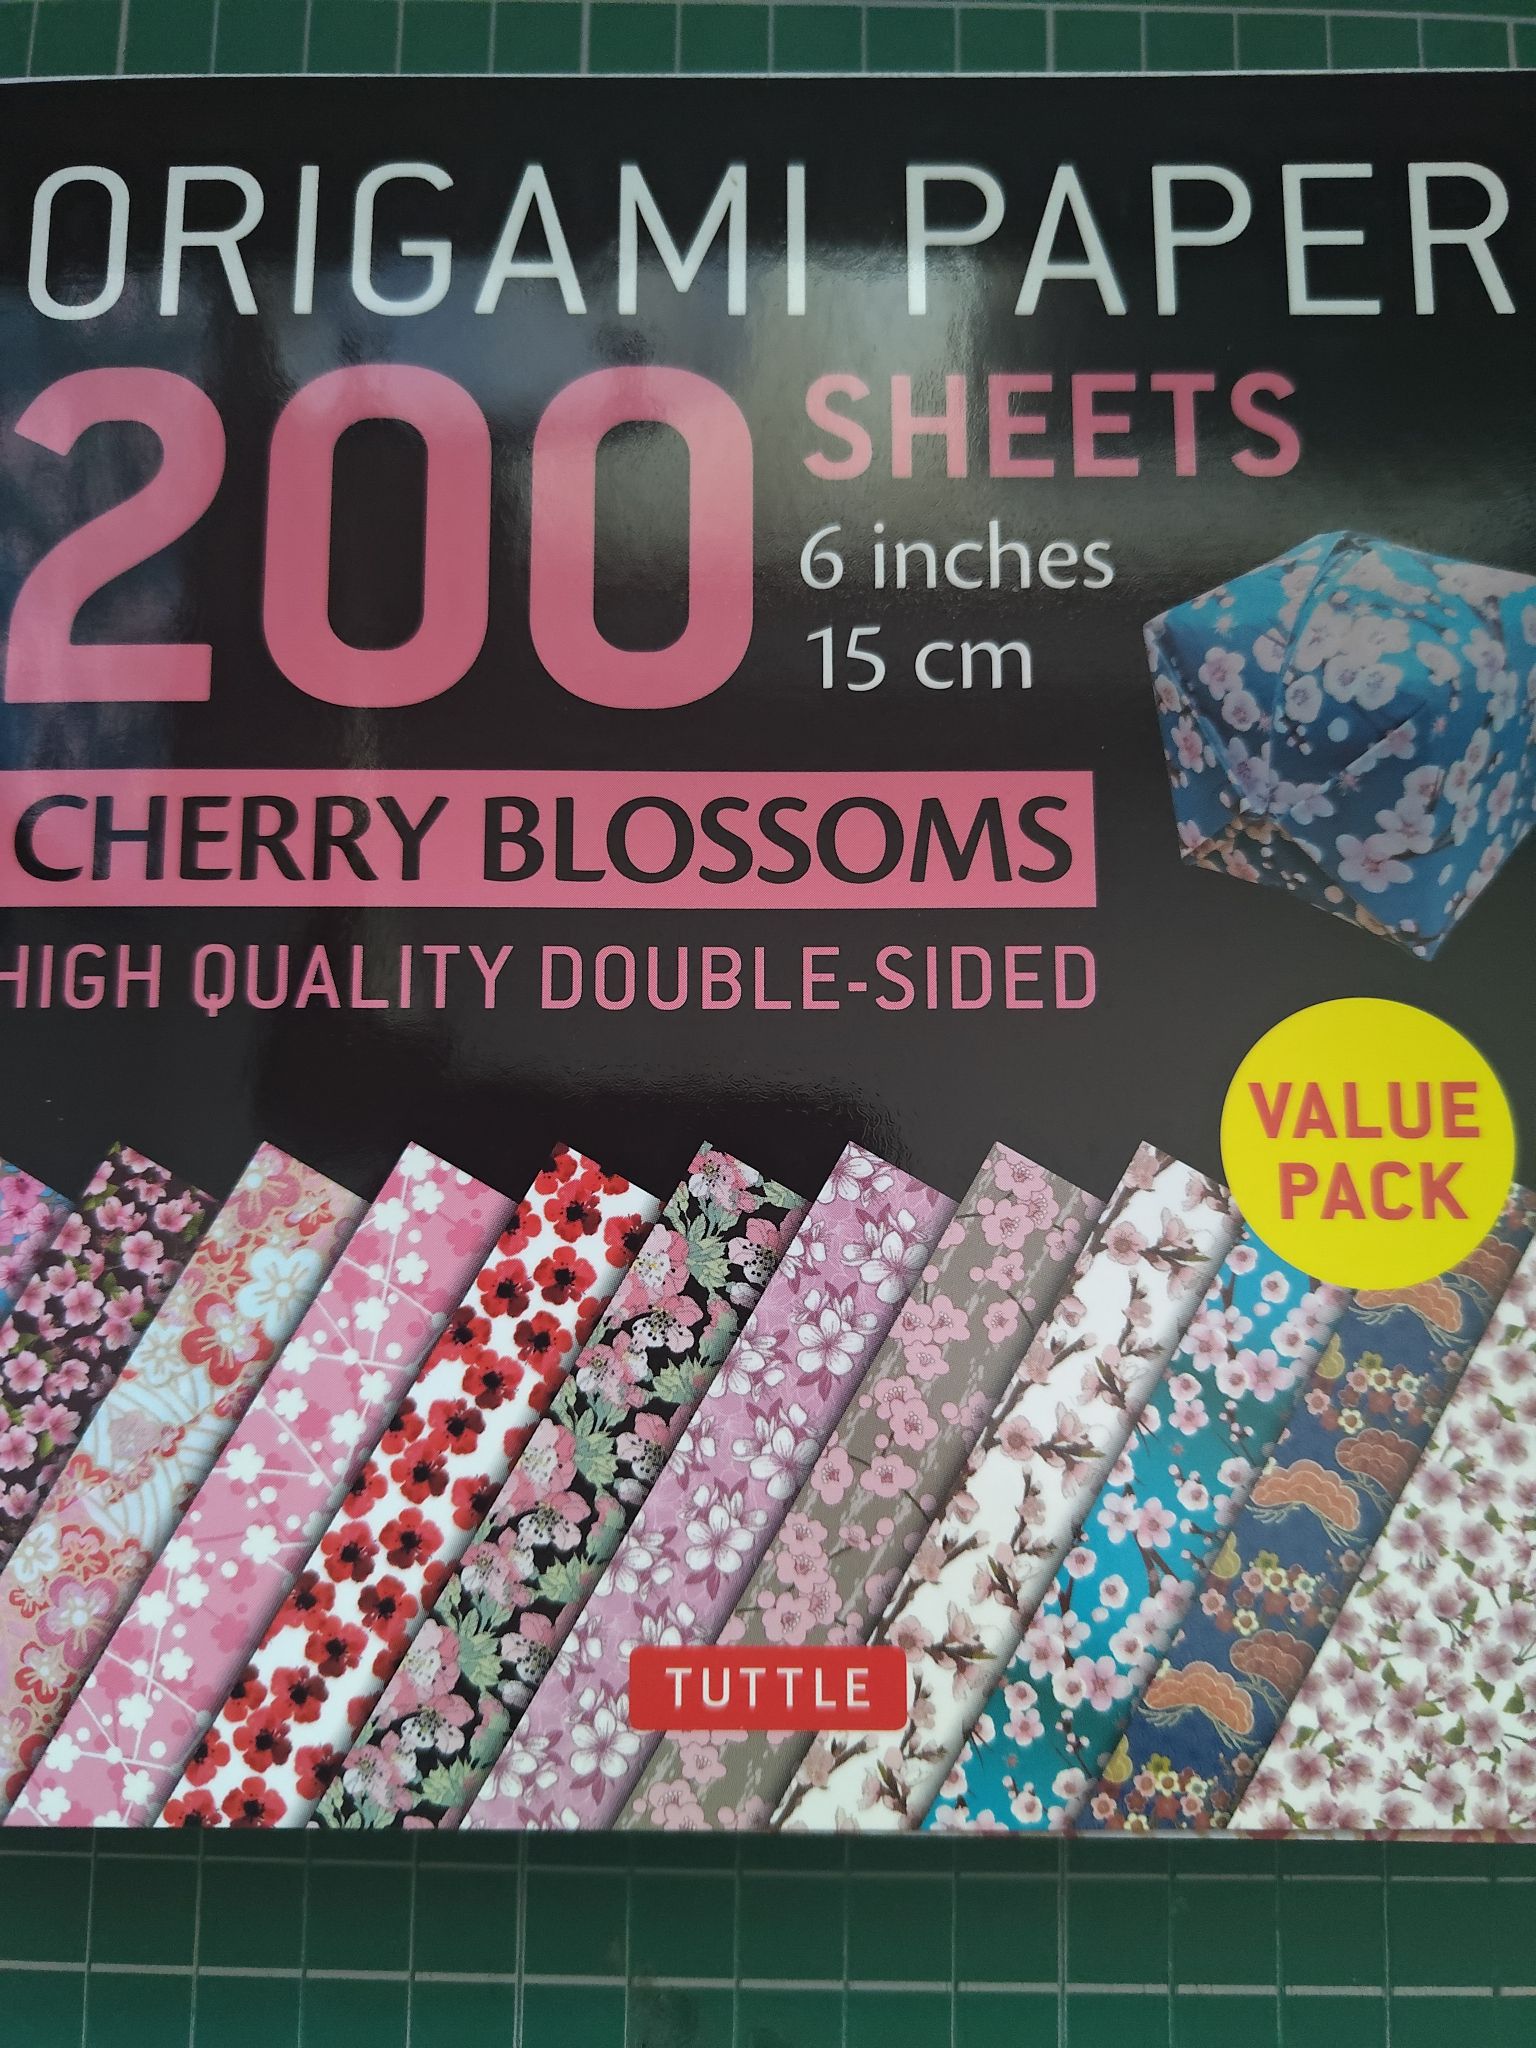
I got this pack of patterned paper in a previous shopping run. The pack seemed like good value with the quantity and type of patterns included, although I do think some of the patterns are more flower-themed than cherry blossom-themed. I was looking through my previous post titles and a similar flower-patterned kusudama bouquet was already done back in 2016, so this time I took even more pictures of the process and provided a slight variation in the design.
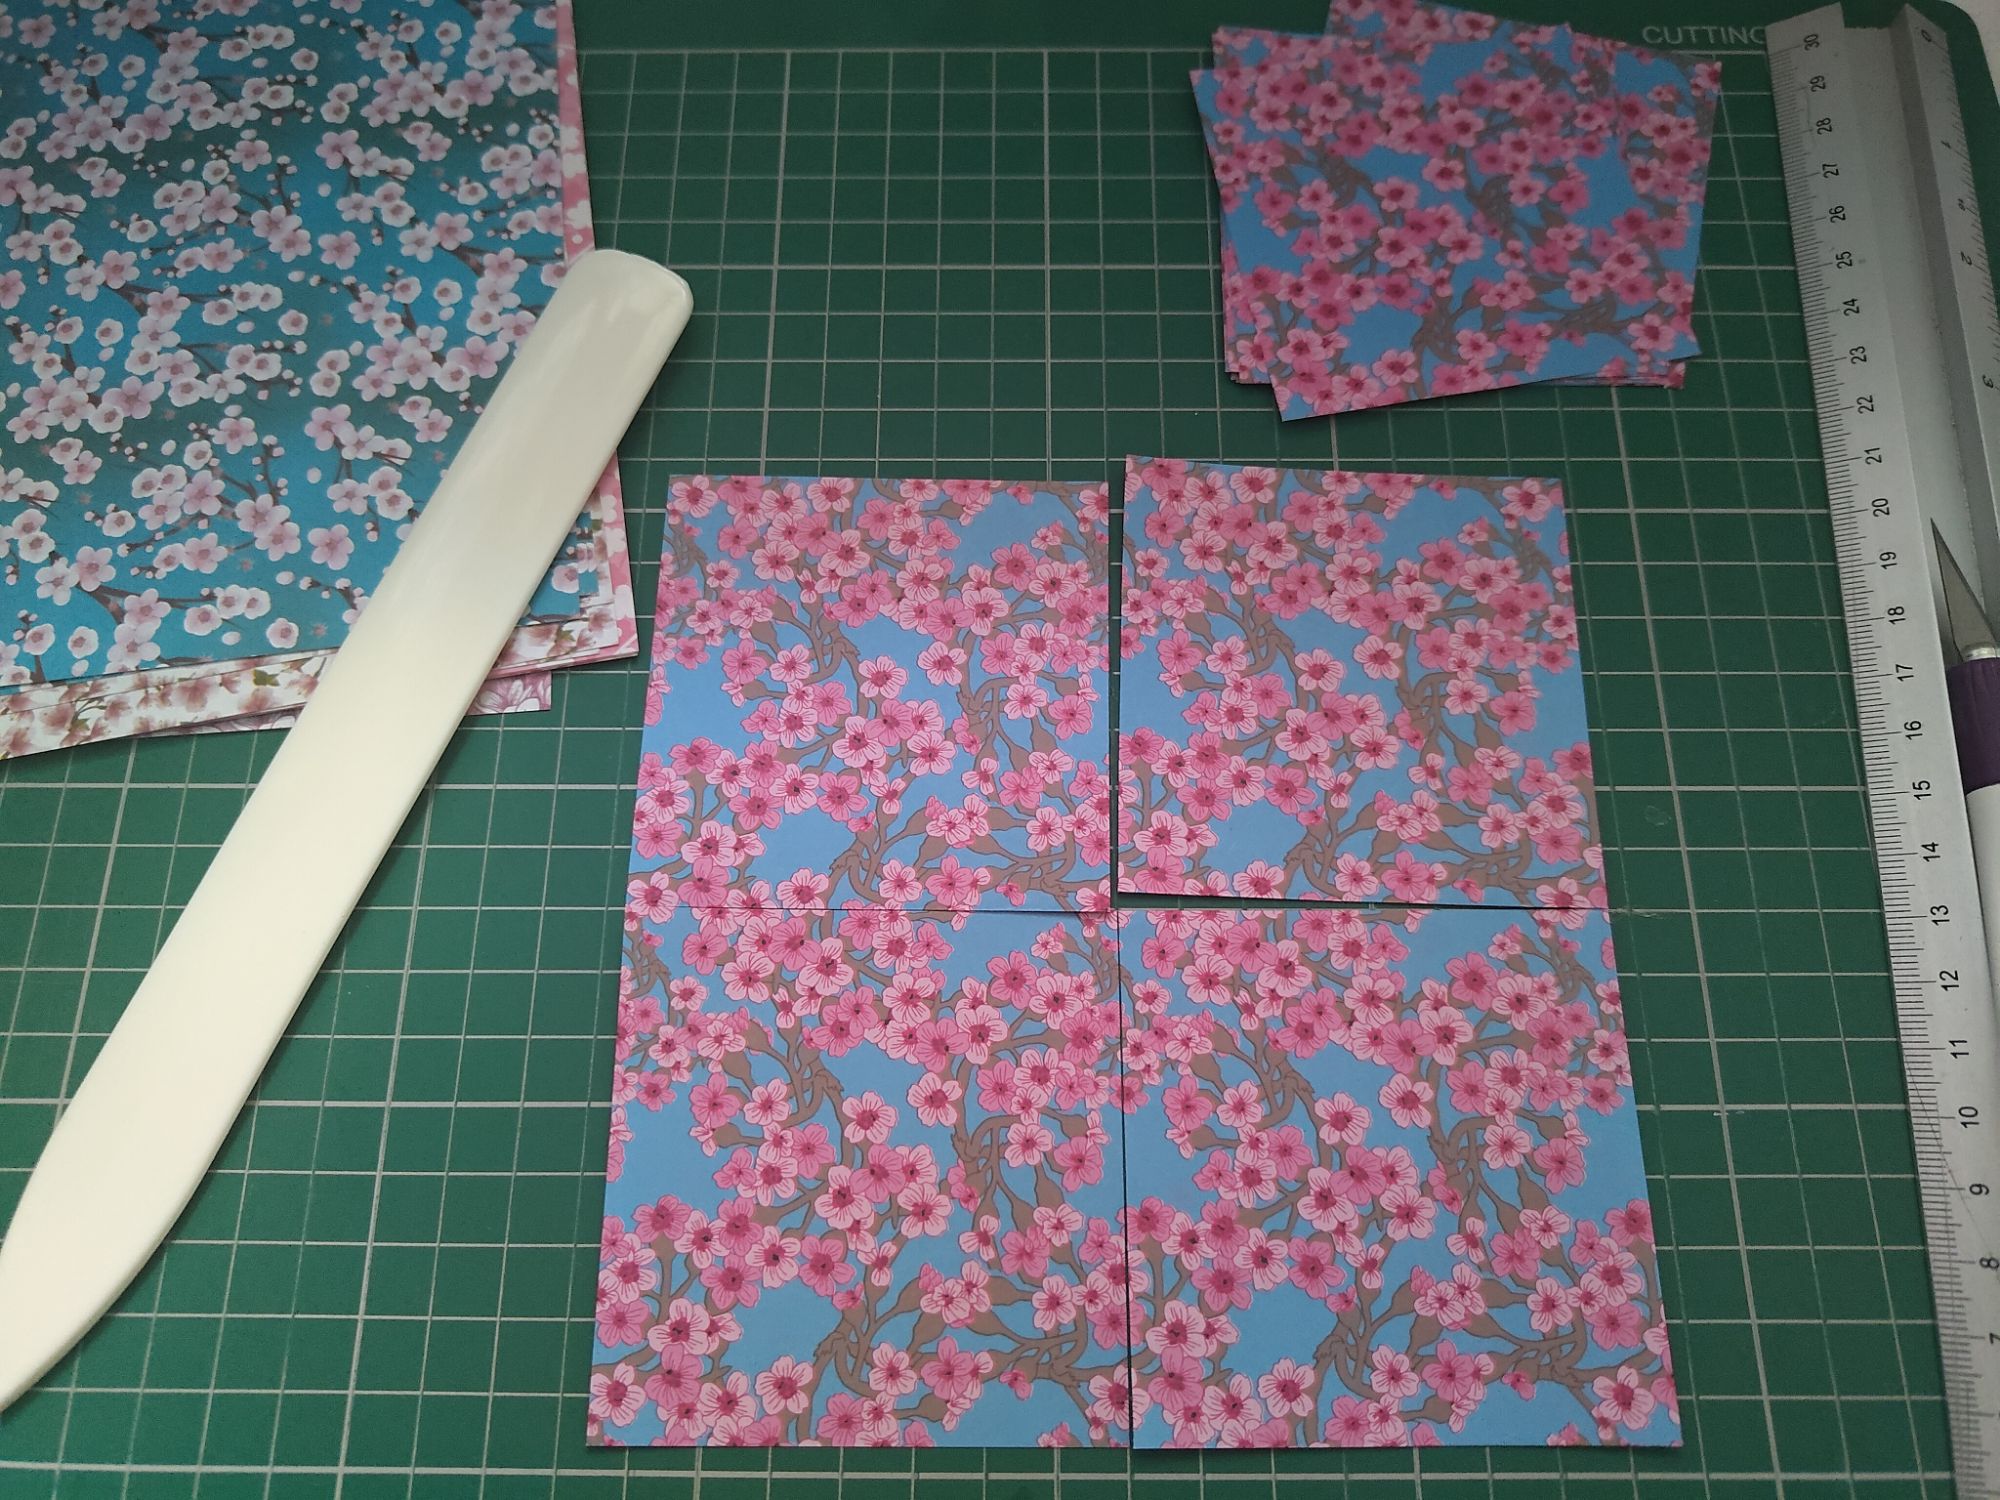
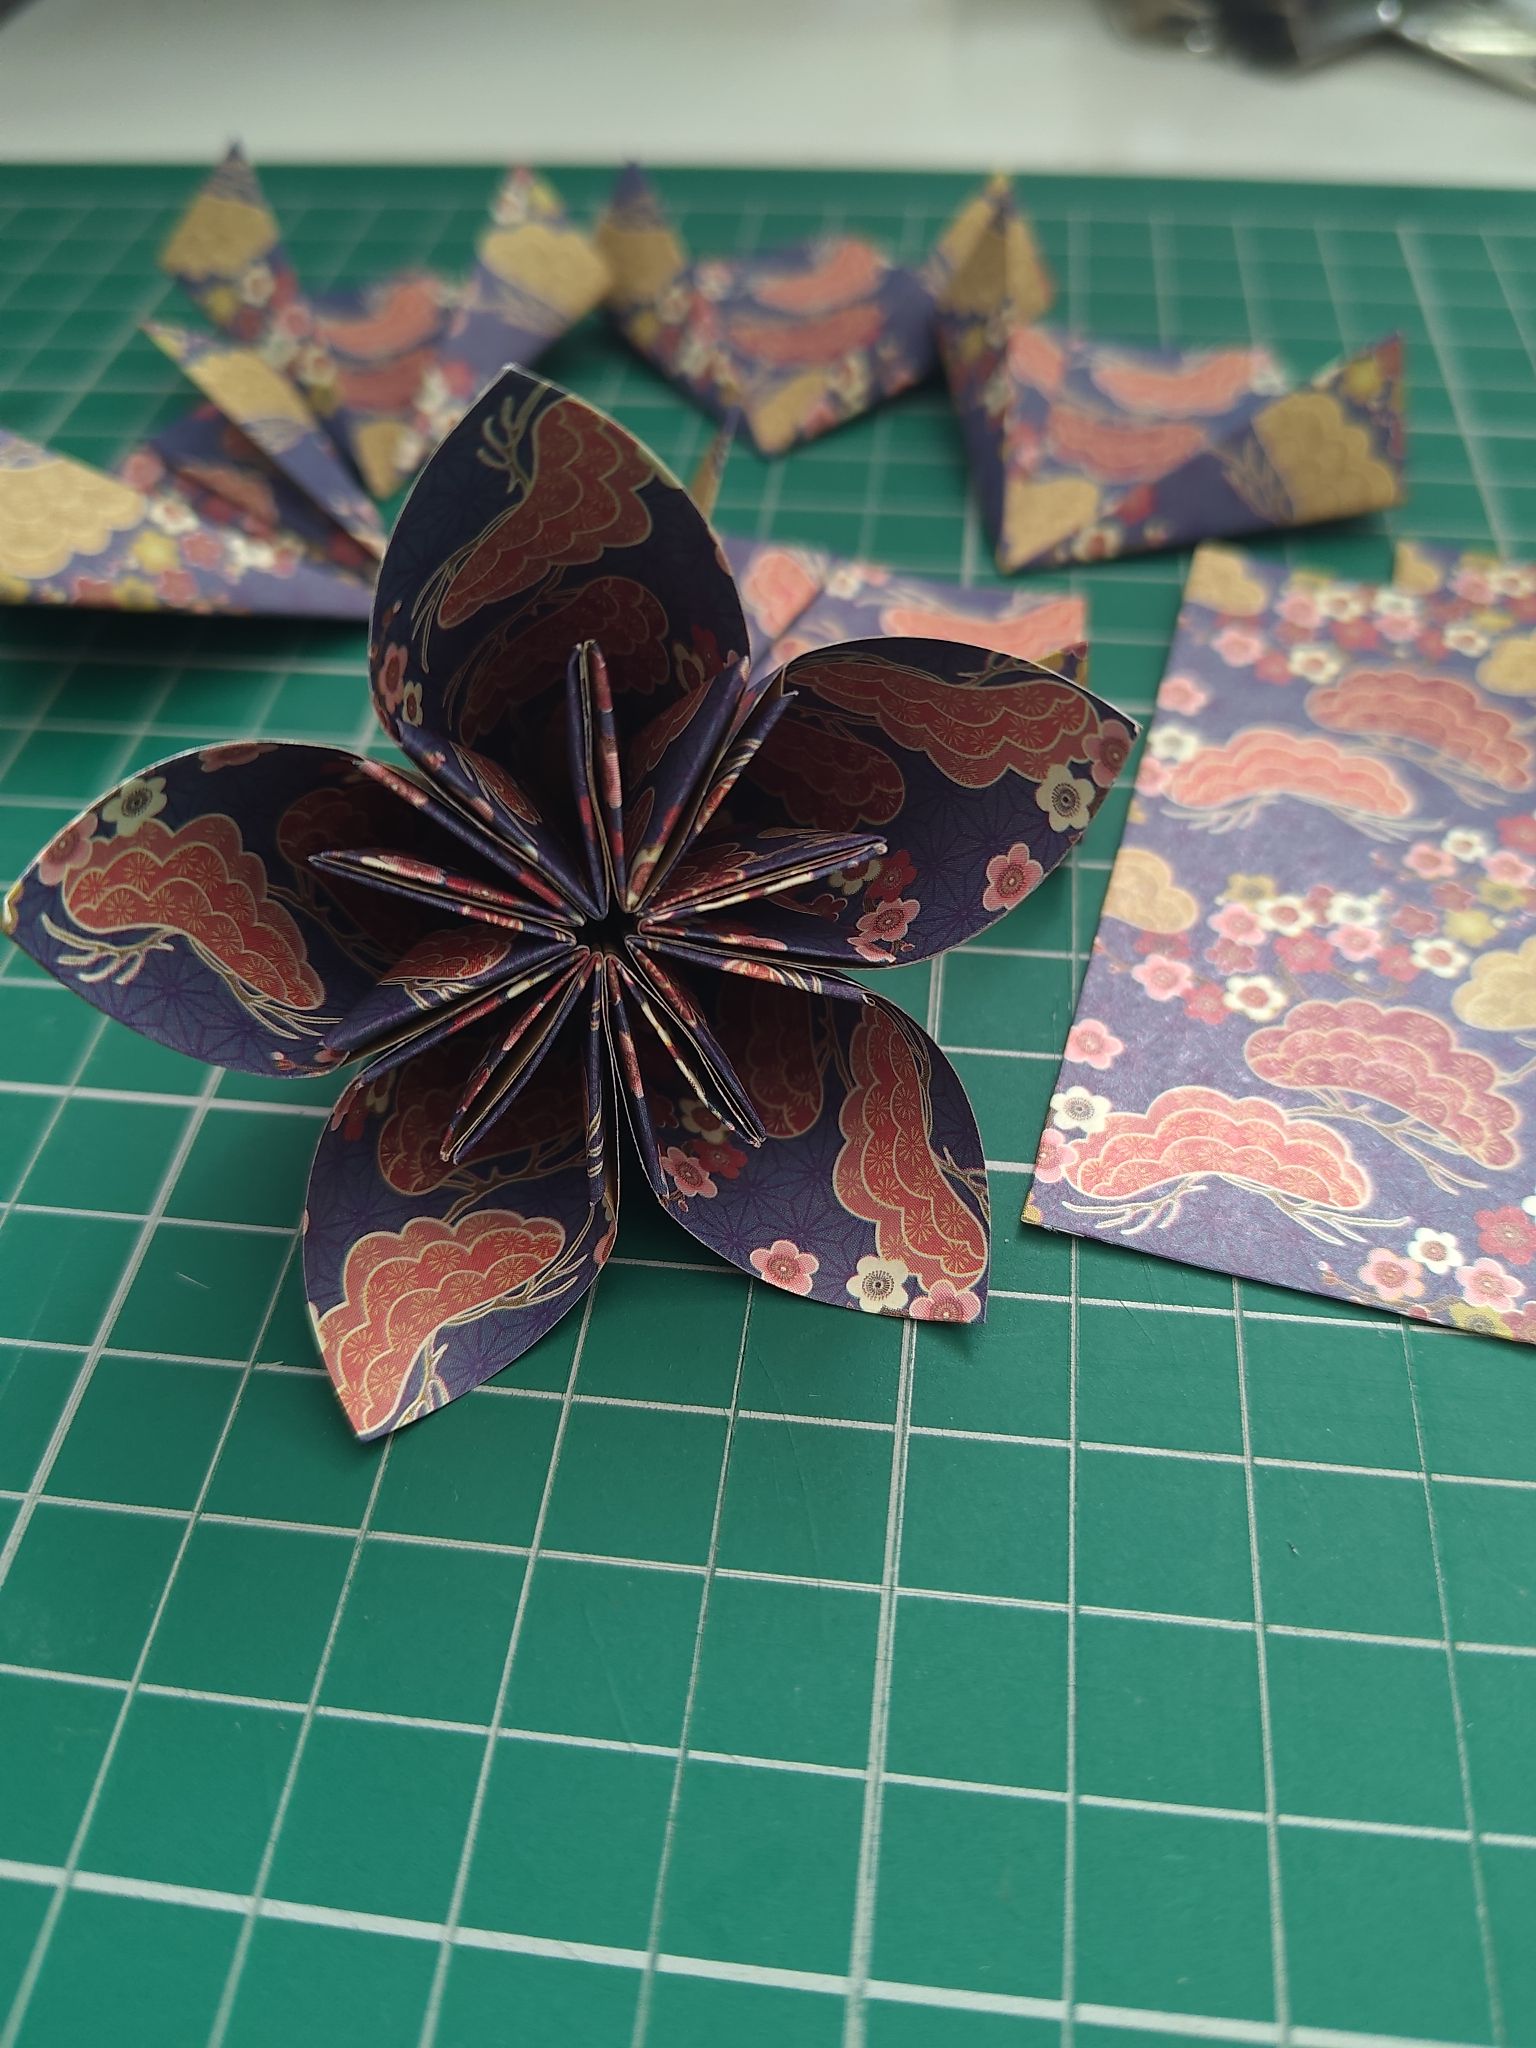
Generally I like to cut my 15cm square paper into four 7.5cm squares, but I also like to use five petals per kusudama flower, so I had to cut into three sheets of twelve patterns to get enough parts plus spares for 24 flowers using a craft knife and cutting mat. I also used a bone folder to crease straight lines and to fold neat units.
Five petals is my preferred number – you could do four for smaller bouquets or even six for statement flowers. If you don’t know how to fold a kusudama flower, here is a free link. I also chose to mountain fold the flaps for a neater look (as seen with the previous bouquet).
When gluing the units together, I prefer to use a small paint brush and PVA glue rather than hot glue for this step, as it dries clear and you can easily fix any mistakes. It would be best if the units were glued as neatly as possible, but I plan to cover the centres up near the end of the process to hide any imperfections.
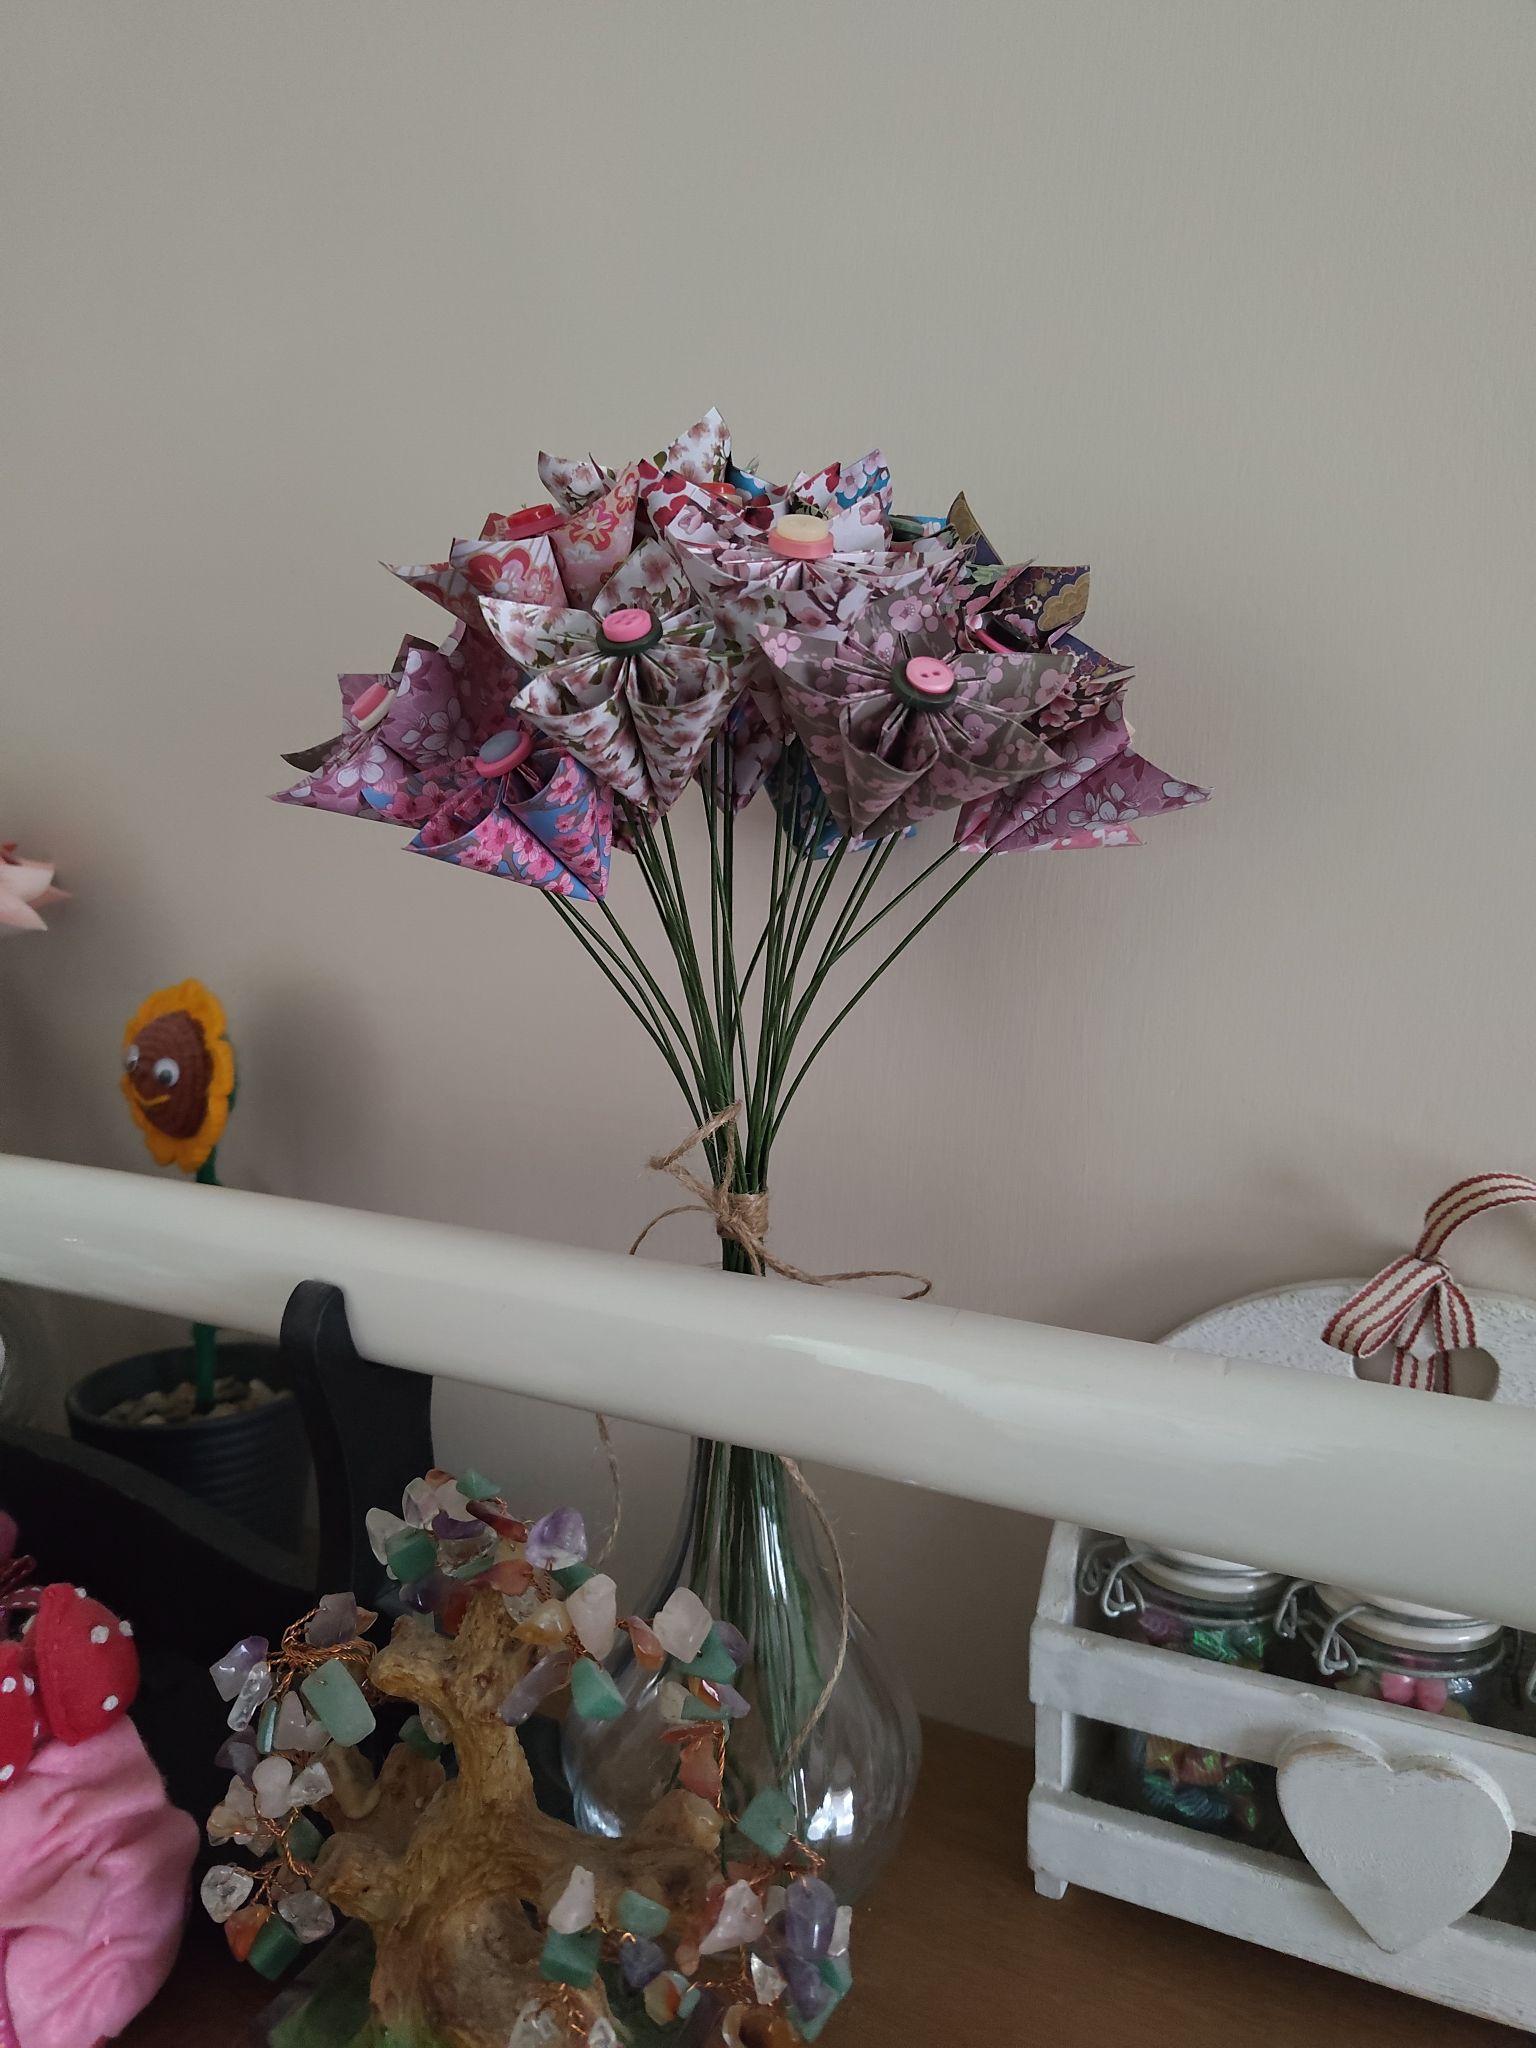
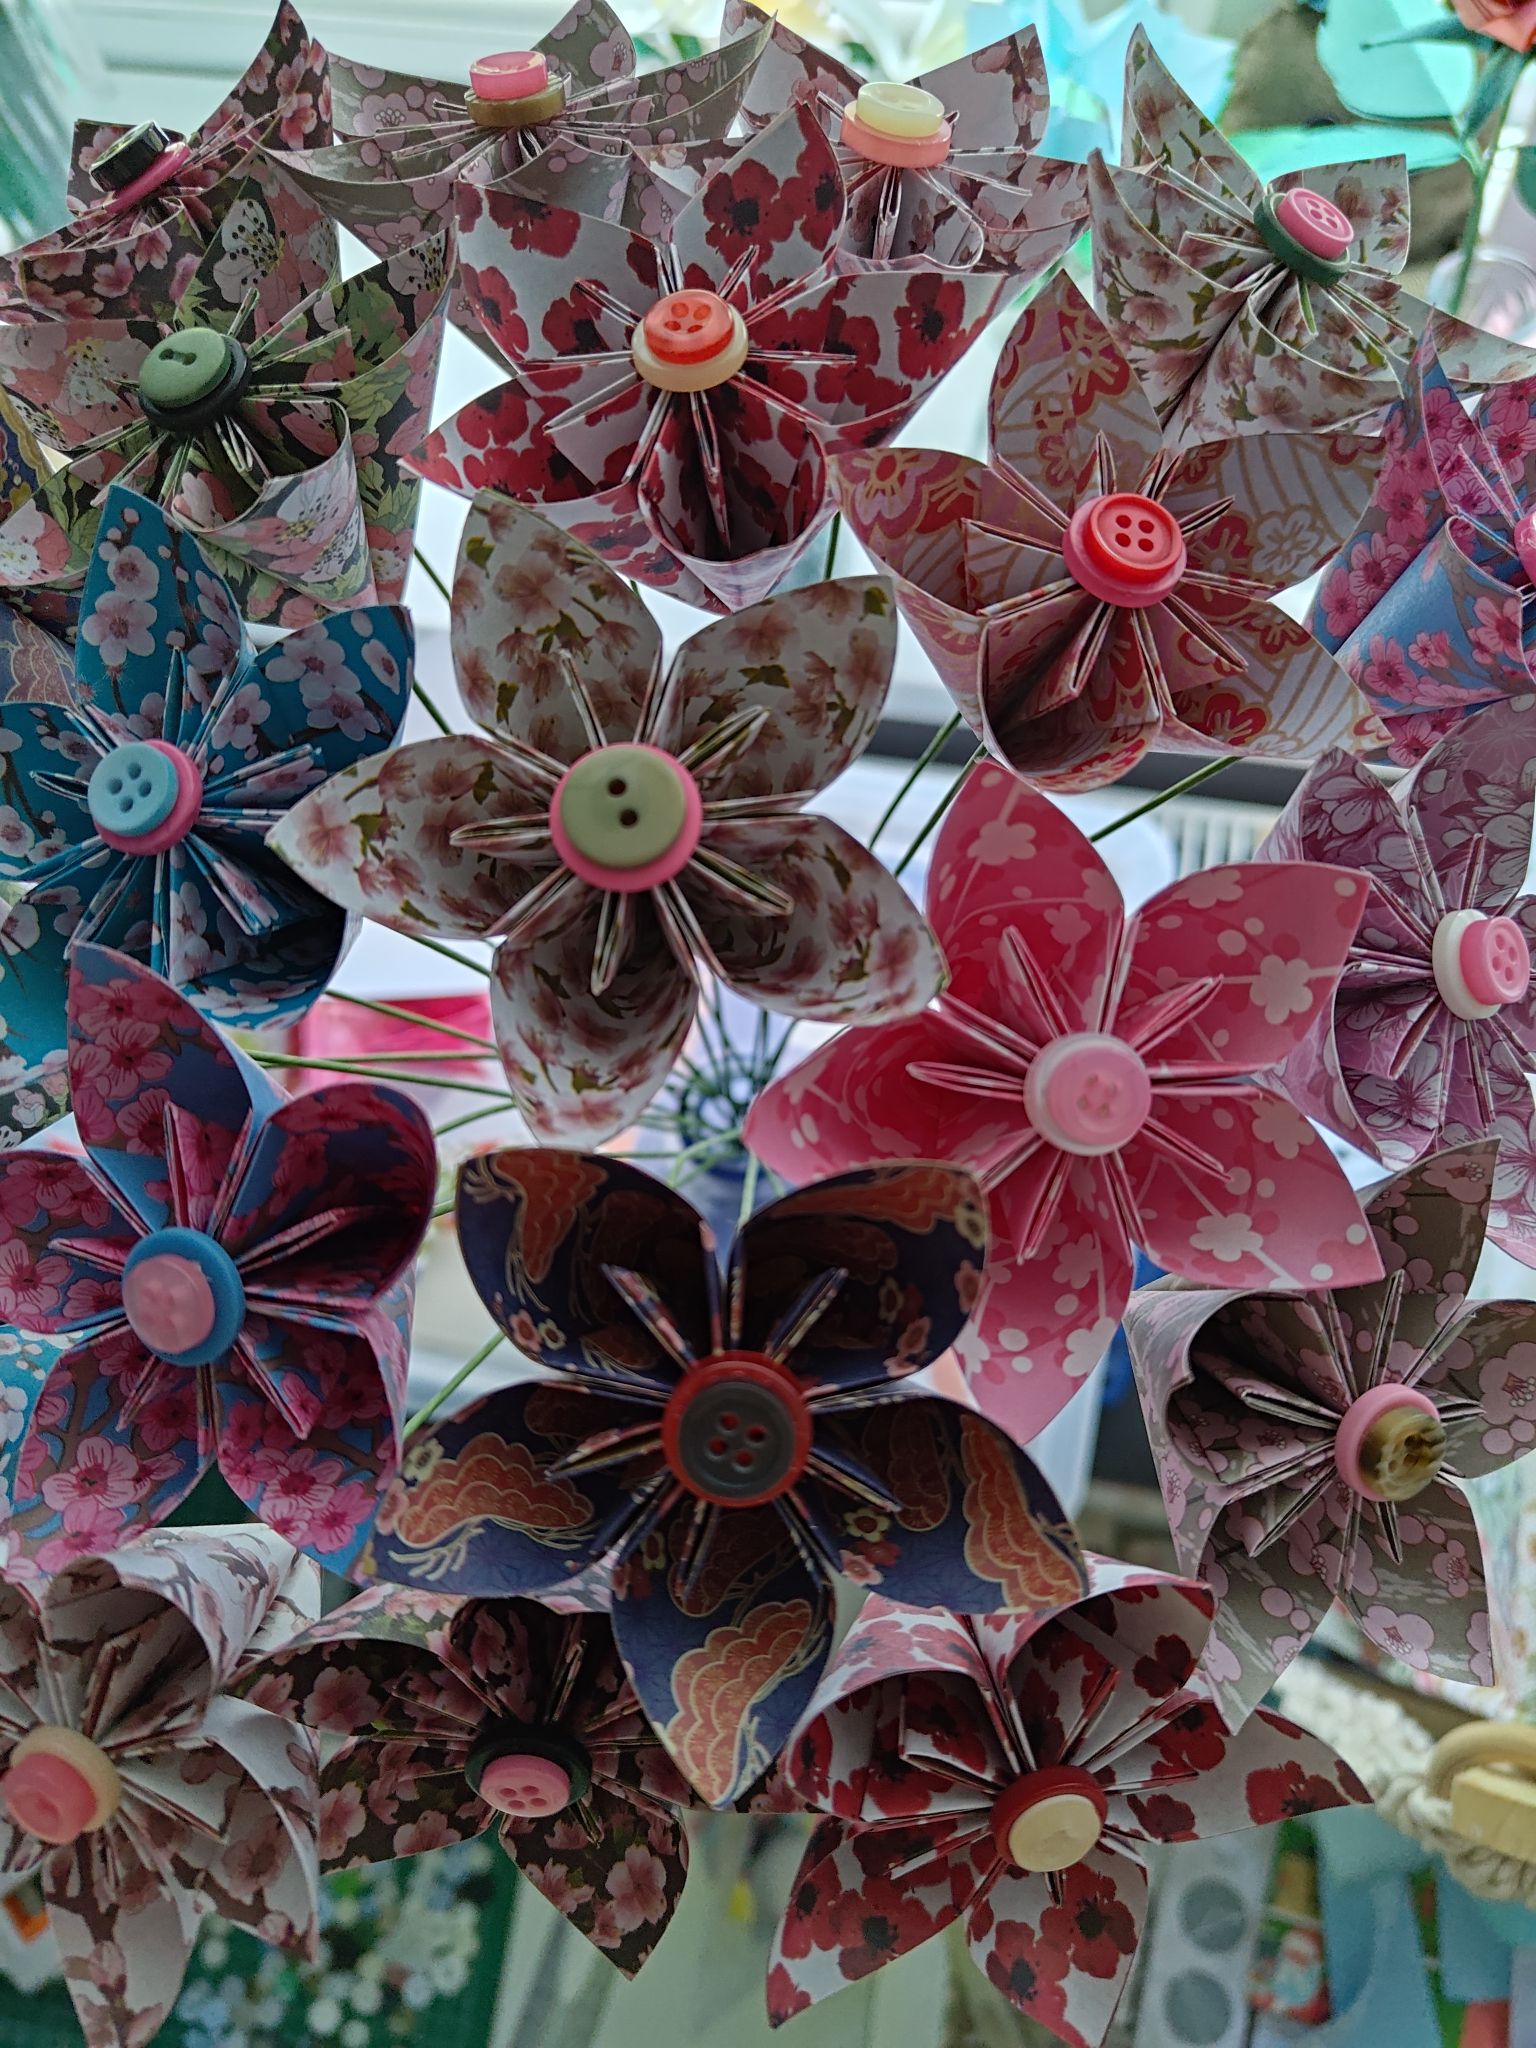
In my previous bouquet I used flat-back pearls to cover the centres, but this time I decided to use buttons – they can add a lot of colour and whimsy to the project! I have this large glass bowl filled with a huge assortment of buttons of all shapes, sizes and colours gathered over the years. For the stems, I used 18-gauge pre-wrapped stems as I had a few packs in storage.

Attaching the stems and embellishments to the flowers was a three-step process. Have the hot glue gun ready! First, thread the flower with the stem, apply hot glue to the end and pull the stem down level with the centre. Then, apply one button, either using residue hot glue from the first step or by applying more. Finally, apply a second button by adding a small dot of hot glue. Make sure that each new part is glued down fully before going to the next step.


I tried to colour-match the buttons where possible, by choosing primary and secondary colours – so for the above flower, I chose black and pink. I also tried to vary button sizes and shapes. With 24 total flowers, I got a really nice mix in!
I decided to tied the bouquet together with a neatly wrapped piece of twine, as I thought adding a ribbon would detract slightly from the colourful flowers. I wrapped the twine around a number of times before tying a single knot. In the process of assembling the stems, I slightly bent a few near the top half to help with creating the bouquet at the end.
I prefer to assemble the bouquet first and then decide afterwards if I need to cut the stems down to size. Here, my vase of choice was slightly too small and I needed to use the wire cutters. It might be difficult to do this step whilst holding flowers, so you can always cut the stems first before hot gluing to the flowers. I don’t like doing it this way however, in case I trim too much off to begin with and the final bouquet is too short.

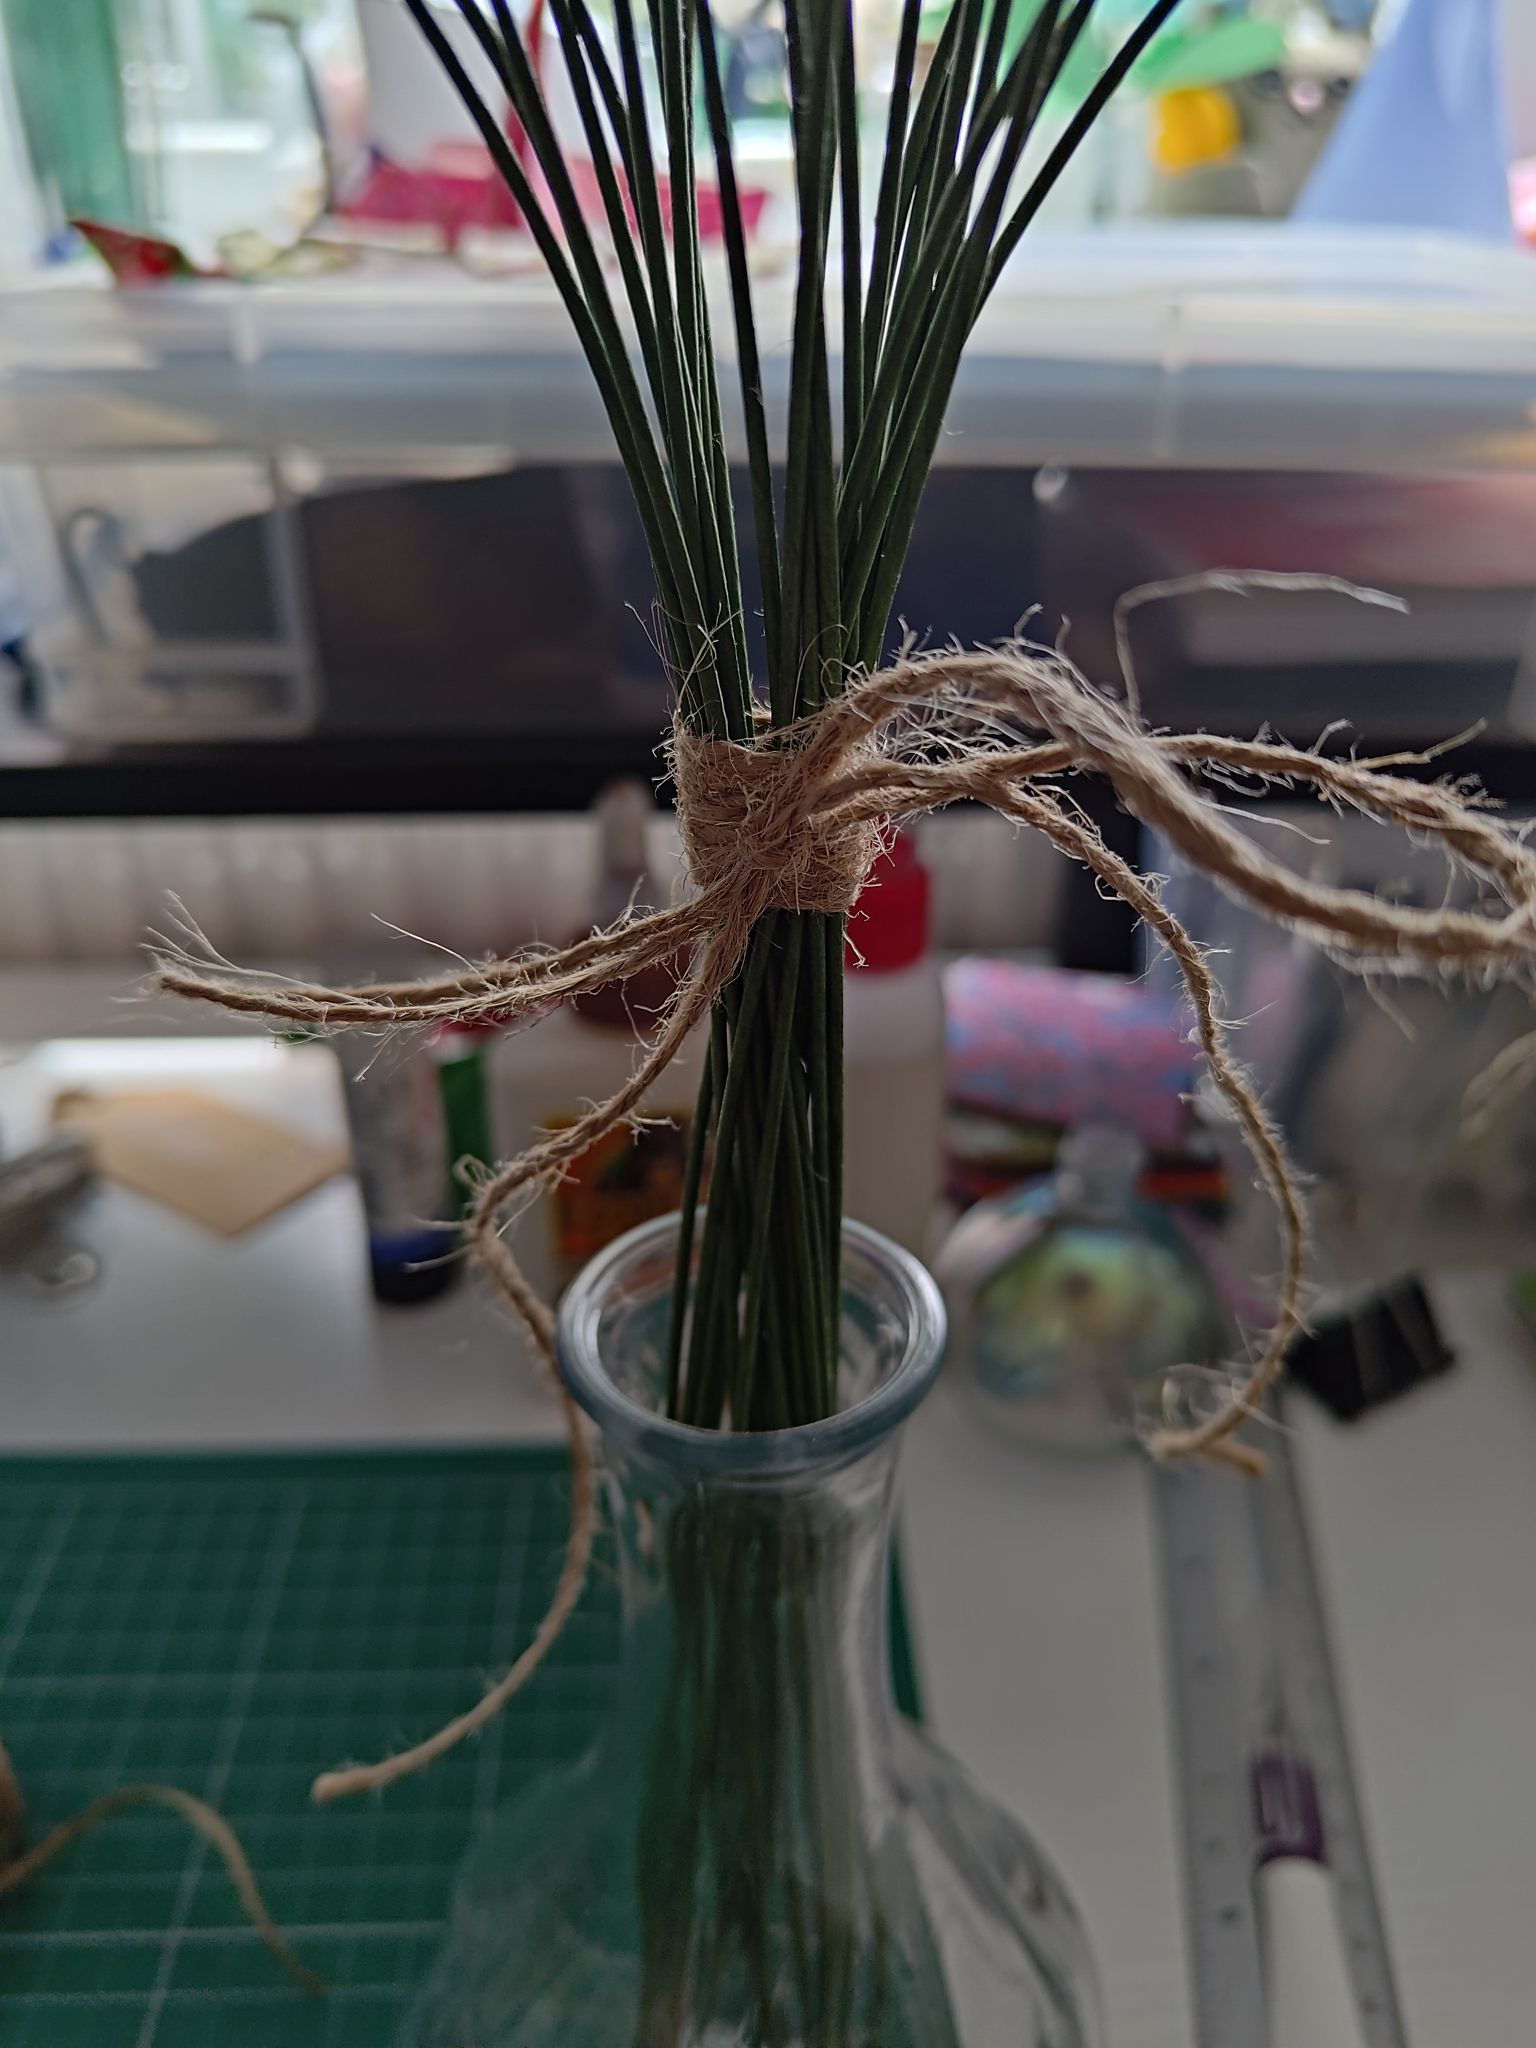
When the stems are held together, the flowers do bunch up and may cause the flowers to squish together, especially when all of the stems are still straight. This is why I bent a few of the stems earlier because they can sit on the outside of the bouquet. But even with 24 flowers, most of the flowers will still point upwards rather than outwards like a sphere.

The final bouquet is a very colourful bundle of kusudama flowers and buttons. I’m glad I went with the buttons instead of the flat-backed pearls! The twine adds a nice natural look to the bouquet and sits neatly above the vase.
I can’t believe the last time I made a kusudama bouquet was in 2021! They are so easy to make and for me they are the go-to for a large pack of themed origami paper. I will be looking more into creating bouquets in the near future, for a certain event…

Materials used:
– 36 sheets of cherry blossom-patterned origami paper in twelve different patterns
– 24 18-gauge paper-wrapped wire stems
– Assorted buttons of different sizes and colours
– Jute twine
Tools used:
– craft knife and cutting mat
– PVA glue and paintbrush
– hot glue gun
– wire cutters
Bonus picture: in the end, the bouquet looked like it would be too tall for the office (in case someone knocked it over by accident) so I decided to keep this one in my home. I rearranged a few bits in my home decor instead! I will show the updated office decor later.