
I have a little background story for this project! Recently I wanted to make a fancy kanzashi hair clip using a craft kit from my Japanese craft haul, but I overlooked an important detail looking at the packaging… The craft kit wasn’t all-in-one and required extra tools! I needed two types of special tweezers for holding the petals, and a special starch or rice glue adhesive for setting the petals. Turns out the latter cannot be transported by airmail anyway so I would not have been able to take it back with me, but I also cannot easily order this through local sellers. So whilst I am still dealing with this conundrum, I still wanted to make some new hair clips…
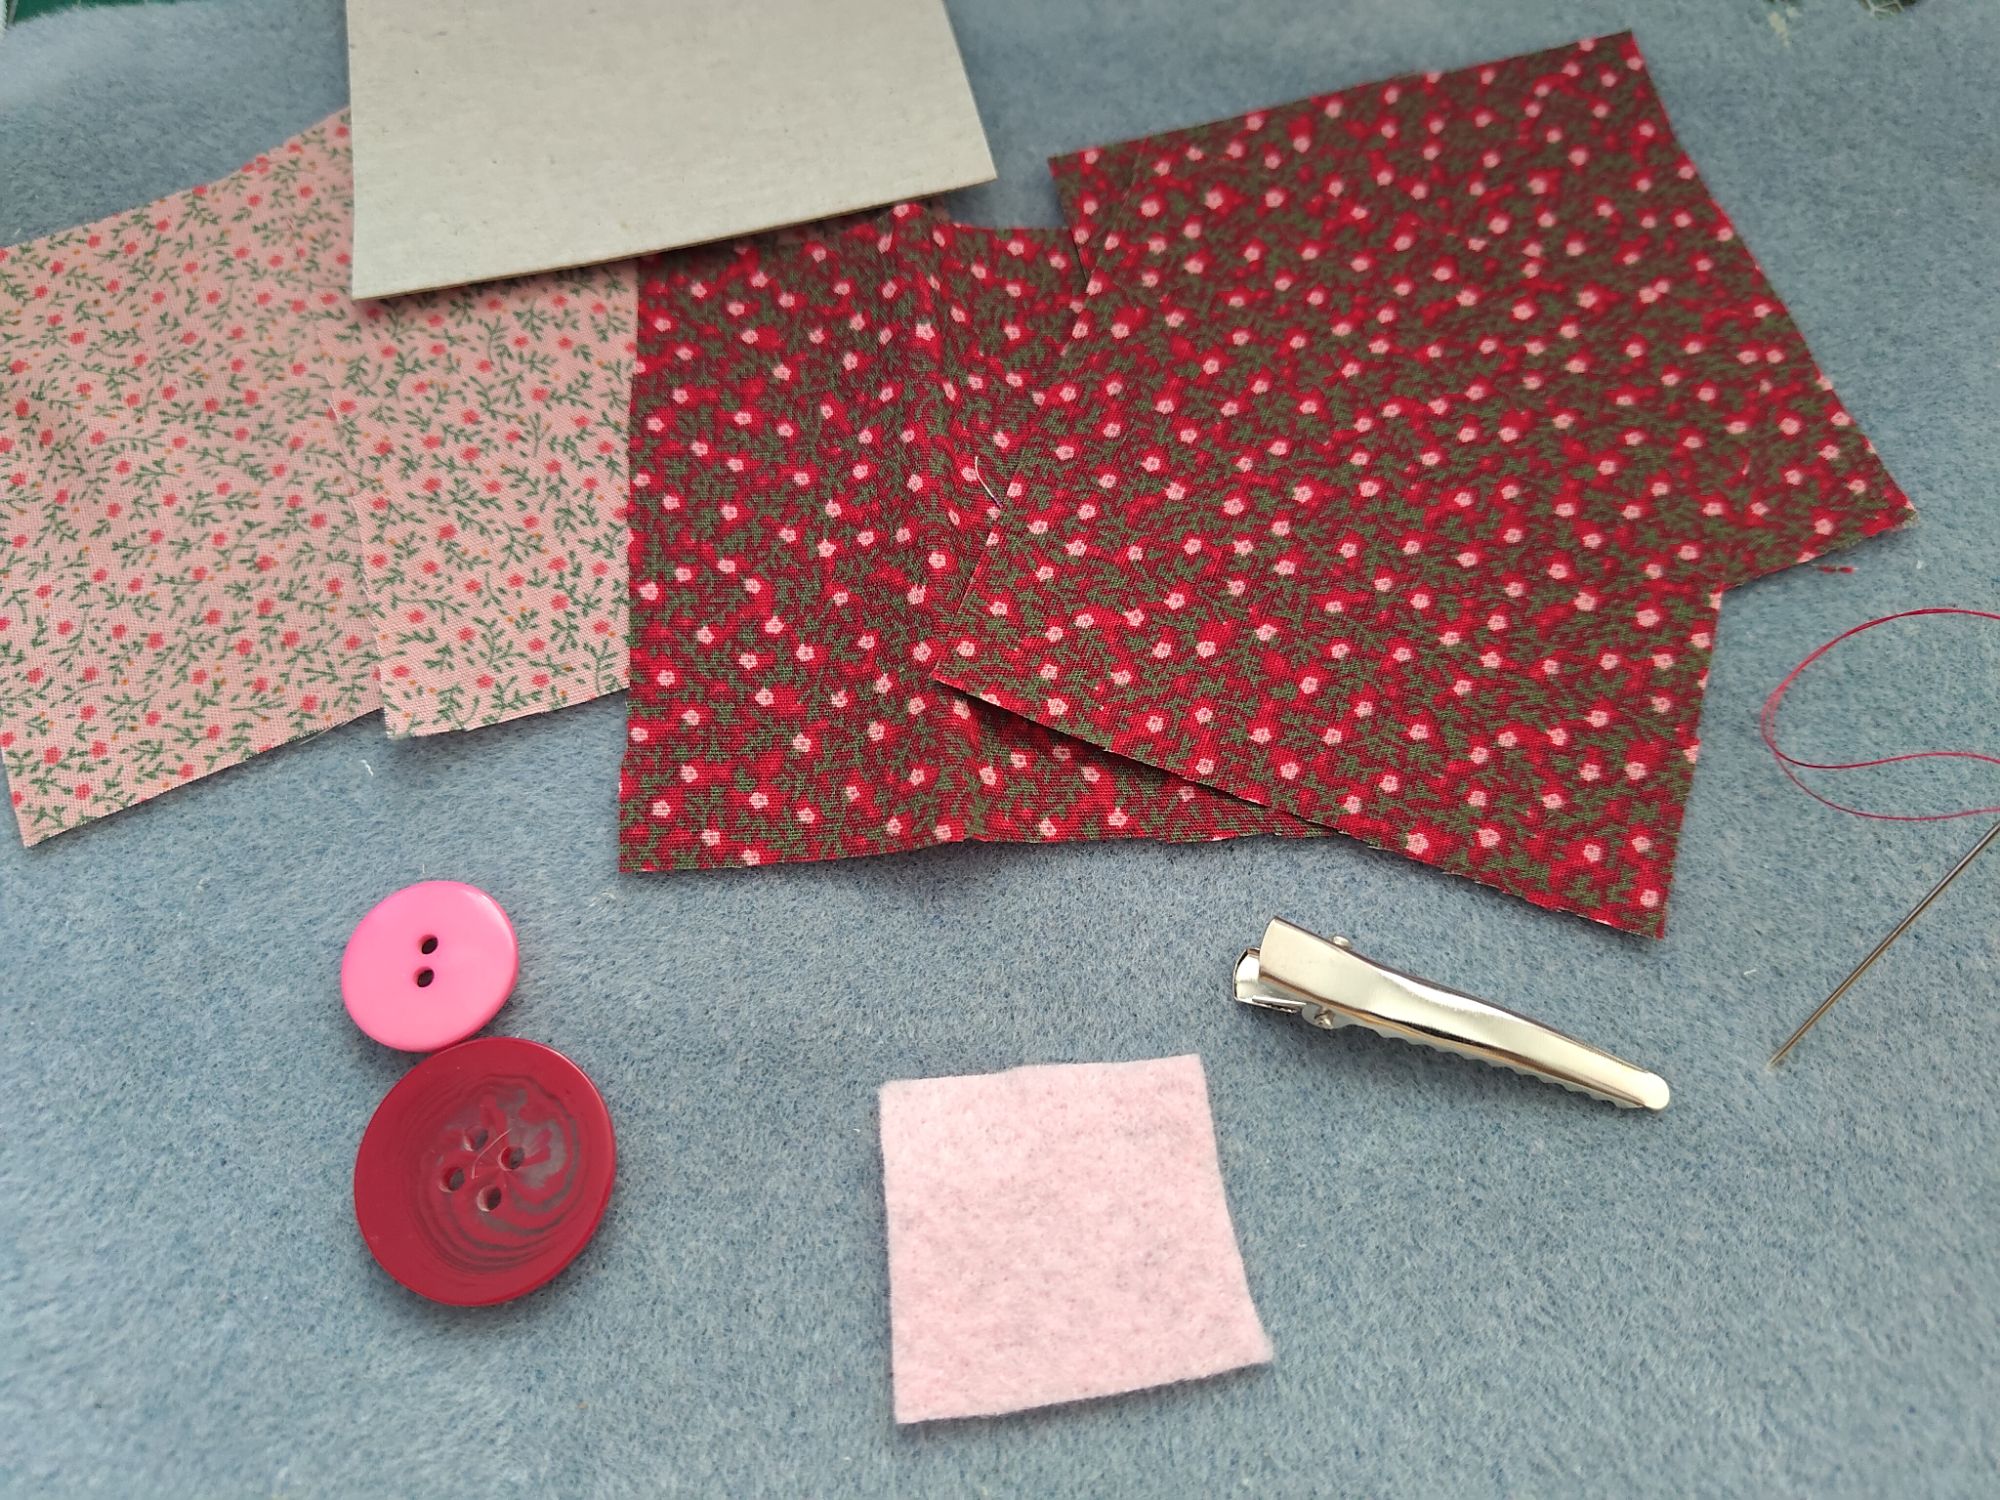
Introducing… fat quarter bundles! All you need is basic sewing knowledge and a needle to create something new. I had a stack already but I ended up getting a few more cheap and flowery patterned packs to inspire some creativity. I also needed matching thread and buttons – I already had a lot of this lying around!
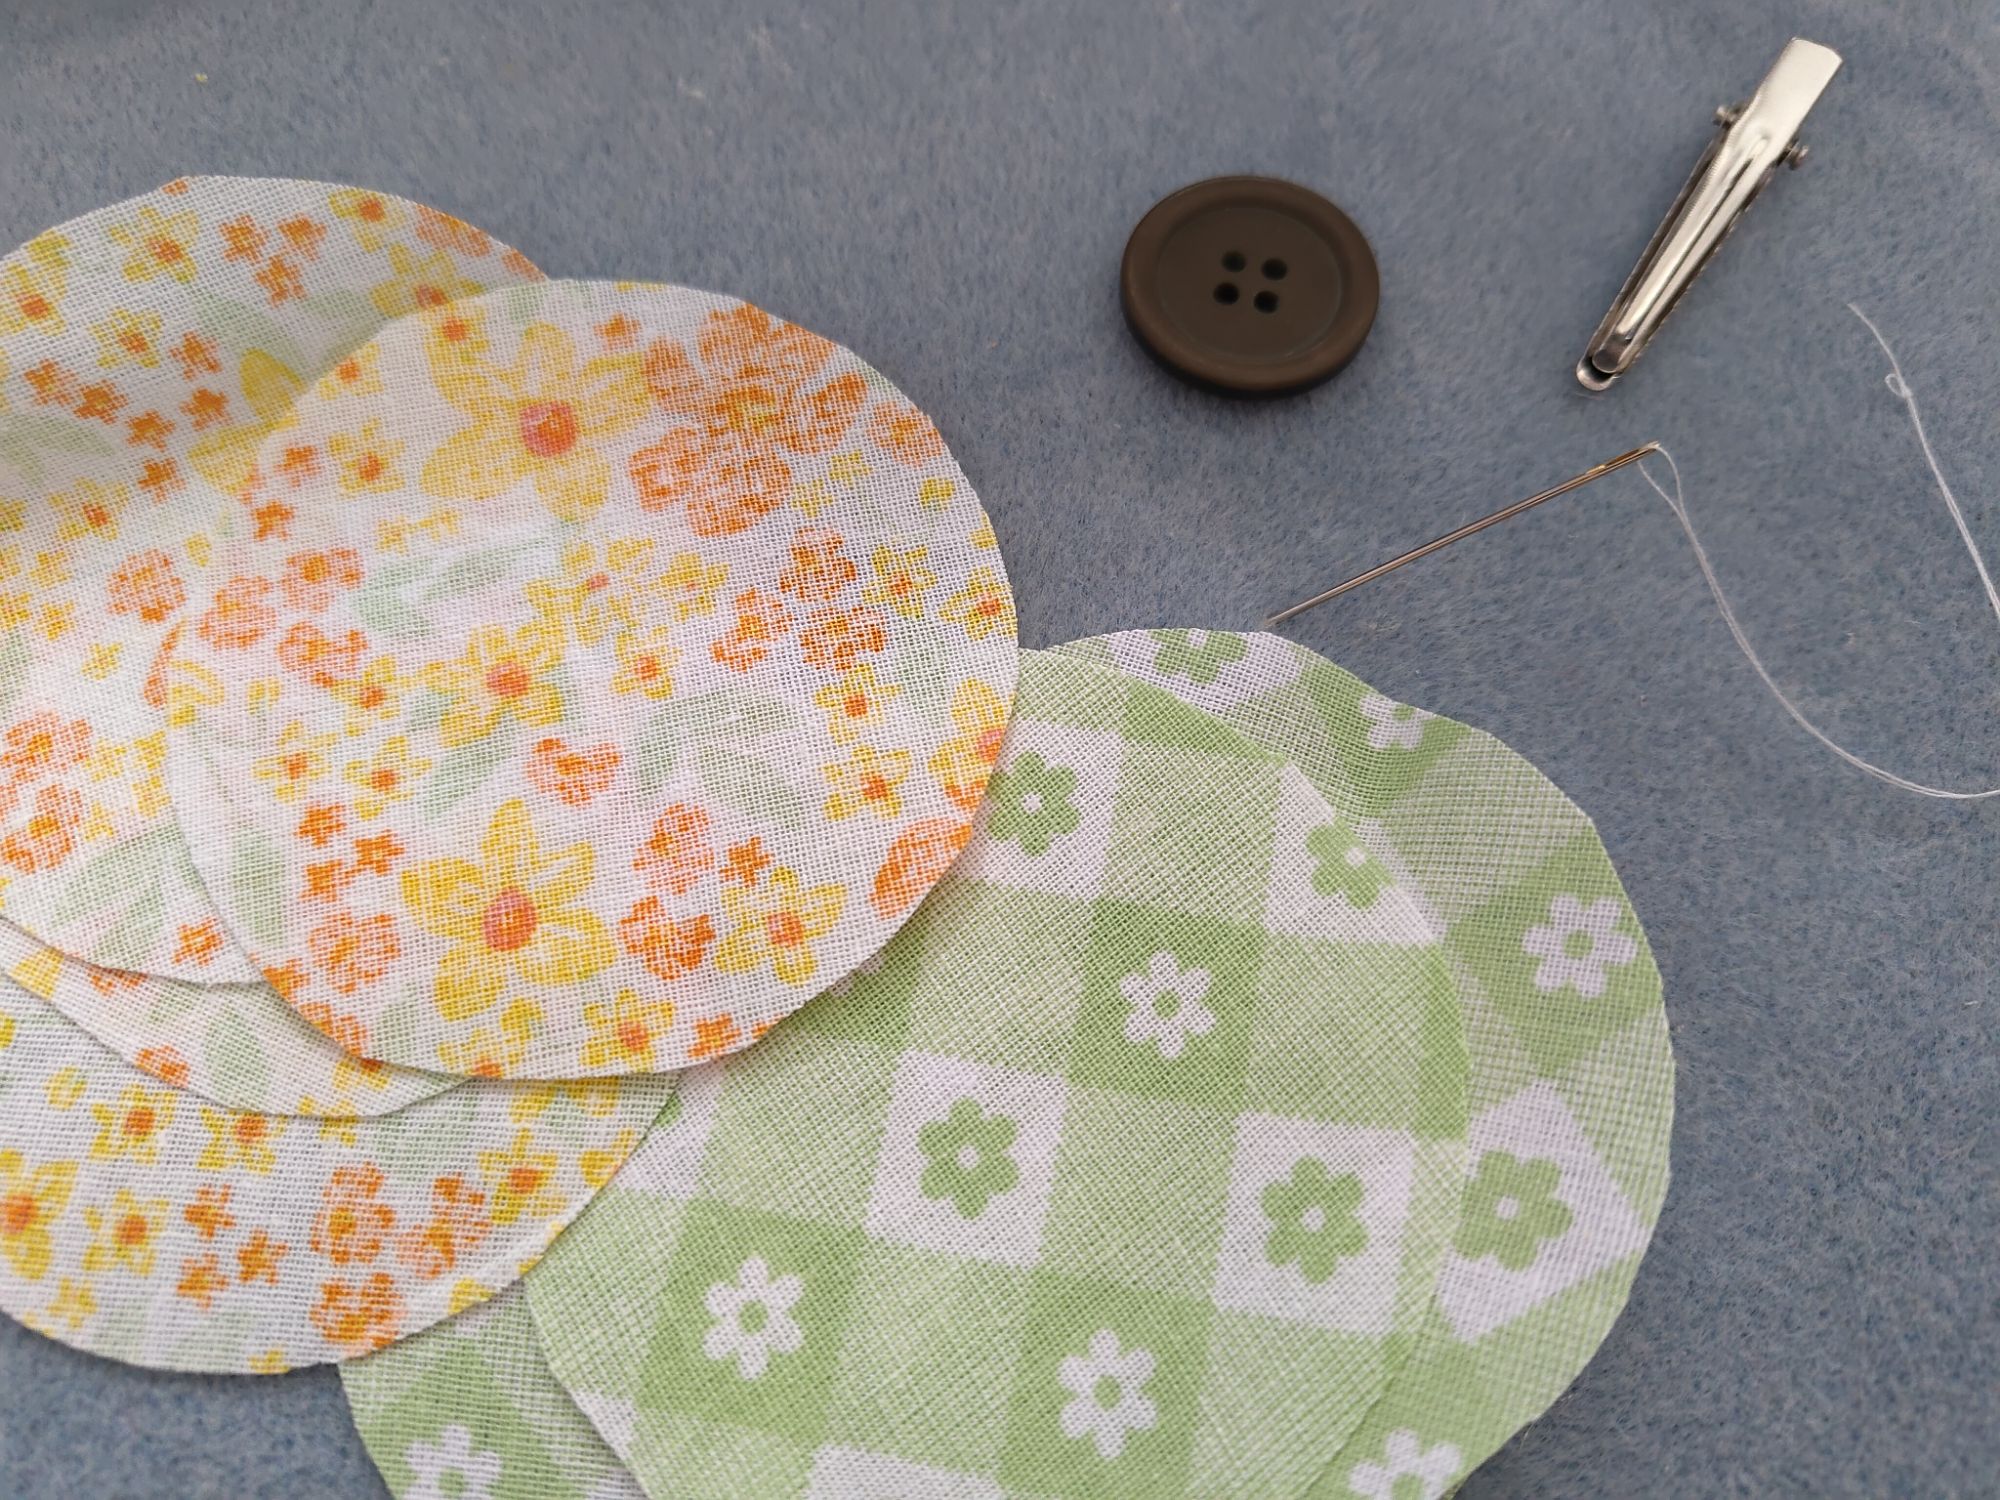
You can use fabric flowers as they are if you wish. To make hair clips, I also needed some felt, alligator clips, and a hot glue gun applicator. This is interchangeable with making a brooch, if you so wished.

I made a few different types today so I can show you the basics of creating a fabric flower. Instructions are easily found online, but why not provide another location on the web to find them?
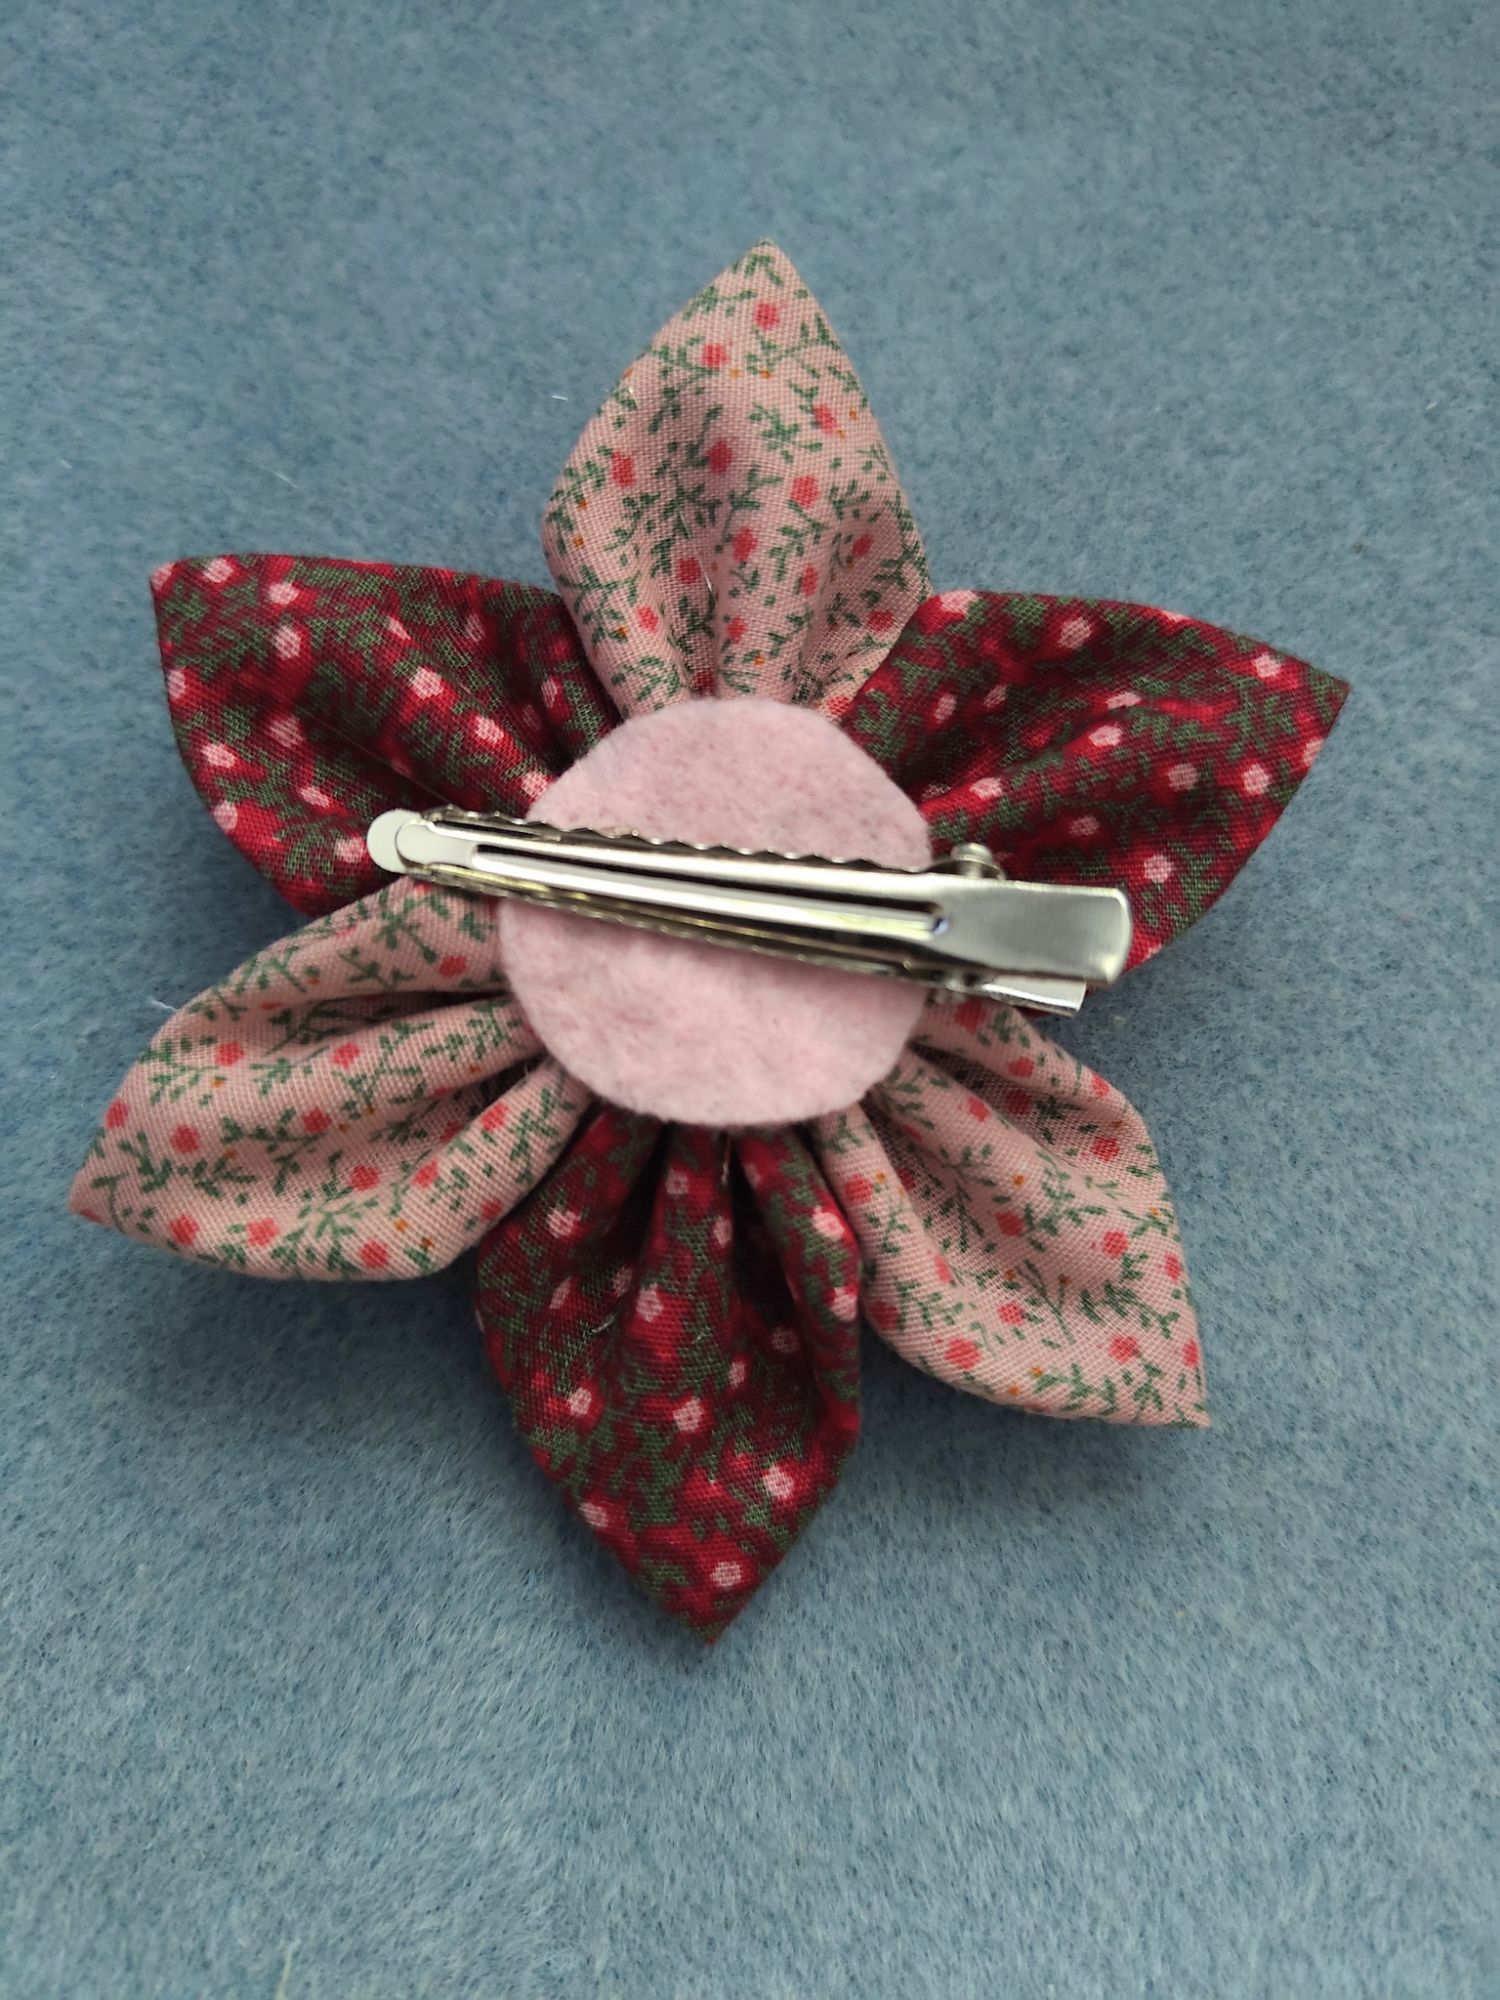
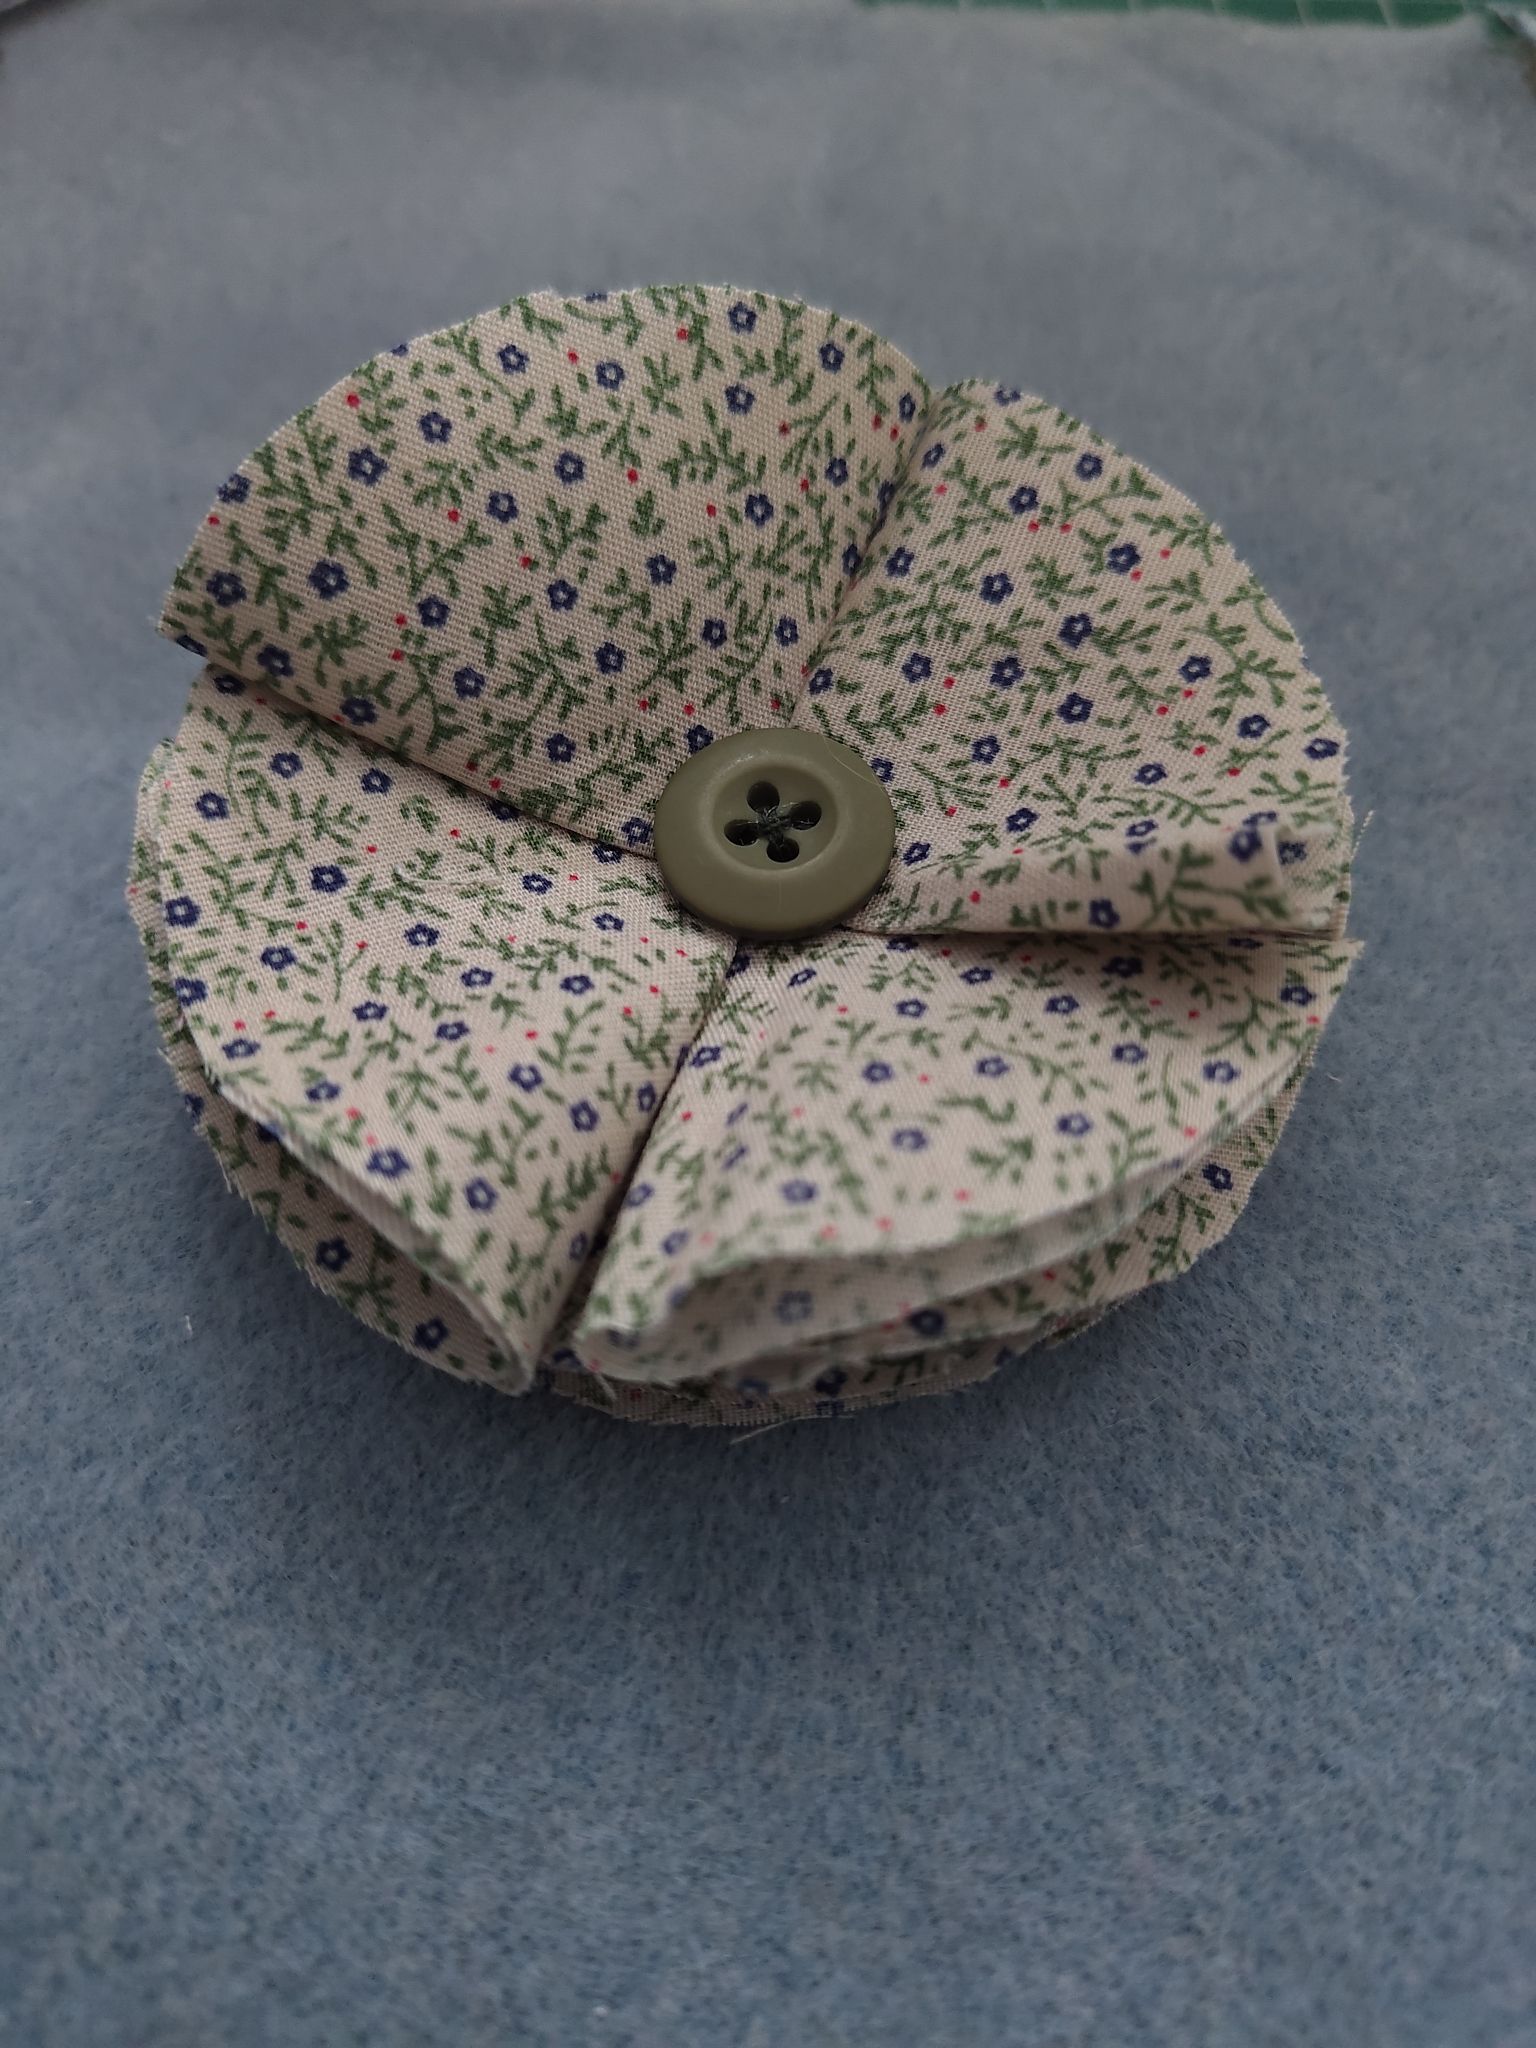
The first type I created used squares. I cut out a 8cm square template out of card and used this to cut out six squares of fabric in two different colours. I also needed red thread, a pink small button, a larger red button, and a piece of pink felt.
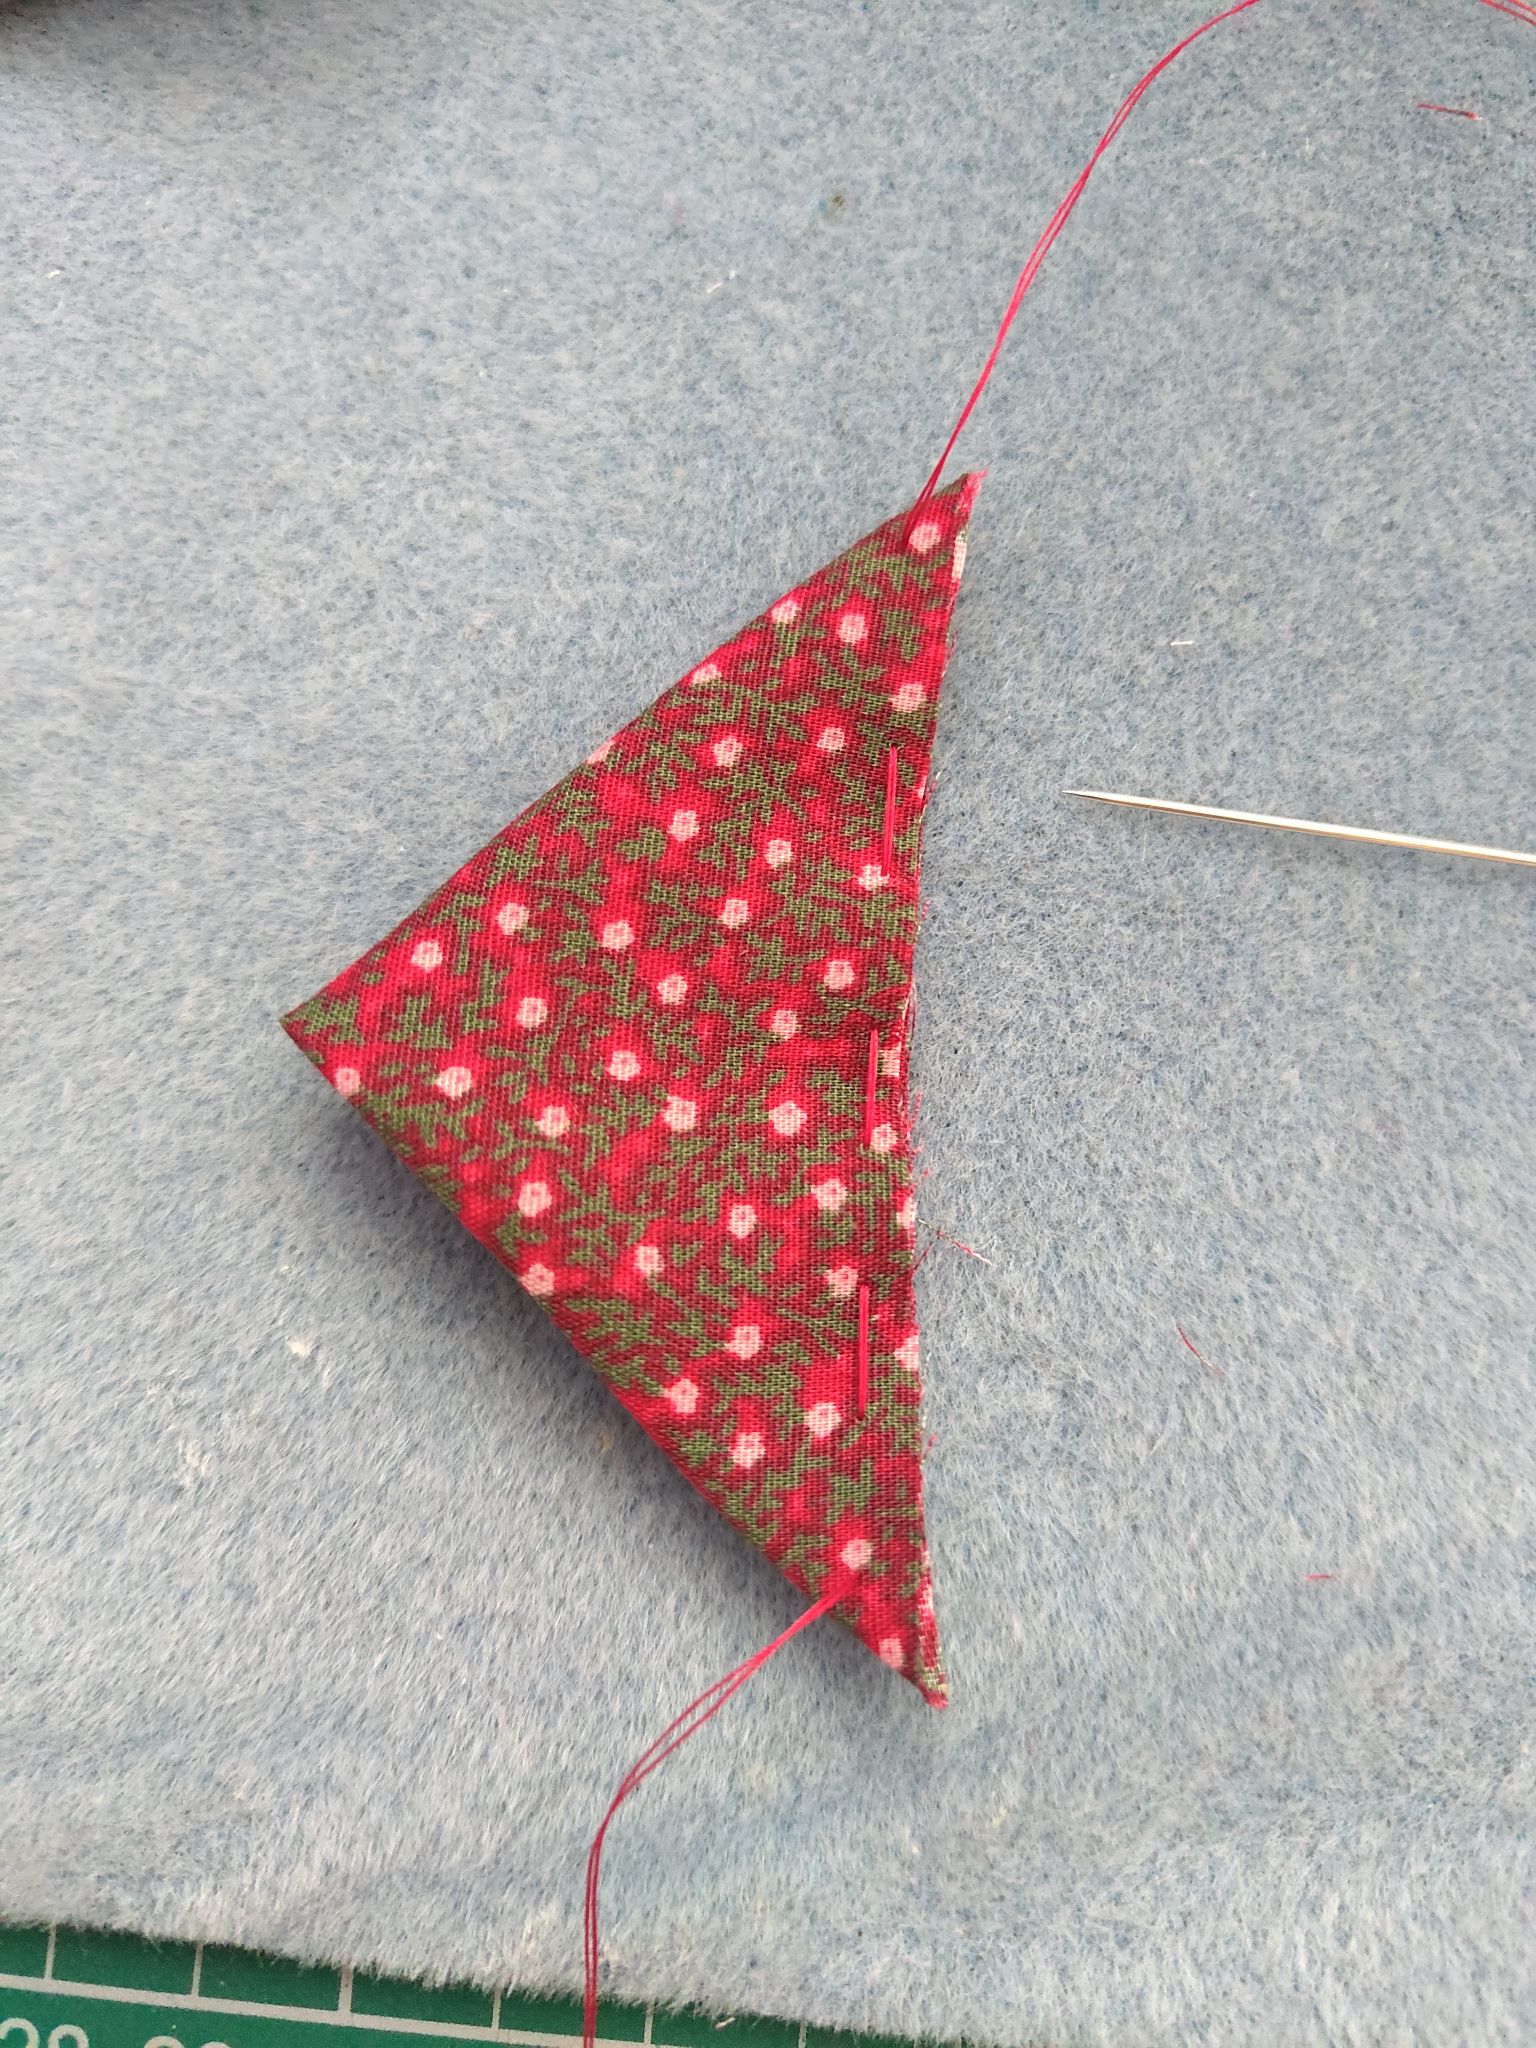
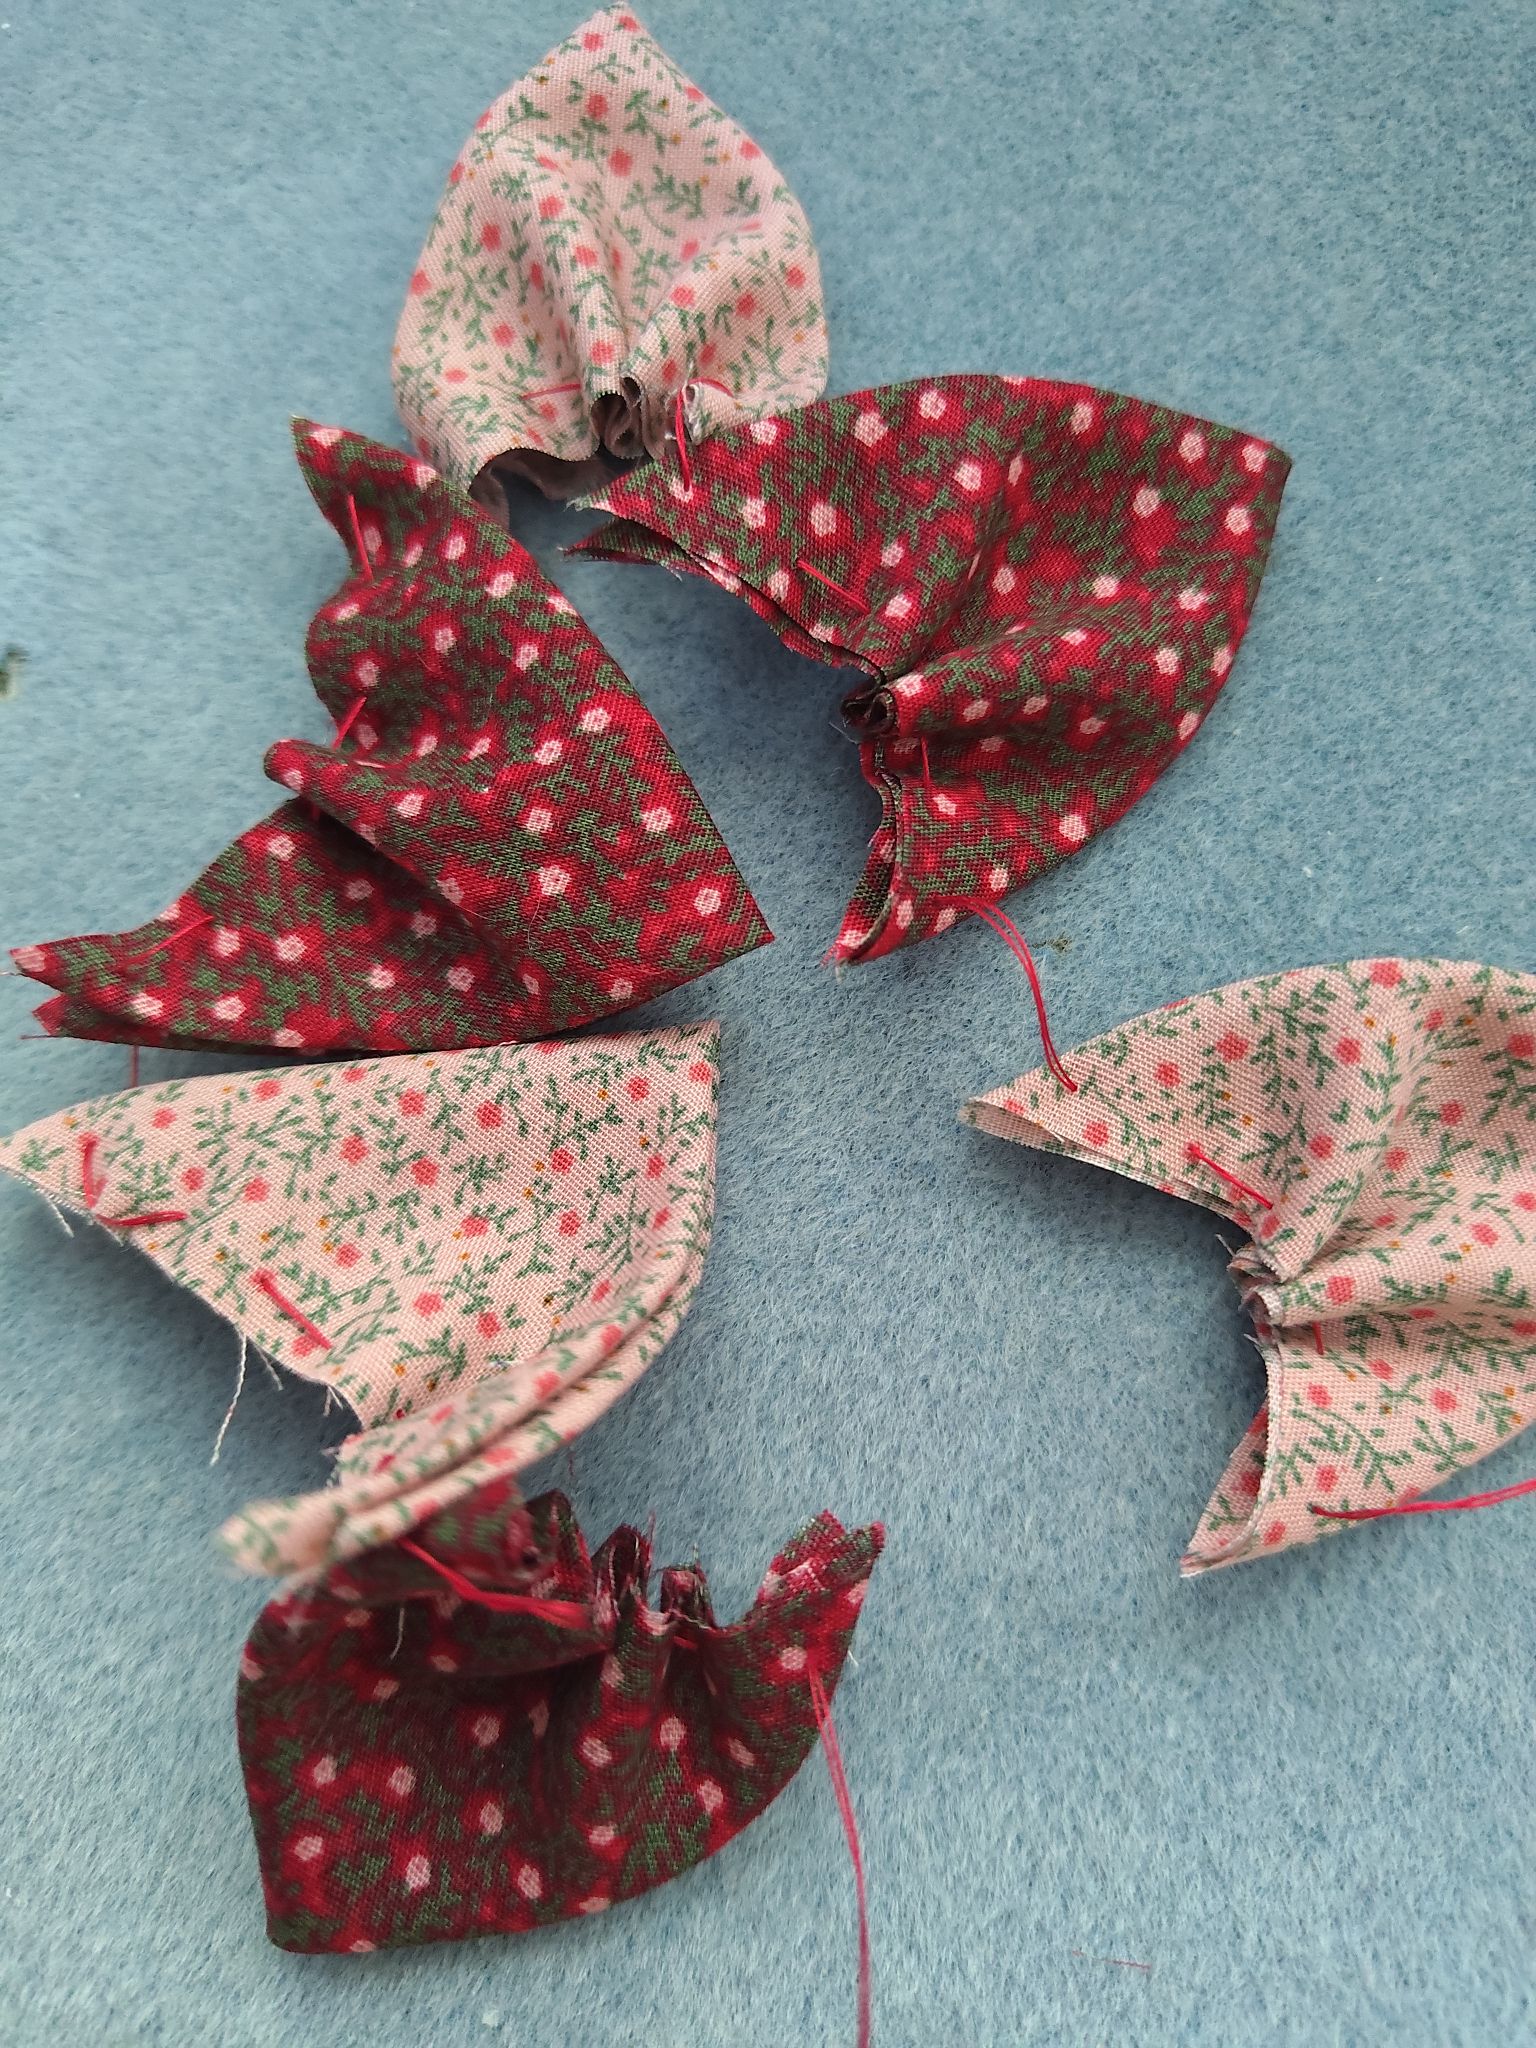
Take a fabric square and fold it in half diagonally so that the correct side of the fabric is showing, then fold it in half again to get a triangle. Do a running stitch on the longest end from one corner to the other, then pull the thread so that it scrunches up to form a petal with a pointed end. I made my stitches quite long so that the centre looked neater. I think adding smaller and more stitches would cause issues.
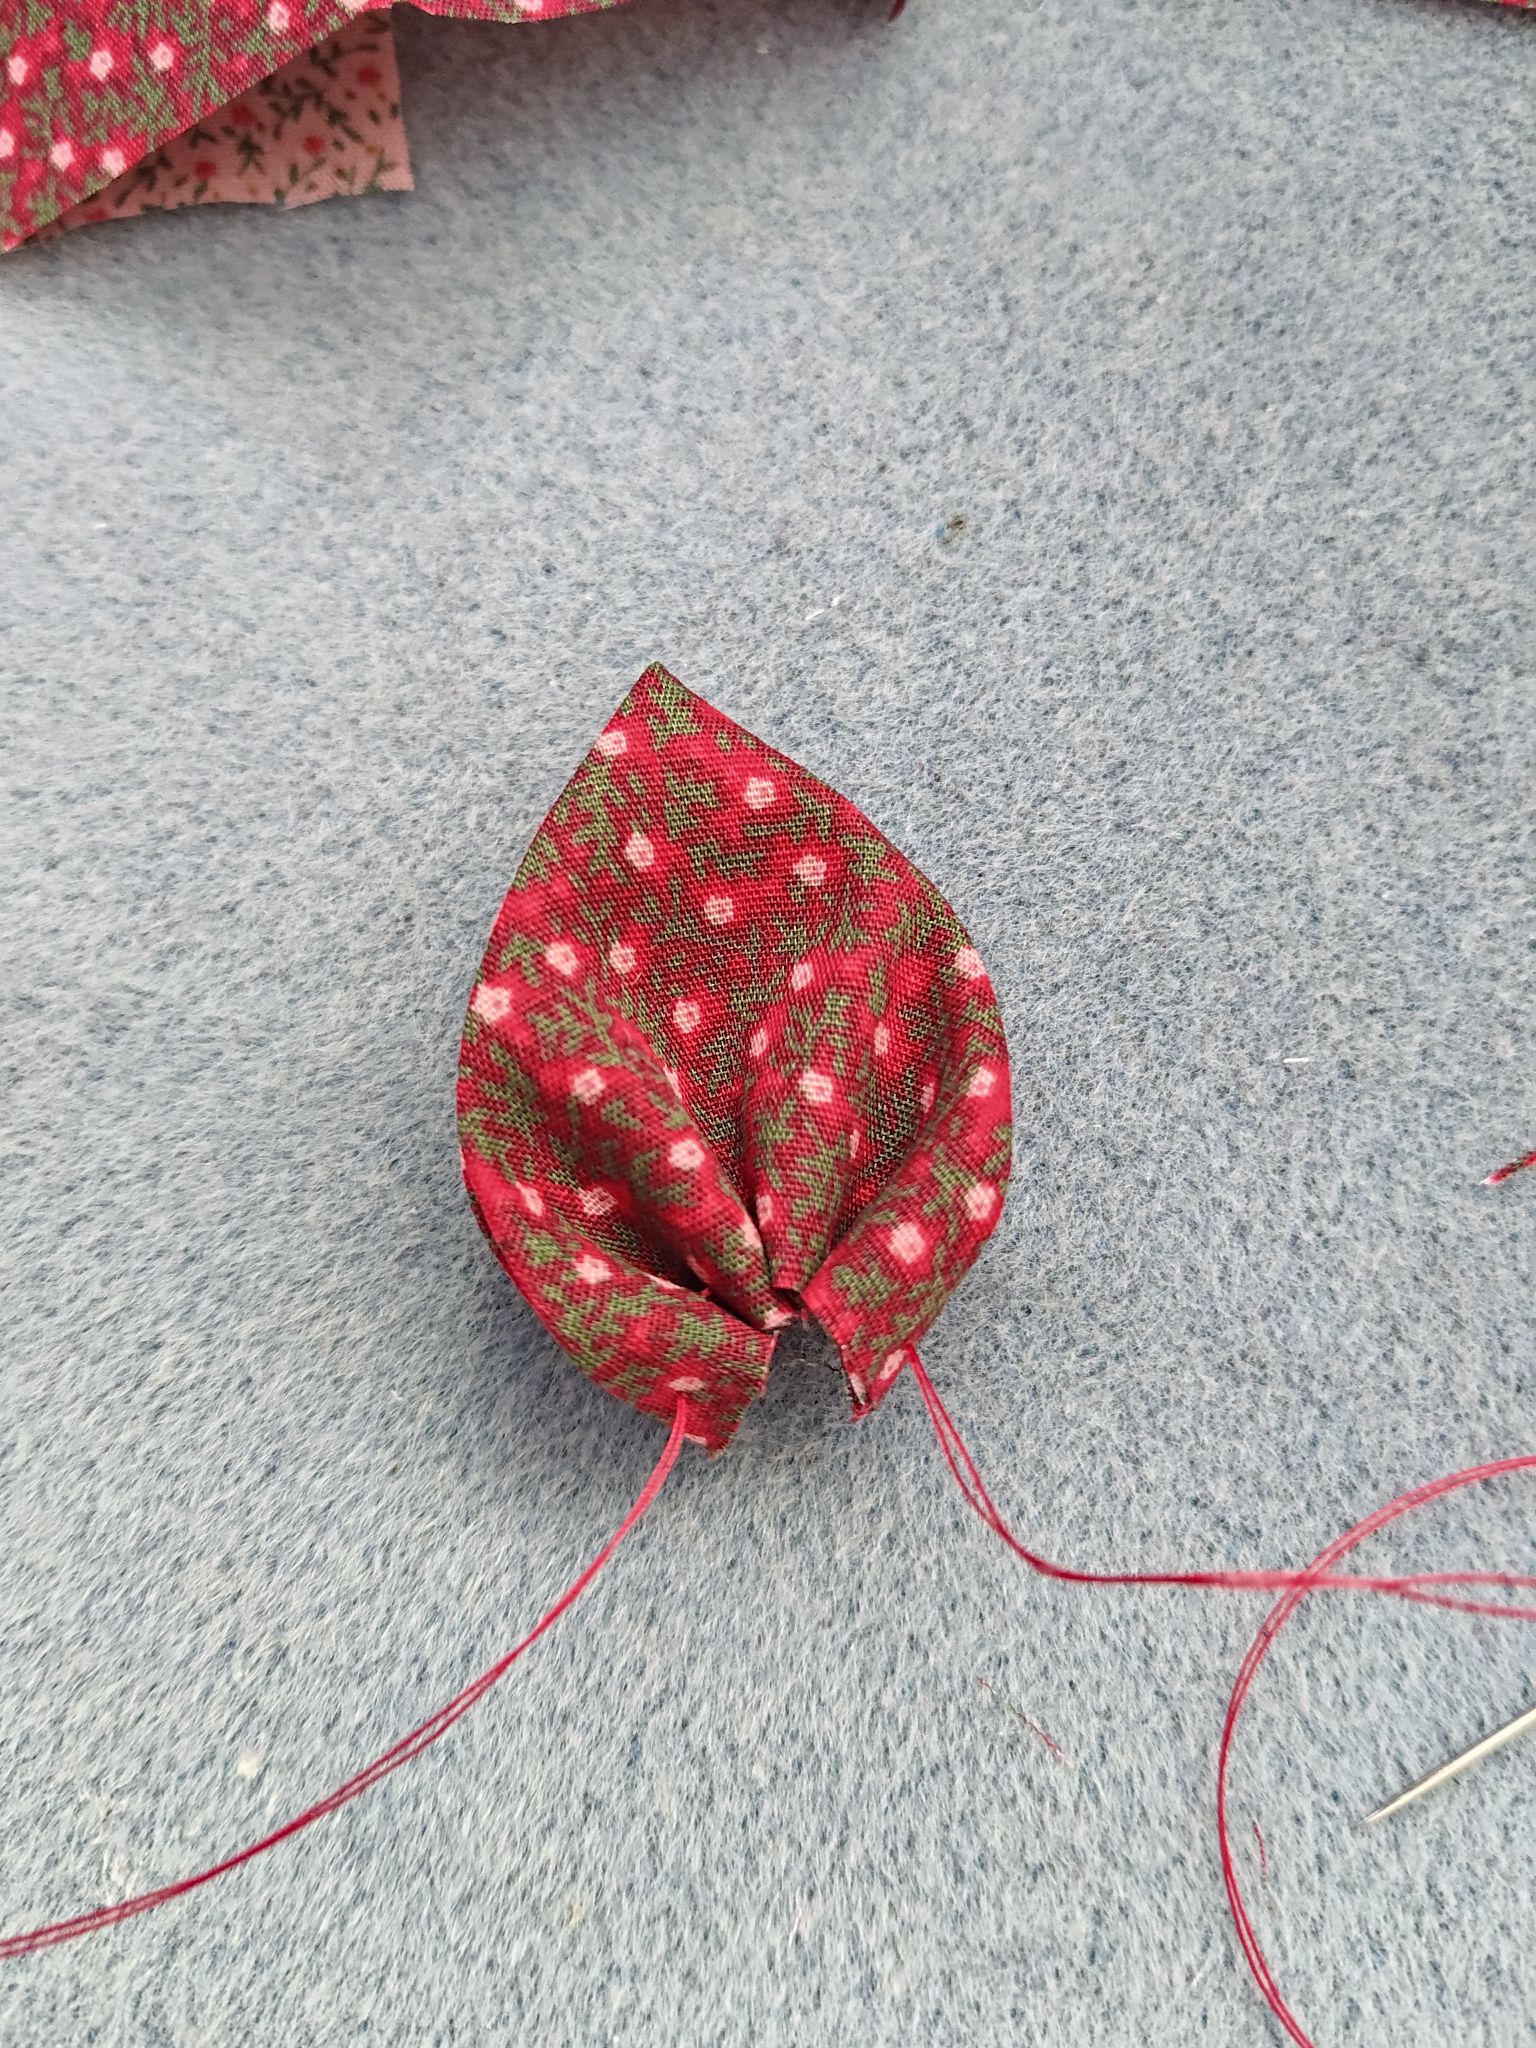
Now using the same thread, do the same thing with a fabric square of the other colour. Try to line up the petals facing the same way and keep the number of stitches the same to make the flowers look uniform. I used six total petals and pulled the thread as tight as possible, then tied a small knot in the thread that is hidden by the petals.

You can continue using this thread or start a new one for the next step. I ordered the buttons on top and threaded it multiple times, attaching the button to the petals. It will look messy underneath, but this can easily be hidden! Just don’t run the thread through the same areas or it will pull the button off-centre.
To hide the underside, I cut out a circle of felt and hot-glued it to the back of the flower. Now the messy stitching is completely hidden!


I like to hot-glue the top of the hair clip directly to the felt. I have seen some designs where the creator will sew the clip into the felt, or even cut a gap into the felt to thread the hair clip through. It’s much simpler to do the former, but the latter can help make the hair clip look more like part of the flower and you don’t have to use any form of glue.
And that’s one flower done! A six-petal red and pink-themed fabric flower. This is the basic process, but you can add some variations to get a different design, as I will demonstrate.

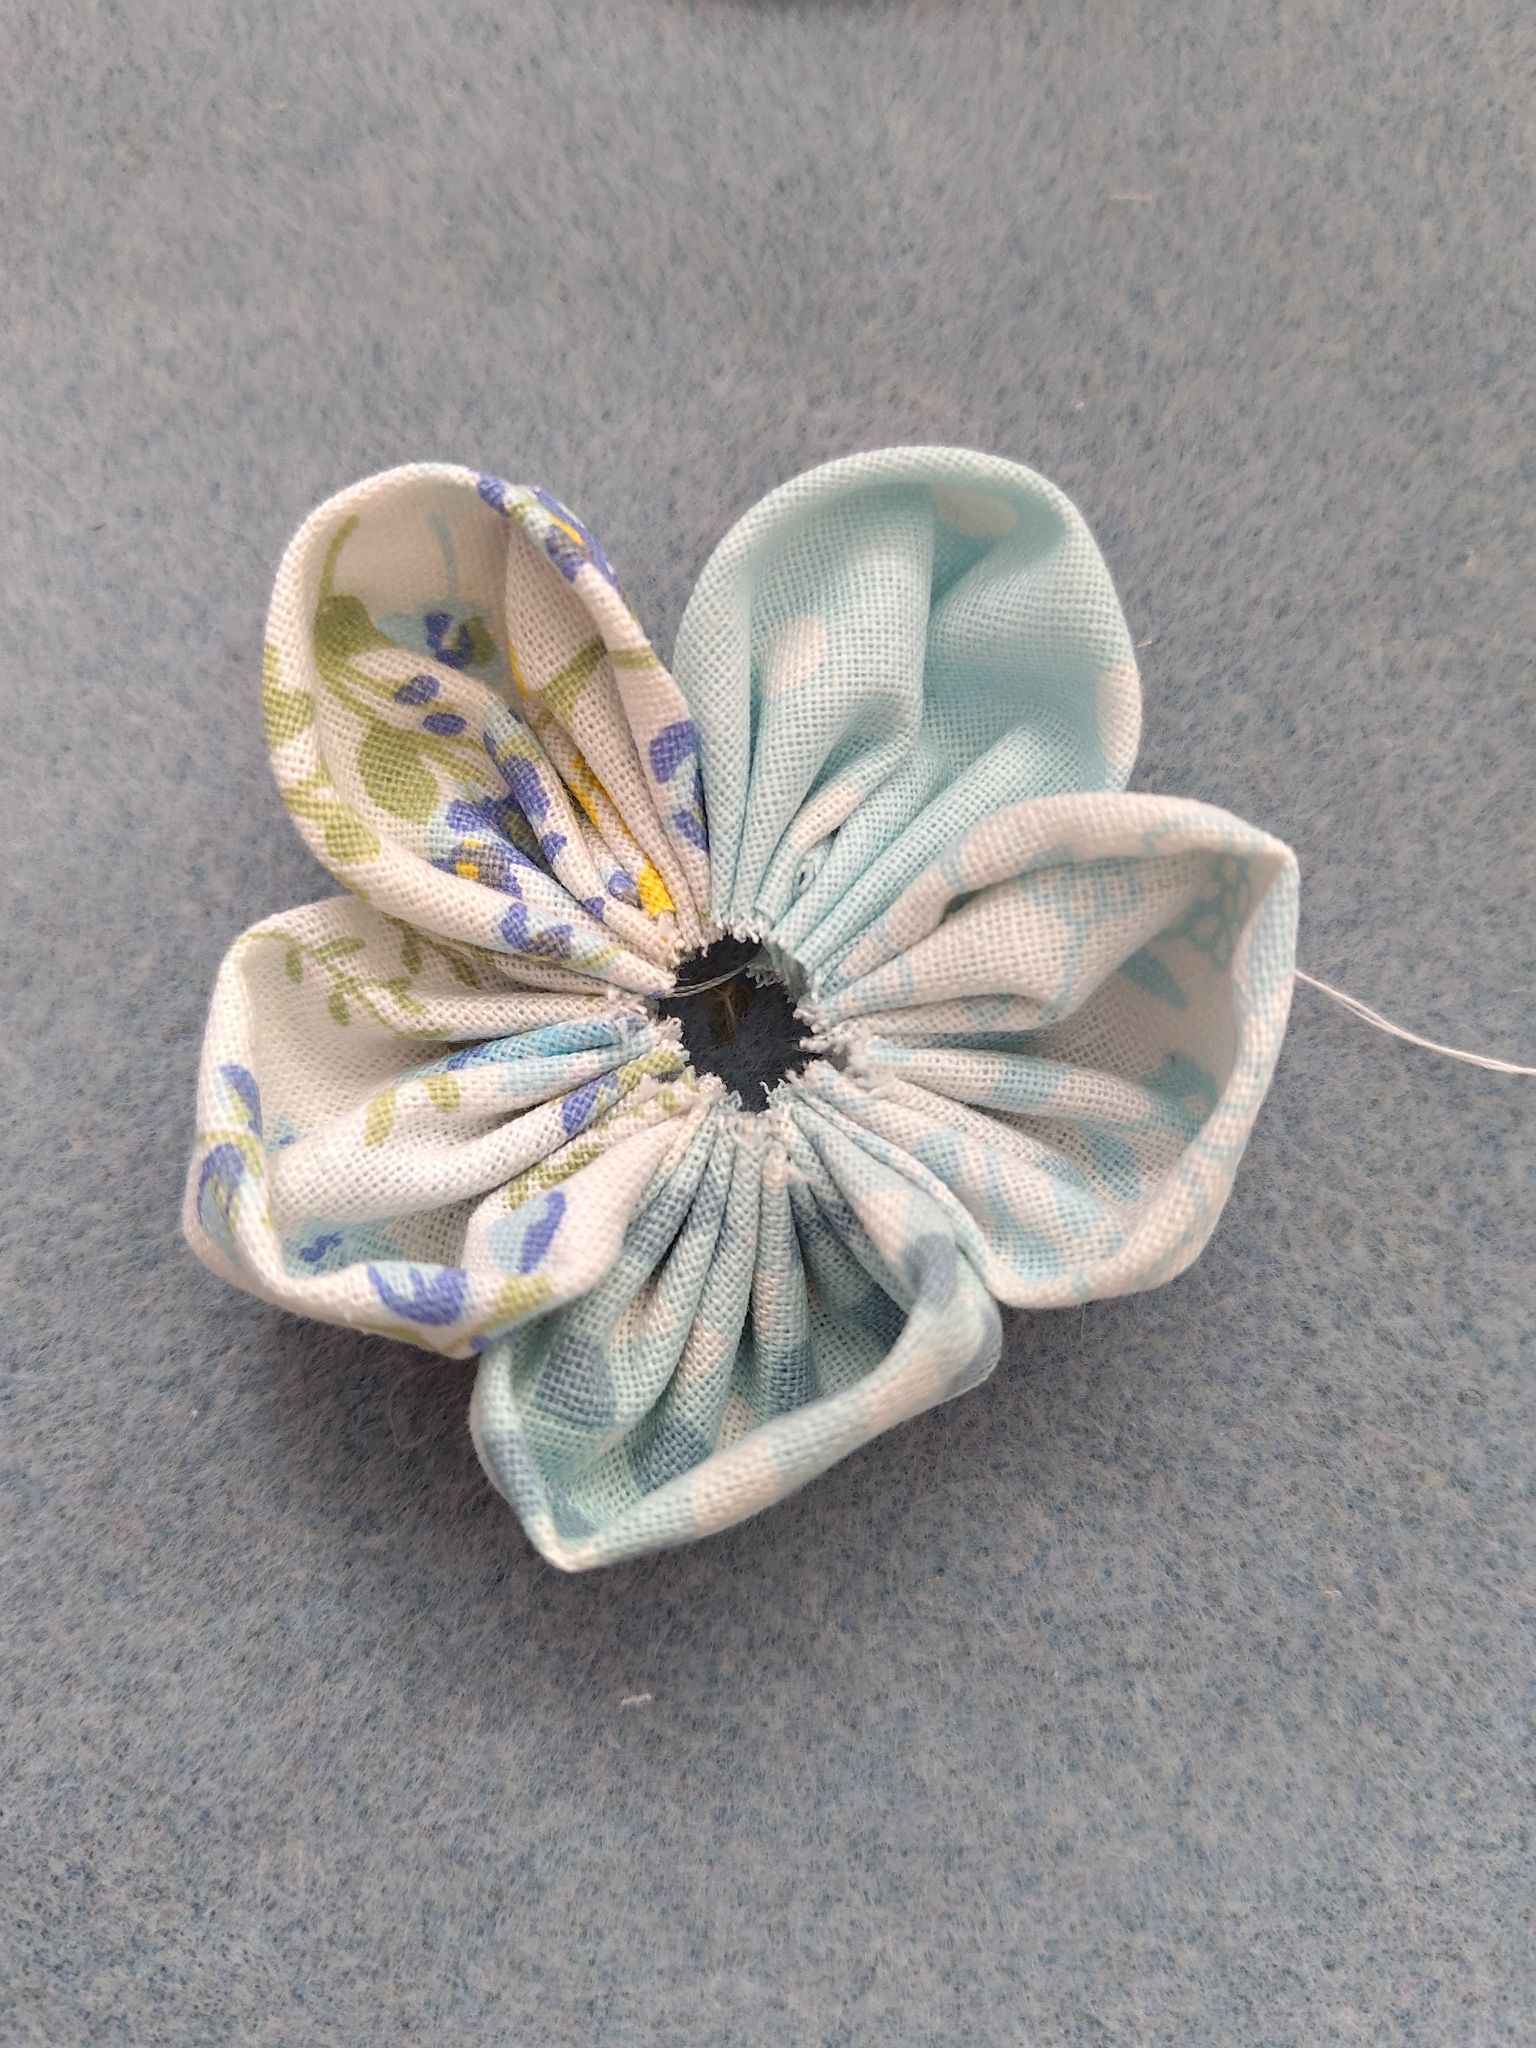
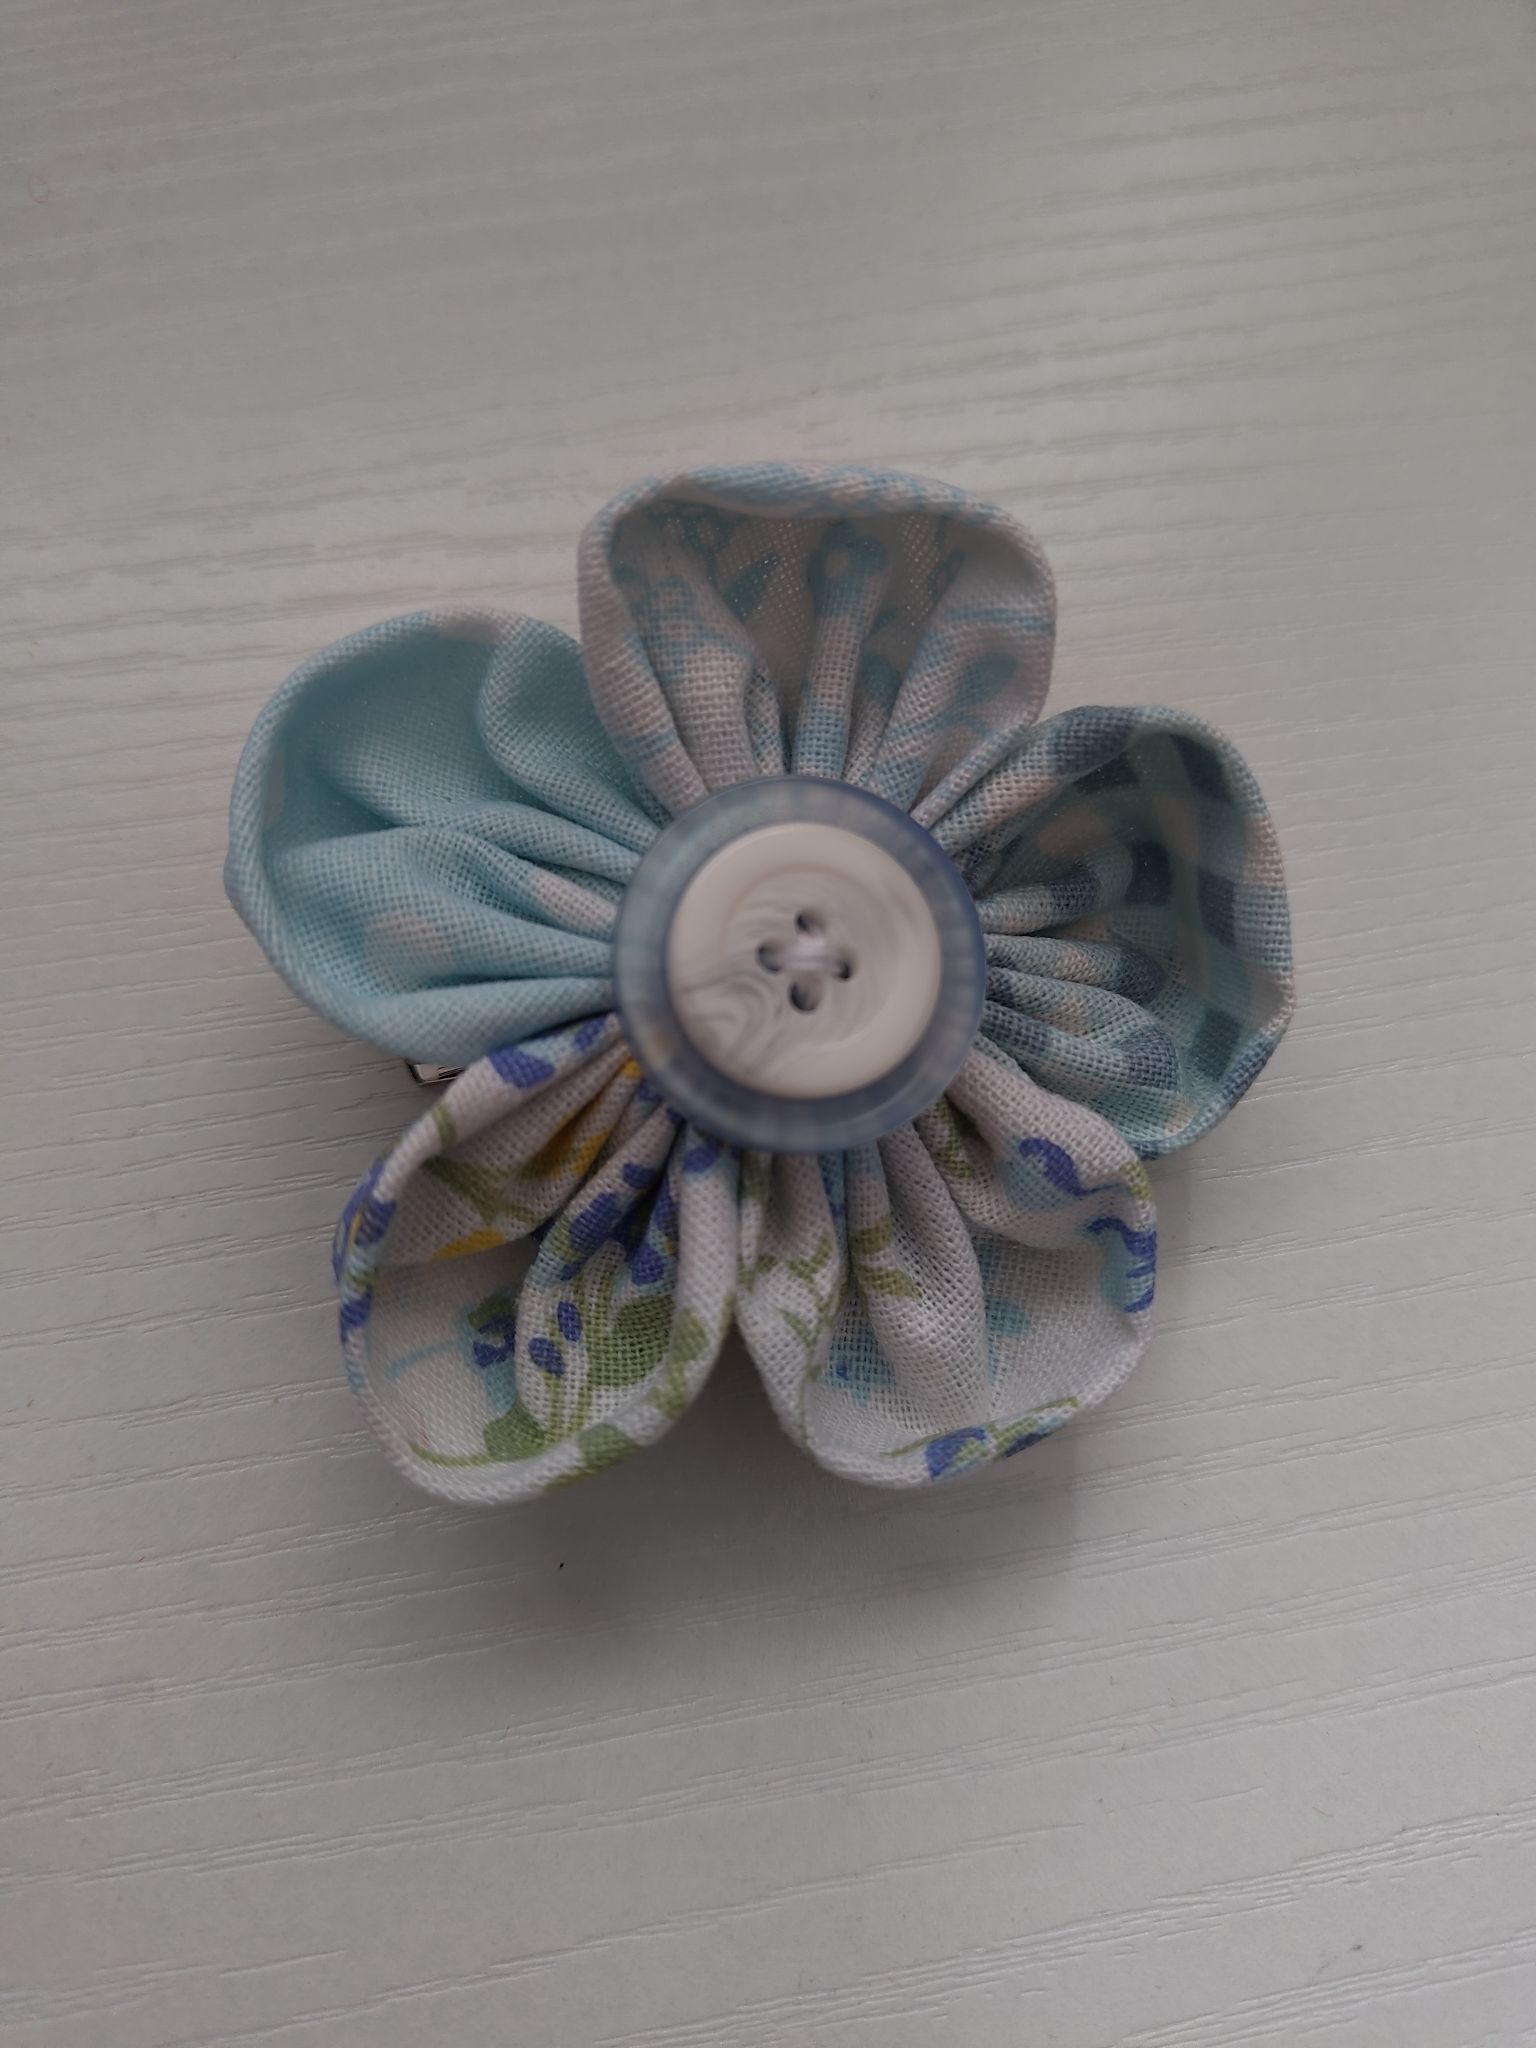
My next flower used the blue fat quarter bundle. There were five different patterns, so I decided to make a five-petal flower. I also used white thread, a white smaller button, a light-blue larger button, and a piece of white felt.
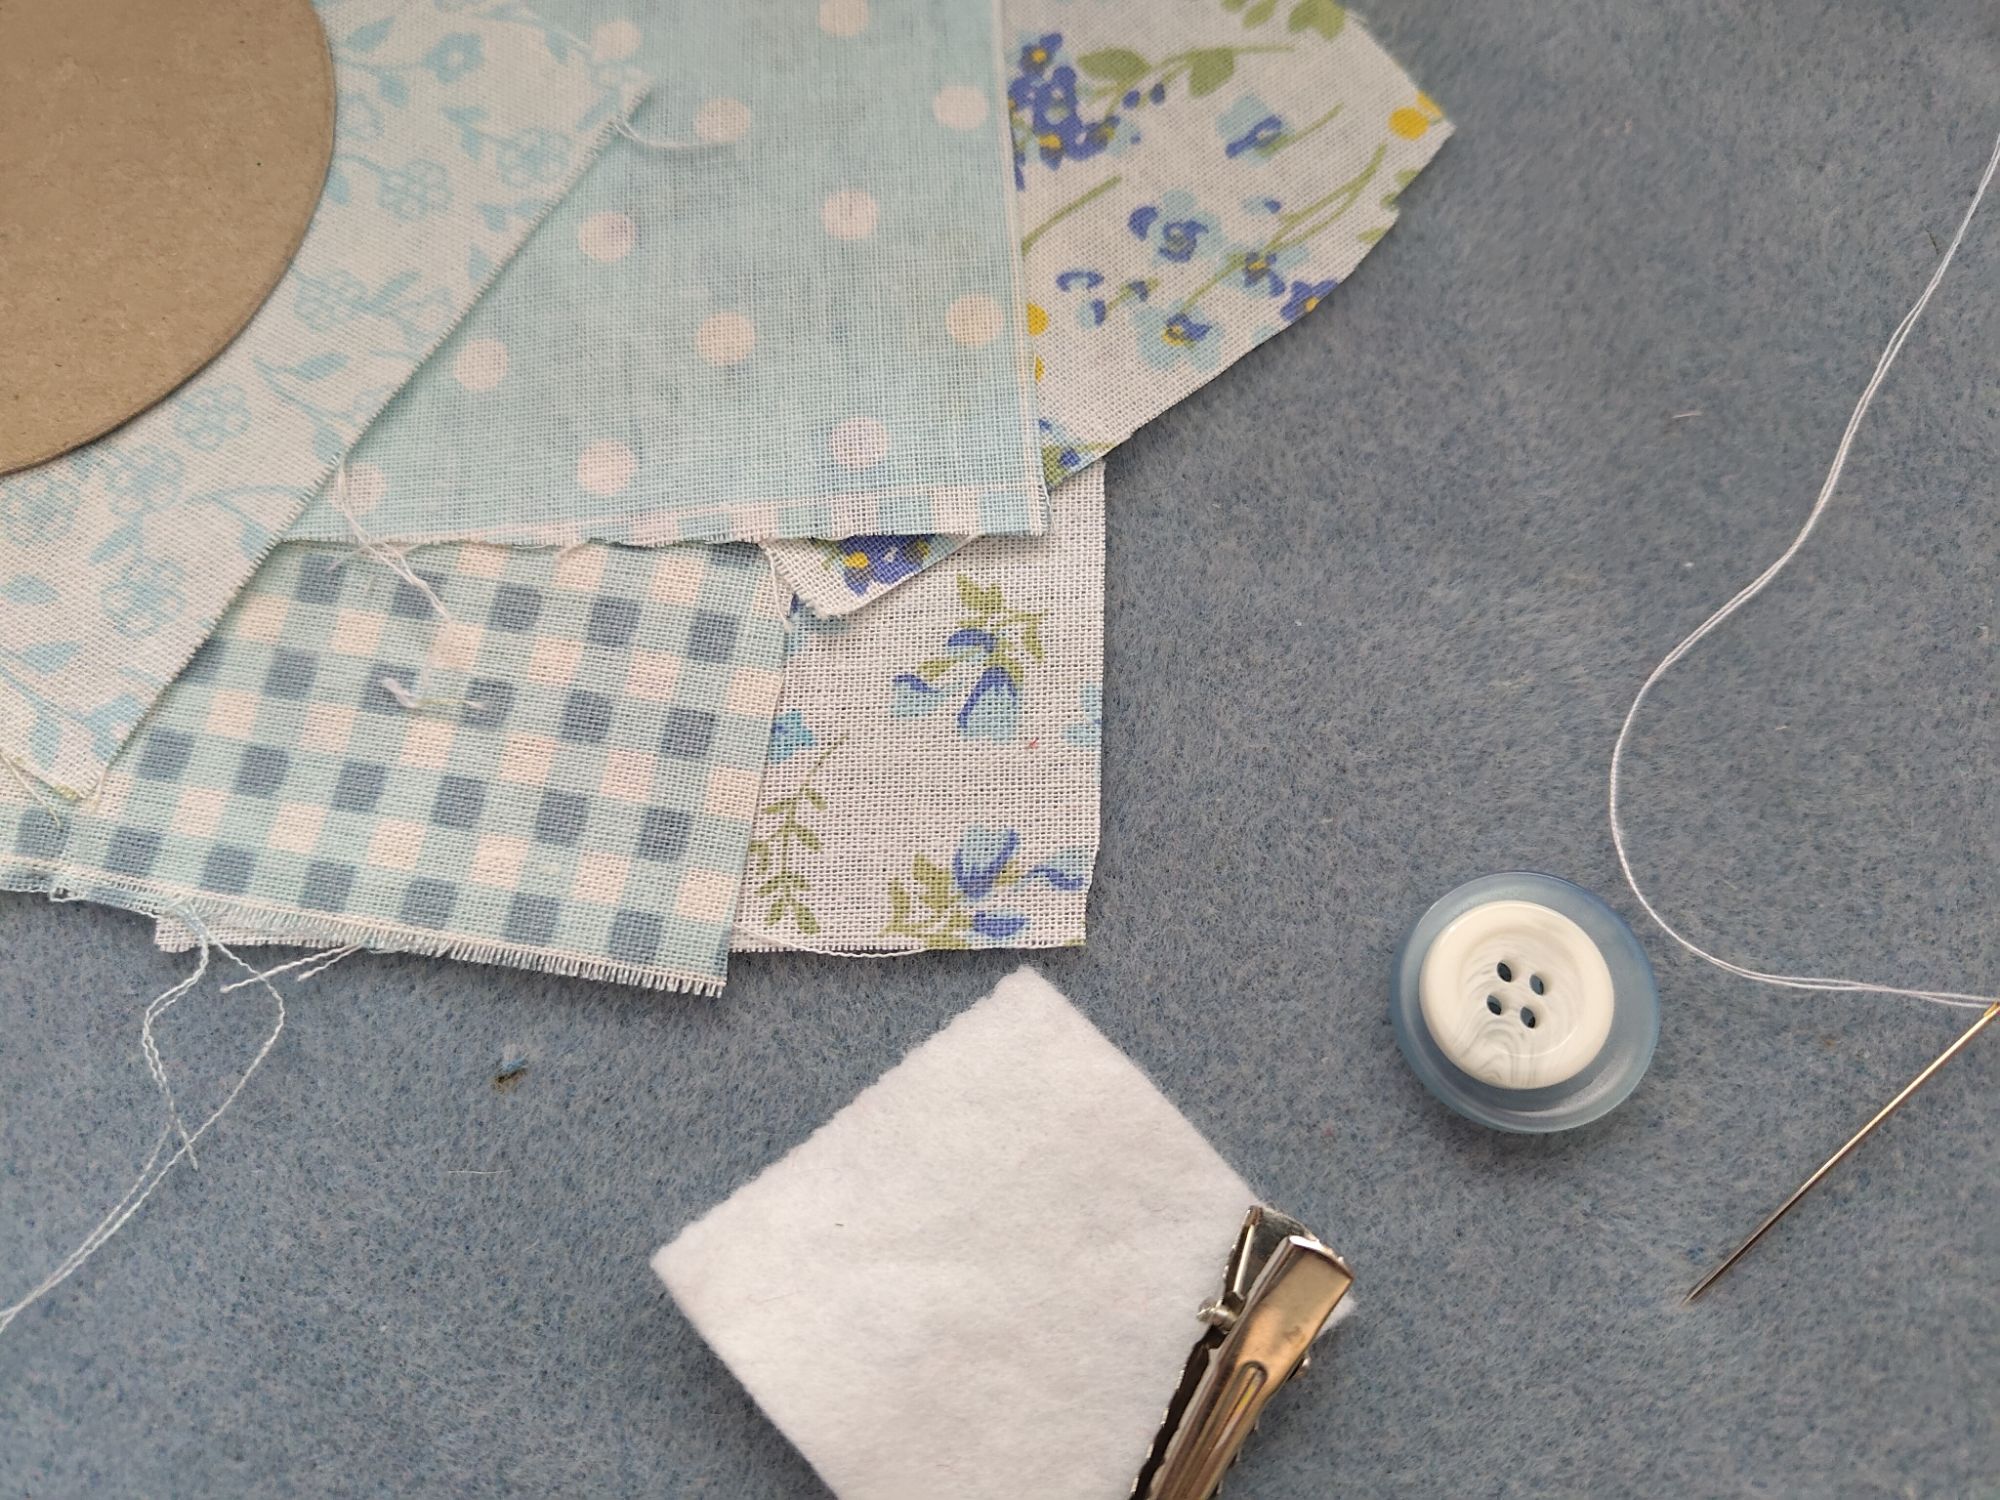
Annoyingly I did not take photos of these steps when I reviewed my gallery, sorry about that! For this one, I was going to use square pieces but I found out that you can use a circle template instead. I used a 8cm diameter card template (drawn from a compass and pencil) and carefully cut out neat-ish circles.
To get the rounded effect on the petals, you only have to fold the petal in half once to create a semi-circle, then stitch along the longest length. When pulling the thread, the circle edge keeps the petal edge rounded rather than pointed. Then it is the same steps as previous, with the buttons and the felt and the hair clip.
If you look carefully, you can see that I used more smaller stitches in this one. The result is a petal with a lot of bunching towards the centre.

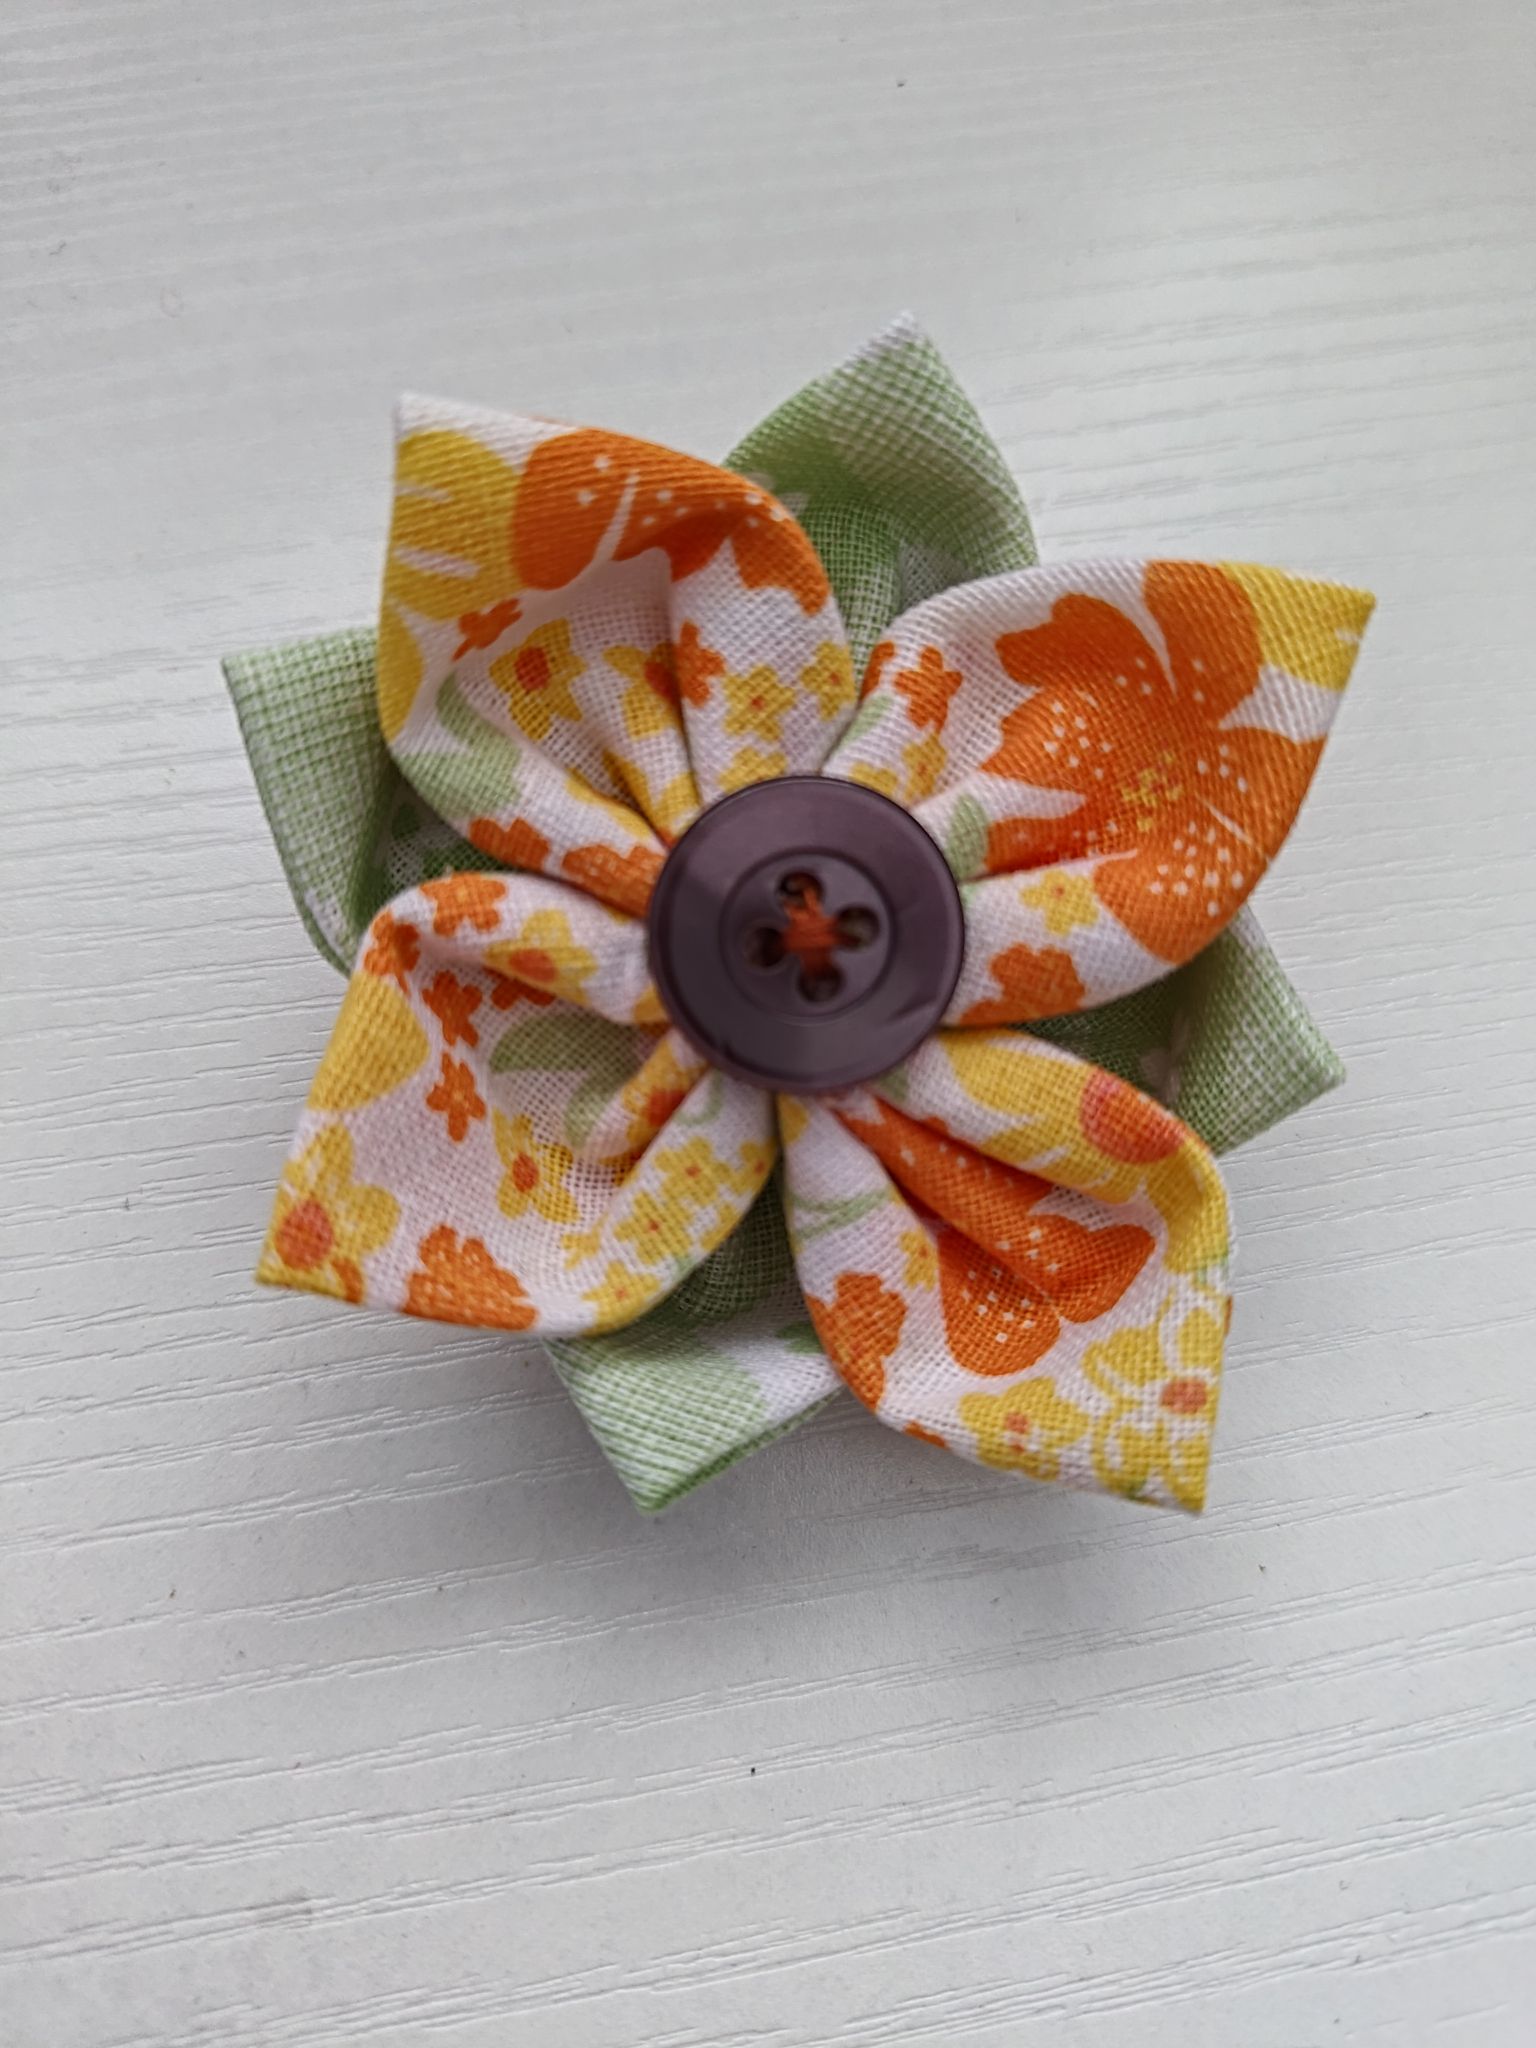
My next flower involved using the yellow fat quarter bundle. At least here I have pictures of the 7cm diameter circles template! I cut out eight in two different colours of yellow and green and paired this with white and brown thread, a large brown button, and white felt not pictured.
With the circles, I followed the first method of folding in half and then folding in half again to get the pointed tip. This time, I did two separate four-petal flowers. To stack the flowers on top of each other, I chose to hot-glue them together. You could use thread, however I wanted to properly position the flowers perpendicular to each other so that the green layer looked like leaves of a flower.
Incidentally, by using circle templates, it makes the centre of the flower more smaller and easier to hide, so you don’t need as large of a button to hide beneath. I also curled the green petals upwards, creating a nice base for the top yellow flower. The brown button gave it a nice centre similar to a sunflower, and I sewed this part with brown thread.
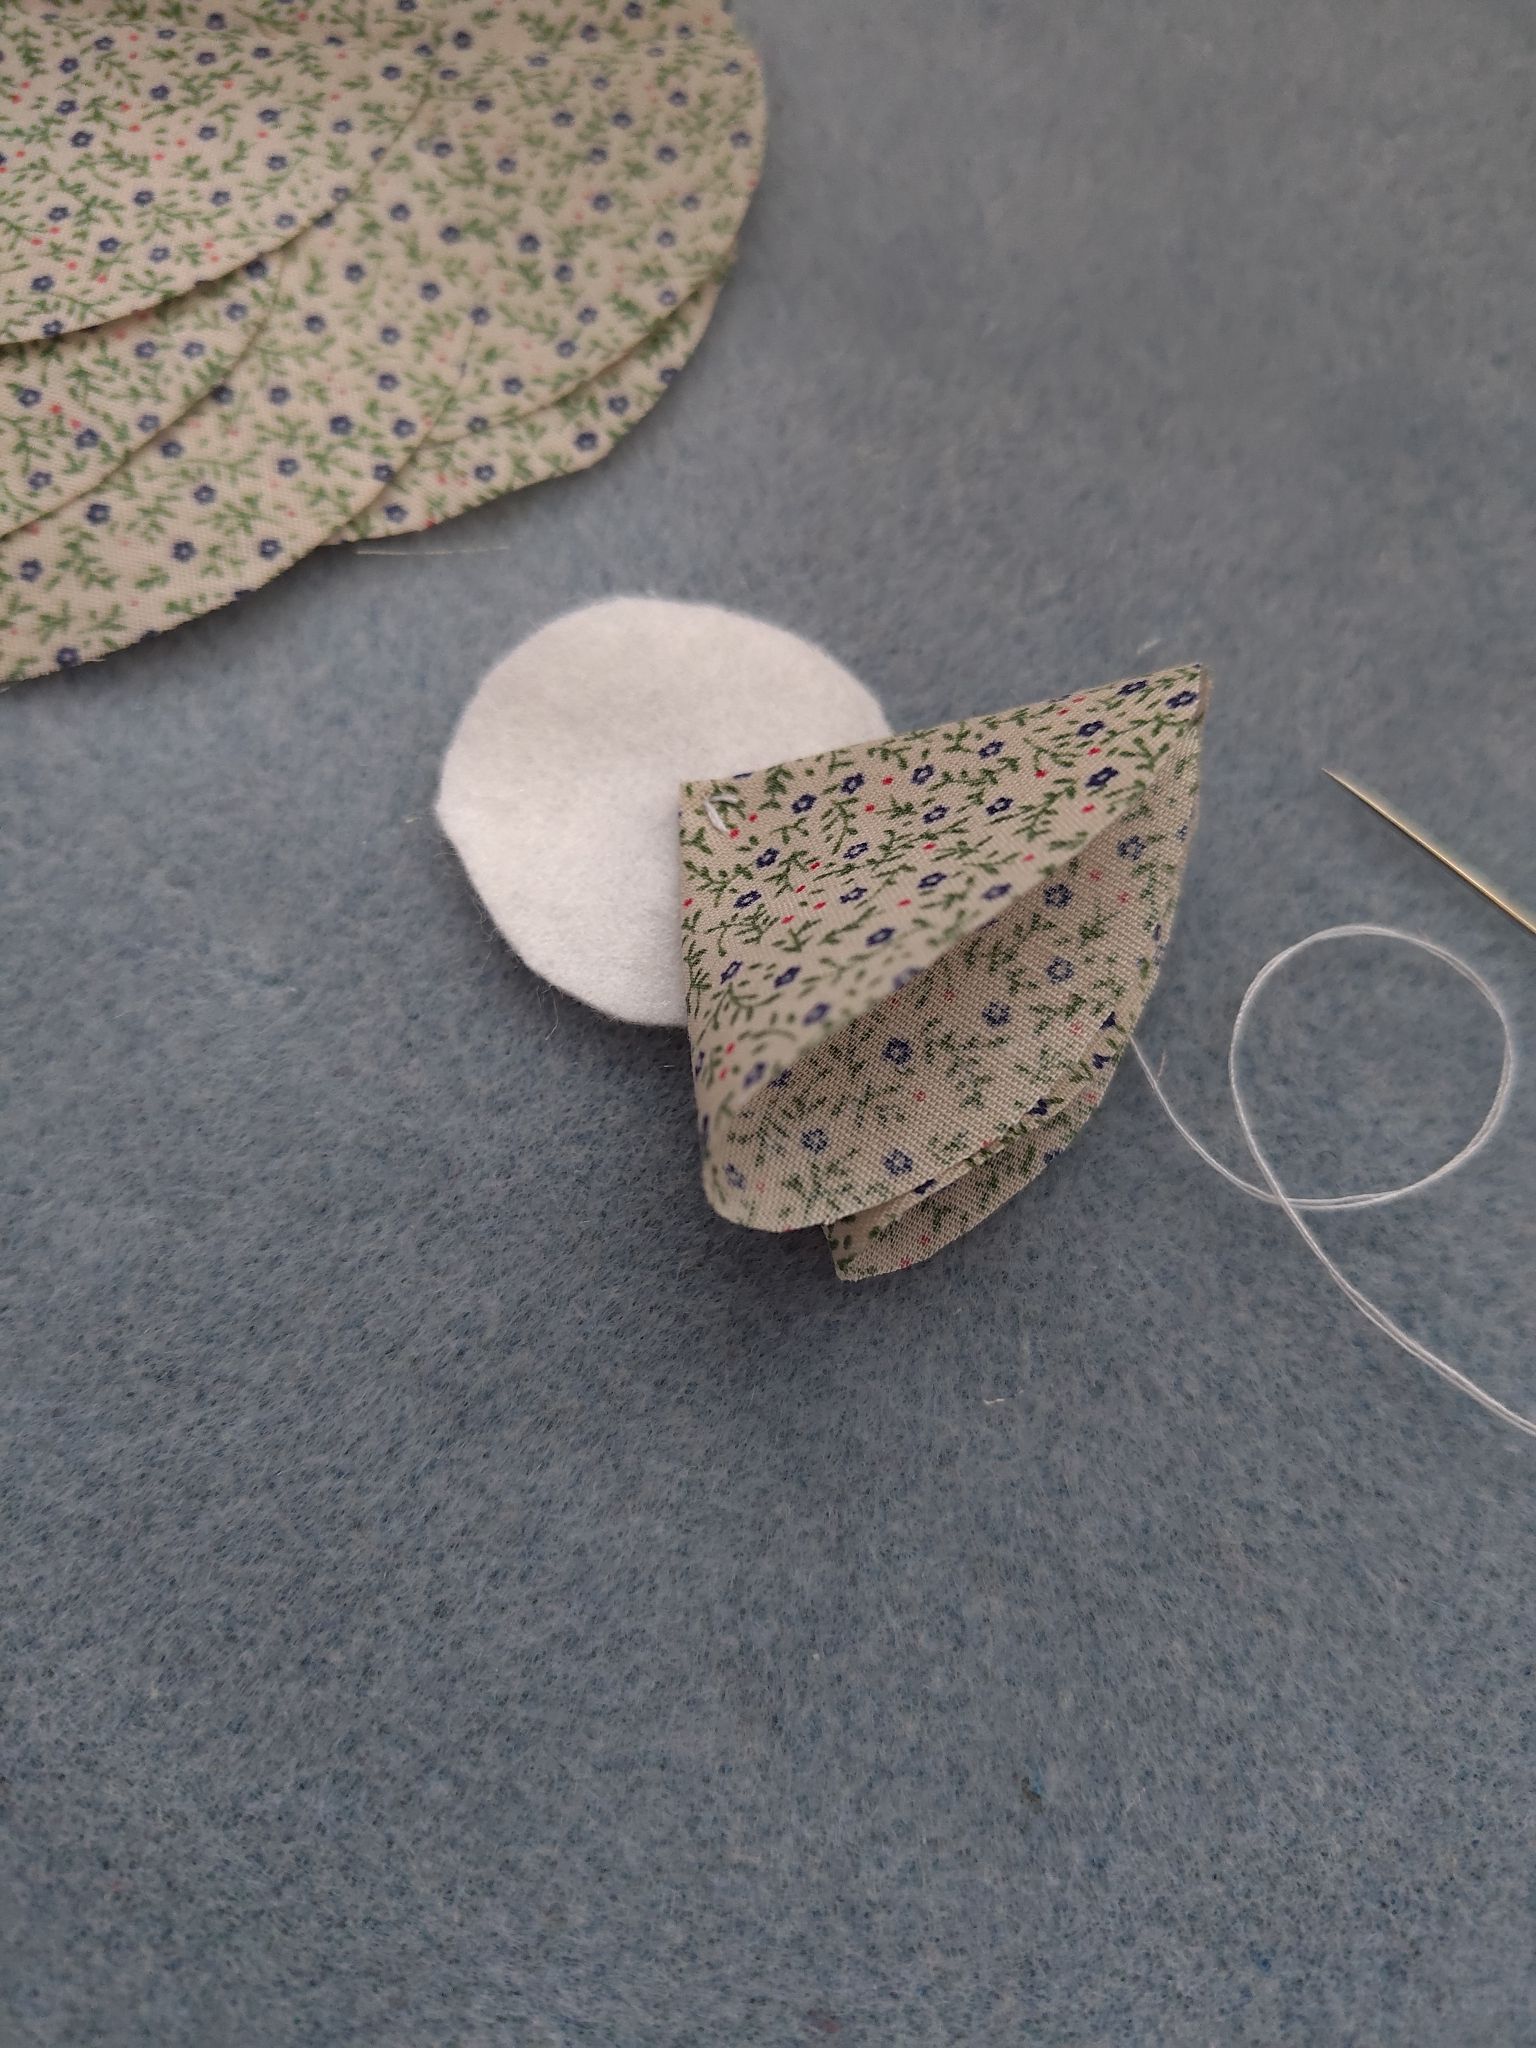
Finally, I wanted to try a different type of flower. With this one, I started with a number of fabric circles in the same pattern, white thread, and a white piece of felt or two. You want to use a pattern that looks similar on the wrong side of the fabric as this will be visible in the final product.

For this one, I once again folded a circle in half and then in half again to create a quarter, but this time I sewed the pointed part into the centre of the white felt. Then I sewed more circle quarters on top, rotating every 90 degrees or changing every cardinal direction.
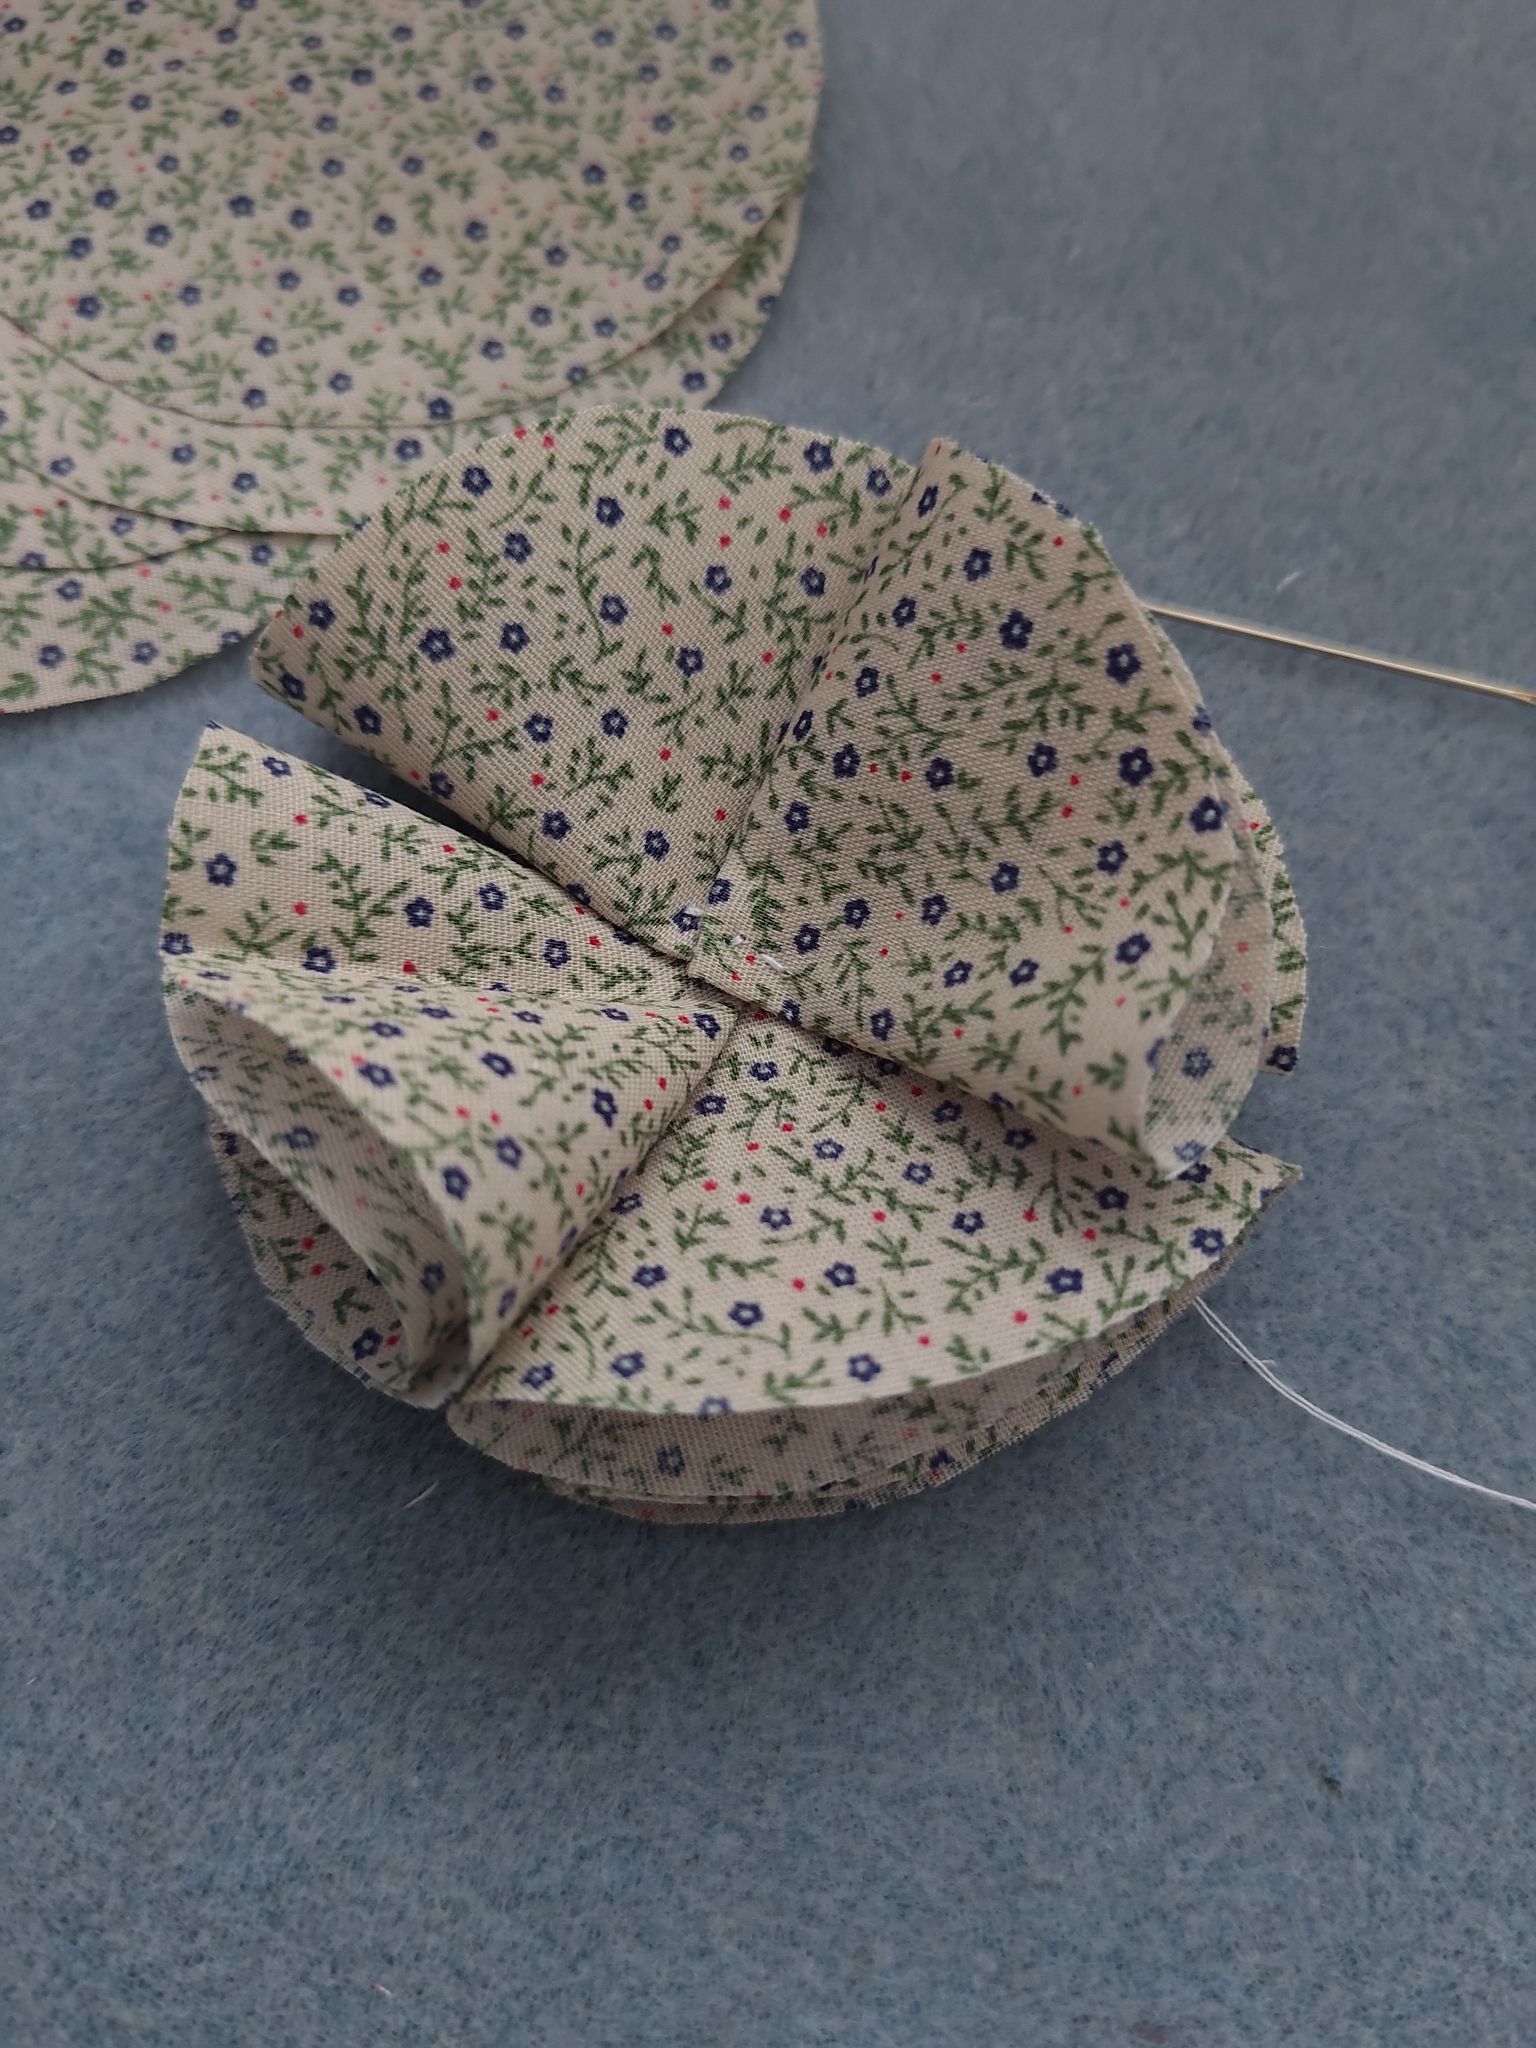
This makes the layers of the fabric circles visible. Stacking more quarters on top adds more layers and ruffles. I ended up using eight circles total, so two full revolutions.
You can add more ruffles on top to fully obscure the centre (and the messy stitching, if you’re like me!) or you can sew a button on top. Adding a button does somewhat flatten the flower a little, but it helps keep the flower in place better. I had a matching green button.
If you’re careful with the fabric, you can mess it up a little to make the layers more pronounced. Just make sure that it doesn’t cause the fabric edges to fray!


So here are four basic fabric flower designs to try! And by varying the patterns and petals, you can create a huge assortment of hair clips to suit the occasion! Well, summer is ending soon here so maybe the flowers aren’t very seasonal anymore, but they will fill up my hair clip tidy at least!

Materials used:
– Assorted flower-patterned fabric from fat quarter bundles
– Assorted buttons of different sizes and colours
– Sewing thread of different colours
– Alligator hair clips
– Felt of assorted colours
Tools used:
– scissors
– compass and pencil for drawing templates
– hot glue gun
