
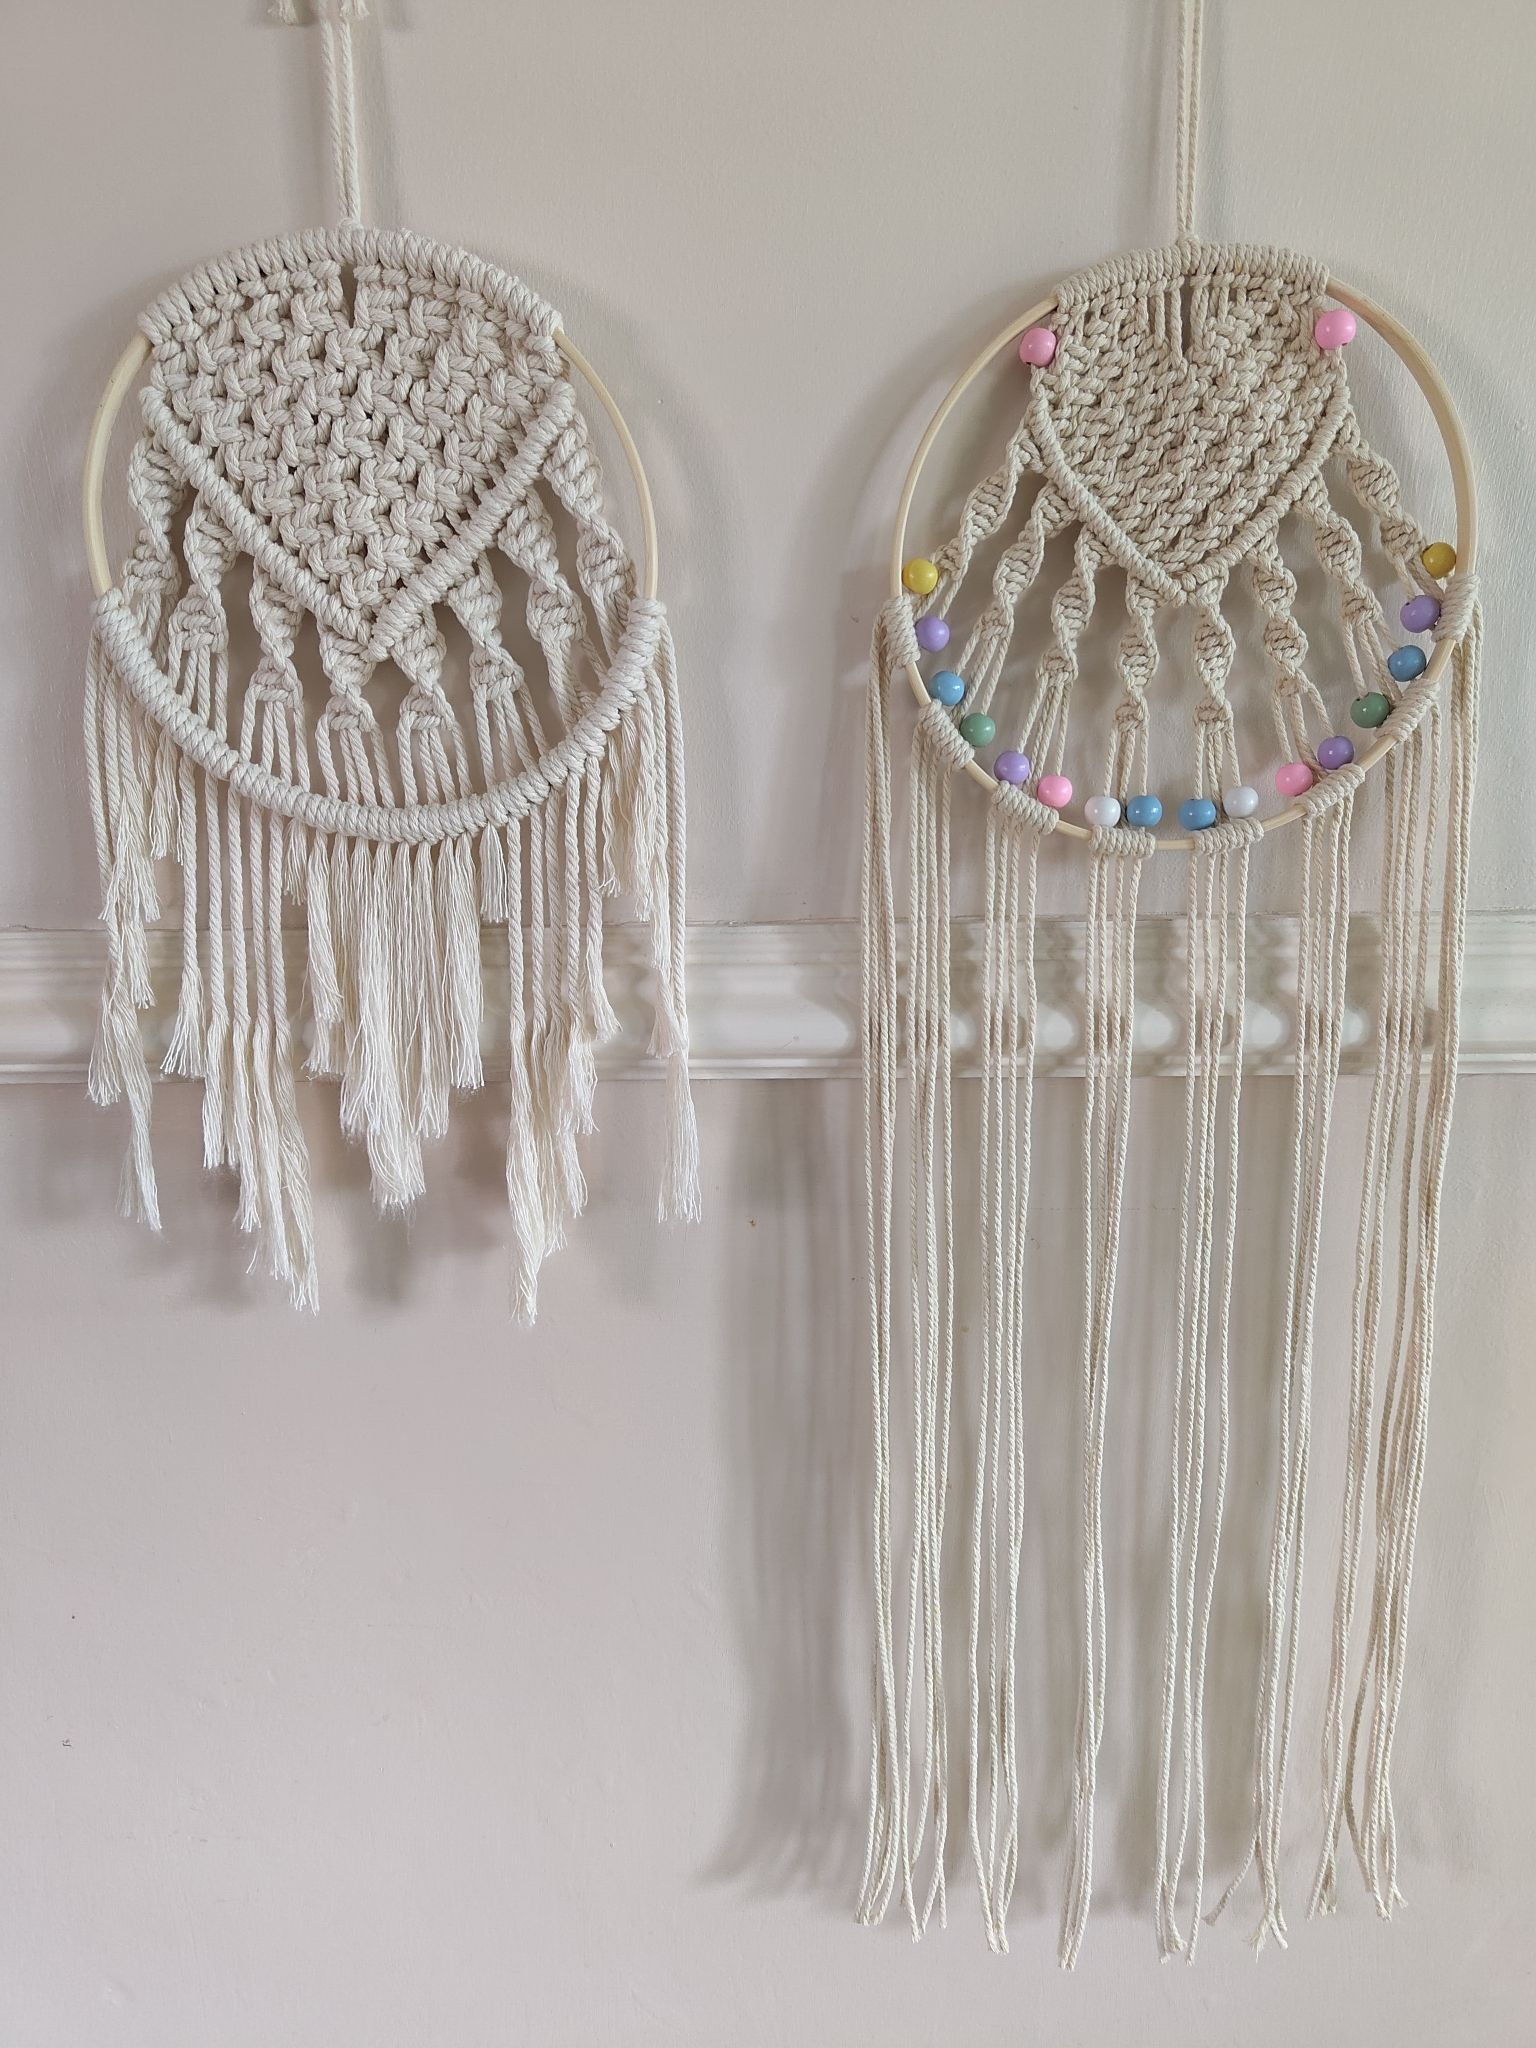
A few weekends ago I made a basic macramé dreamcatcher from a project book that I had mixed feelings about. It made for a nice display on a wall in the end, but I had used the wrong size cord (not intentionally) and I chose to cut the cords shorter than recommended (this one was intentional) which caused numerous problems during the process.
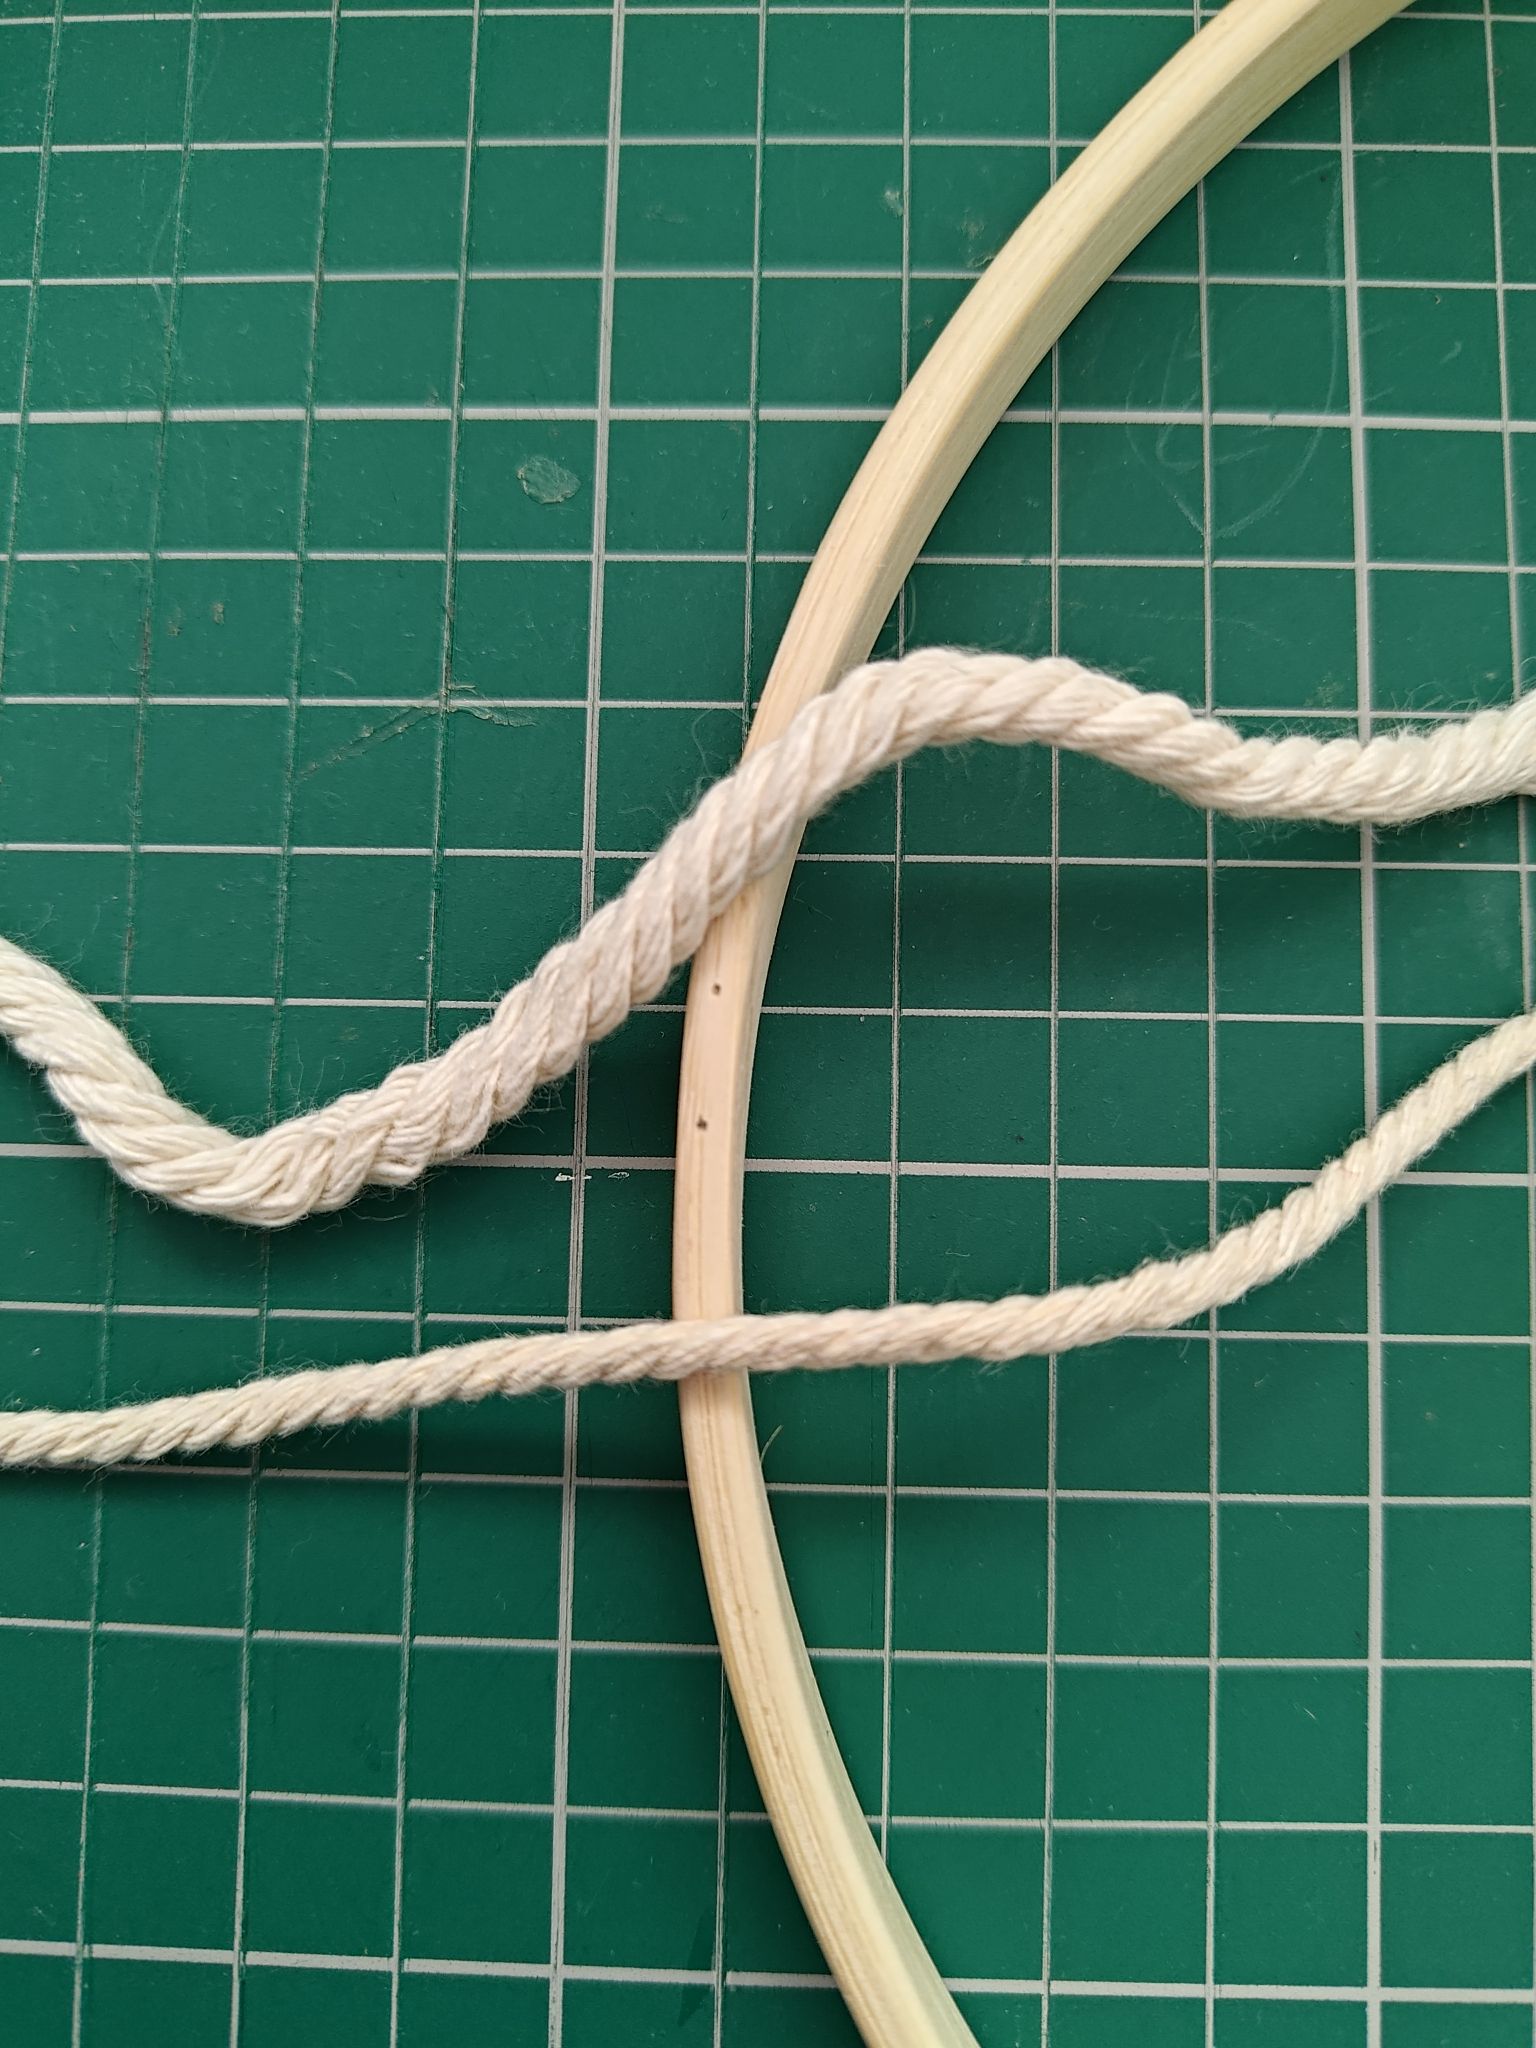
I was definitely planning on revisiting this project on another free and dreary weekend, and fortunately for me I also noticed that I already had the proper 2.5mm cord recommended in the project! In the Christmas-themed cord pack I got last year, there was also a spool of cream-coloured cord. Looking at the two types of cord side-by-side, it really is obvious now where I went wrong. The wider cord is probably better for free-hanging designs and for holding things like plant pot hangers or hammocks, whereas the thinner cord seems to be suited for intricate designs.
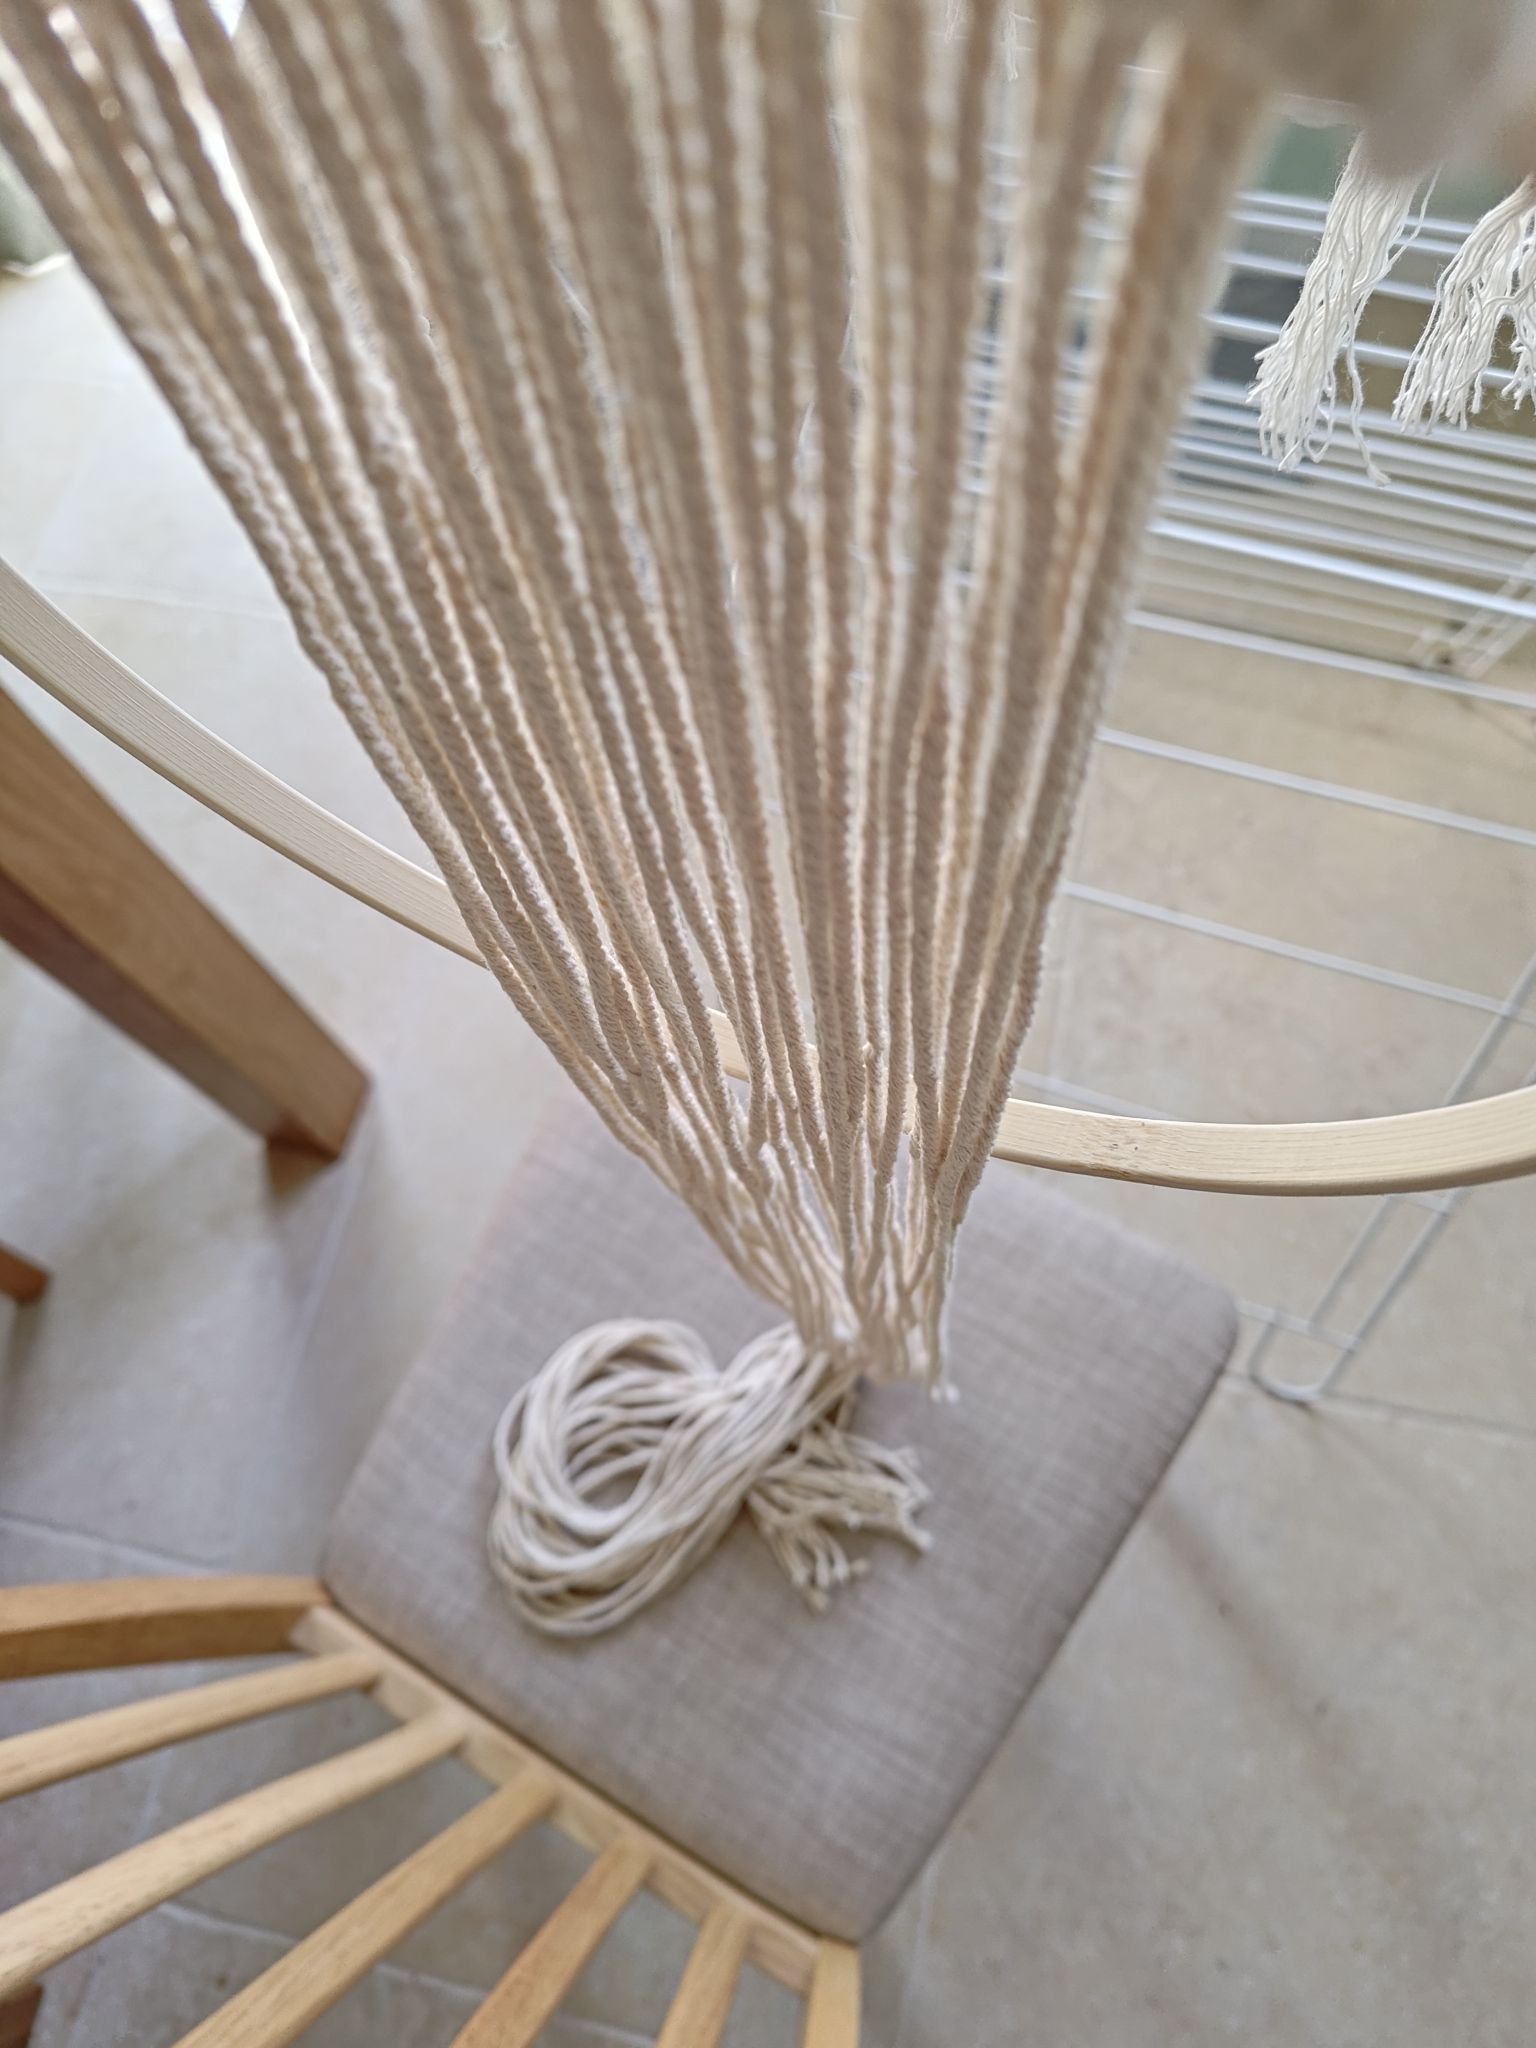
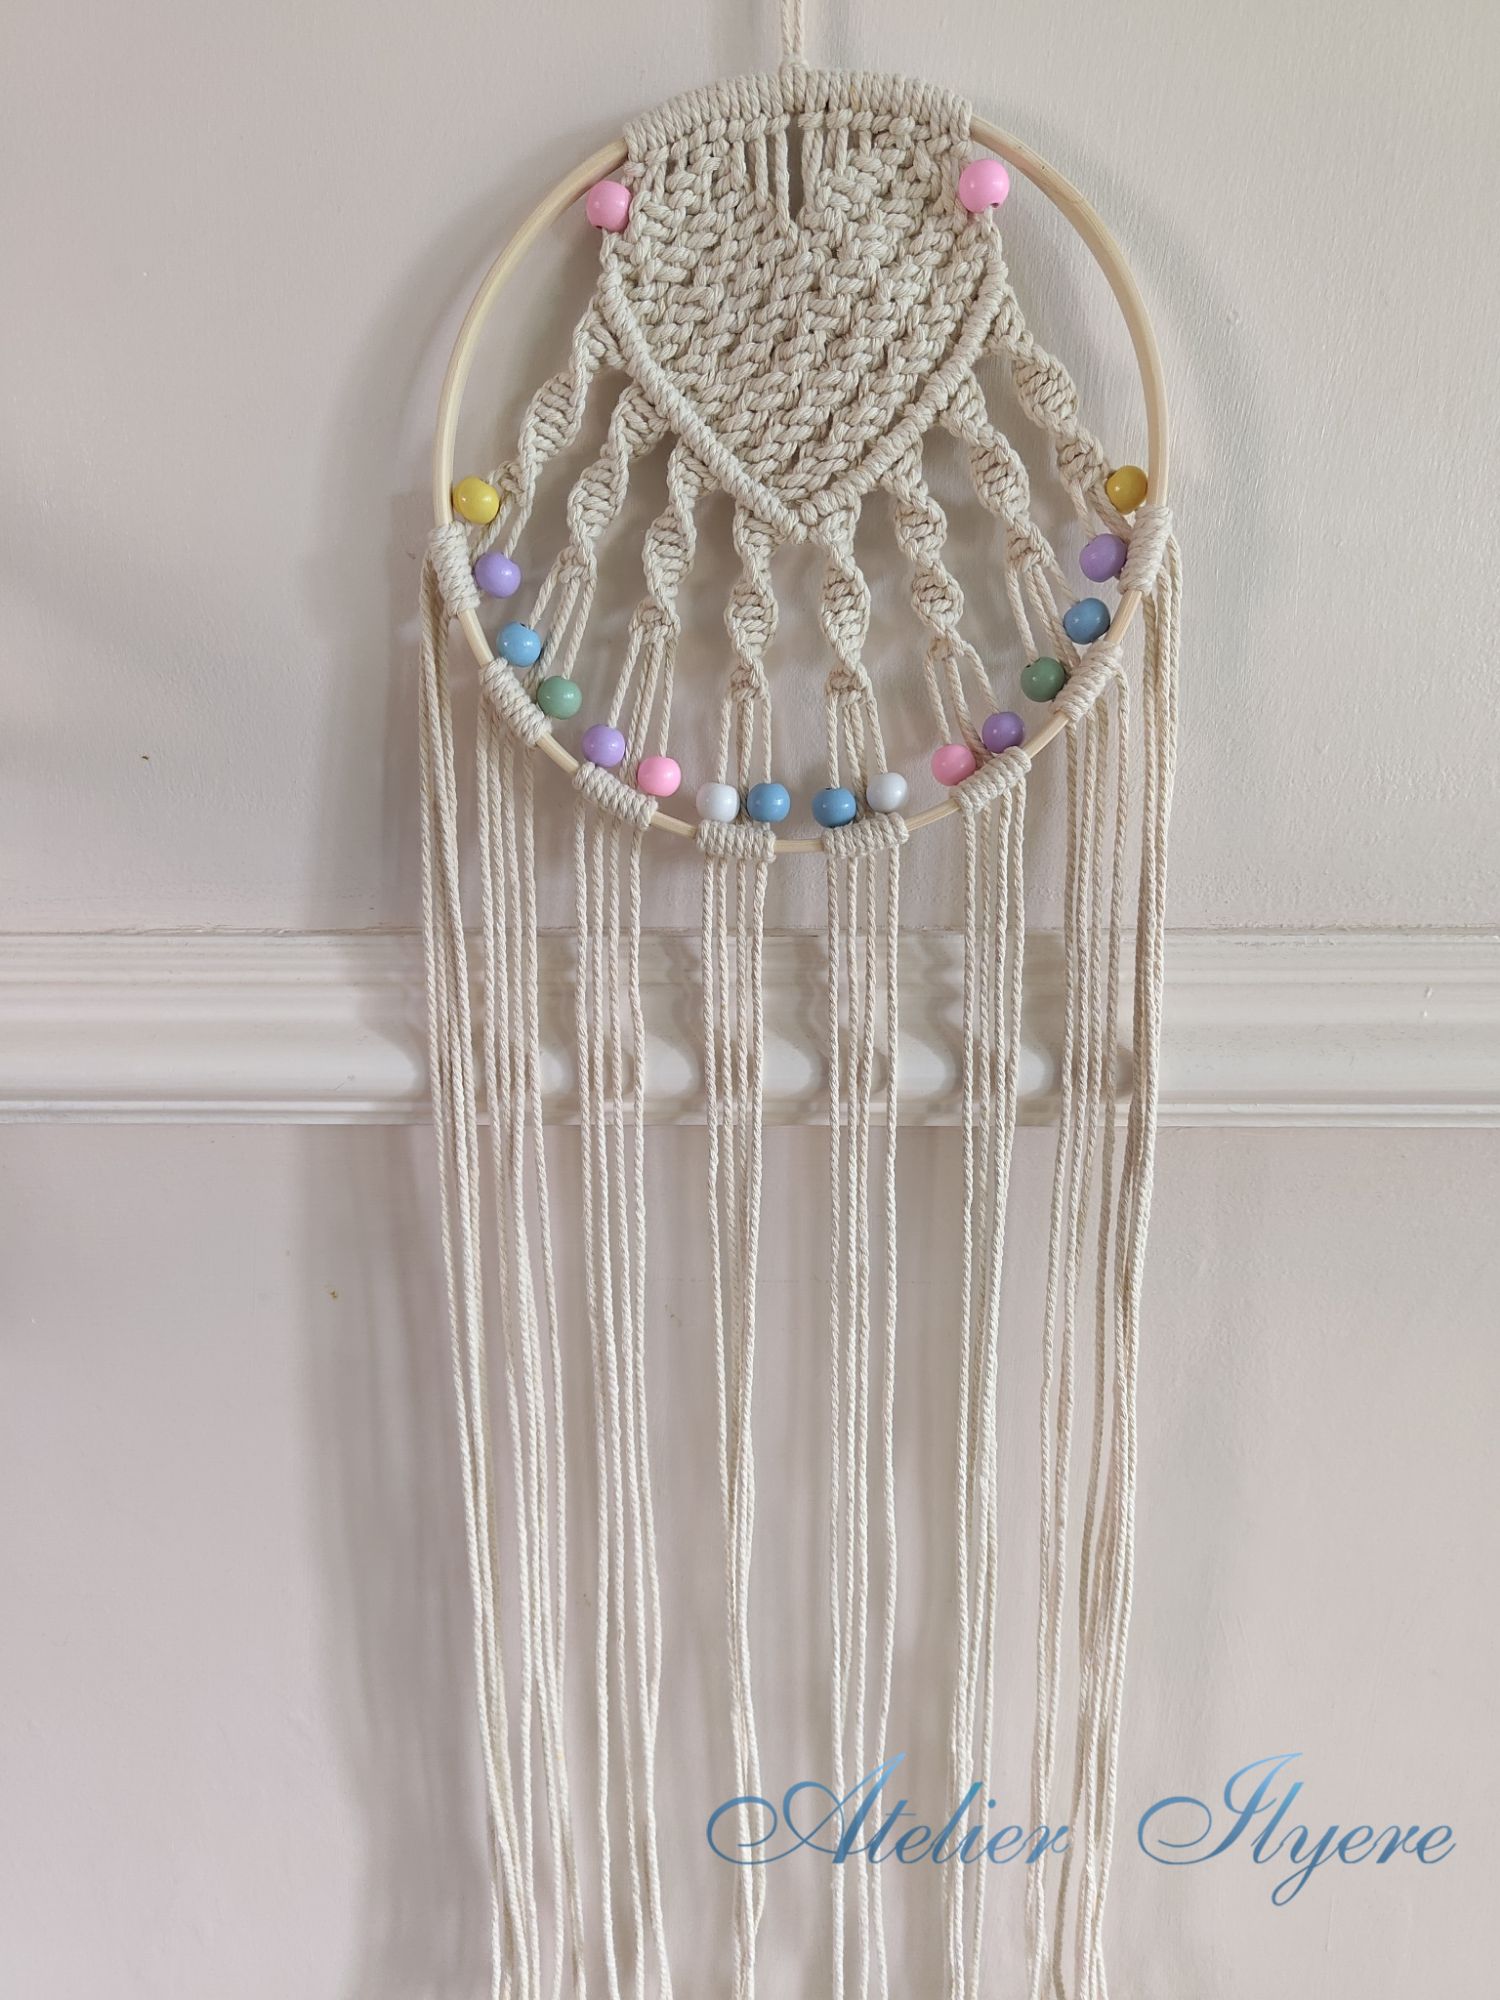
This time I would not make the same mistake – I cut 16 lengths of at least 2.5m and connected them up to my 20cm wooden hoop. These lengths pretty much touched the kitchen floor when I hung it up on the washing rack – for one, I wouldn’t like it brushing the floor constantly, but the main issue for me was my cat potentially coming through and getting his fur on it! I had to bundle it up on a chair for a bit until I made a few starting knots.
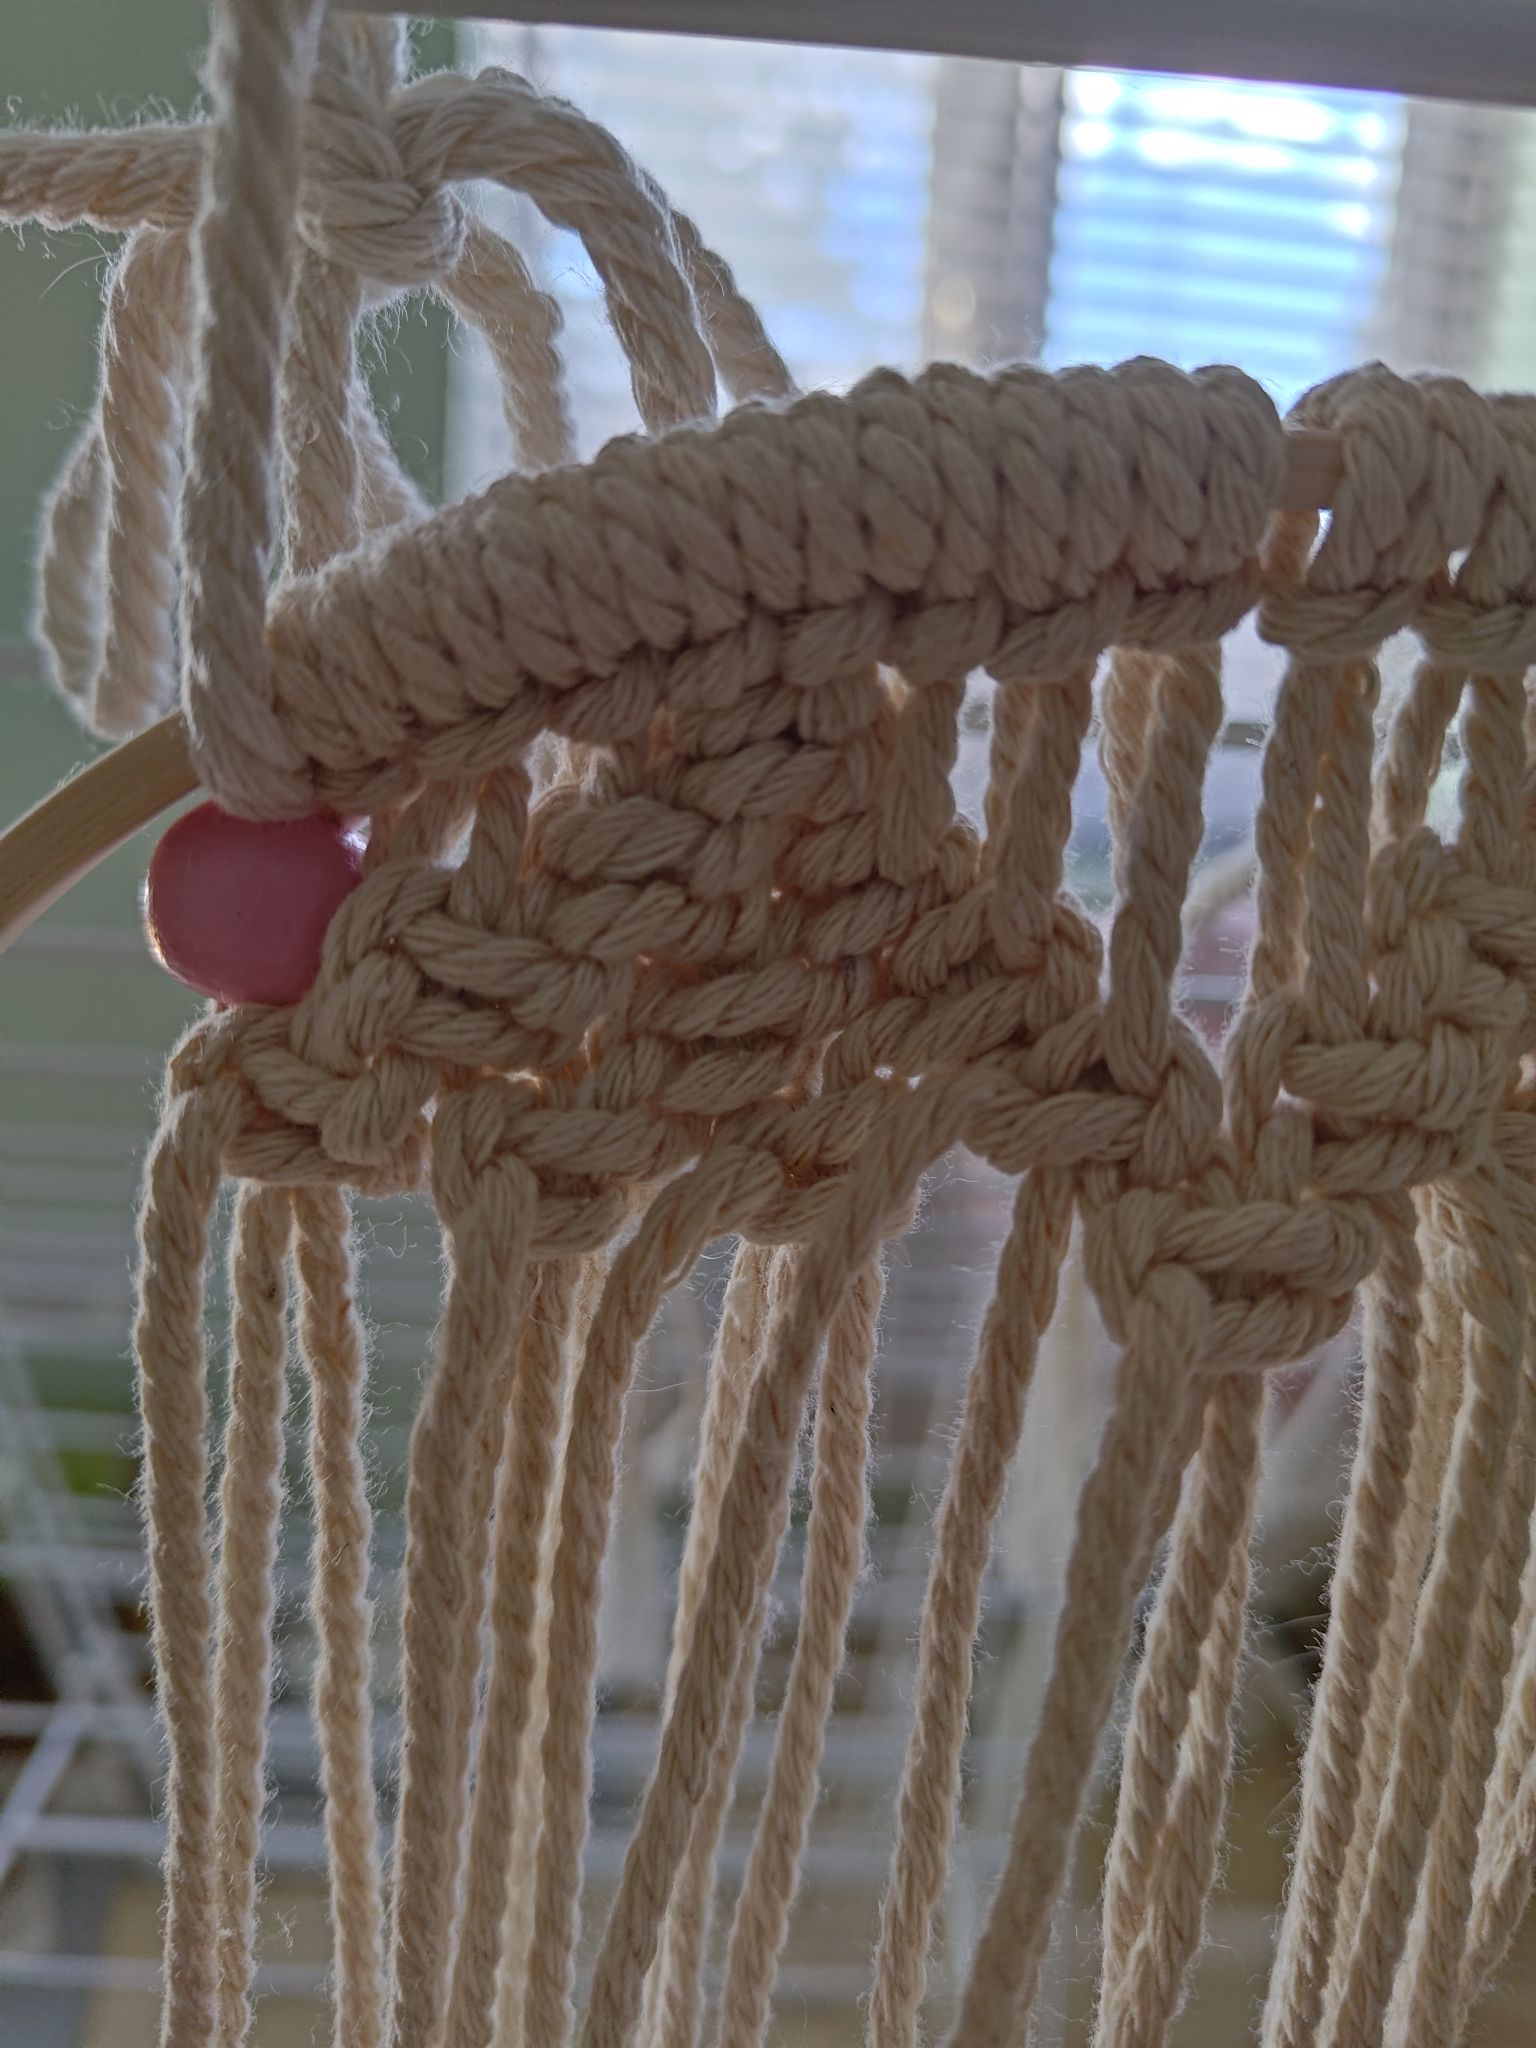
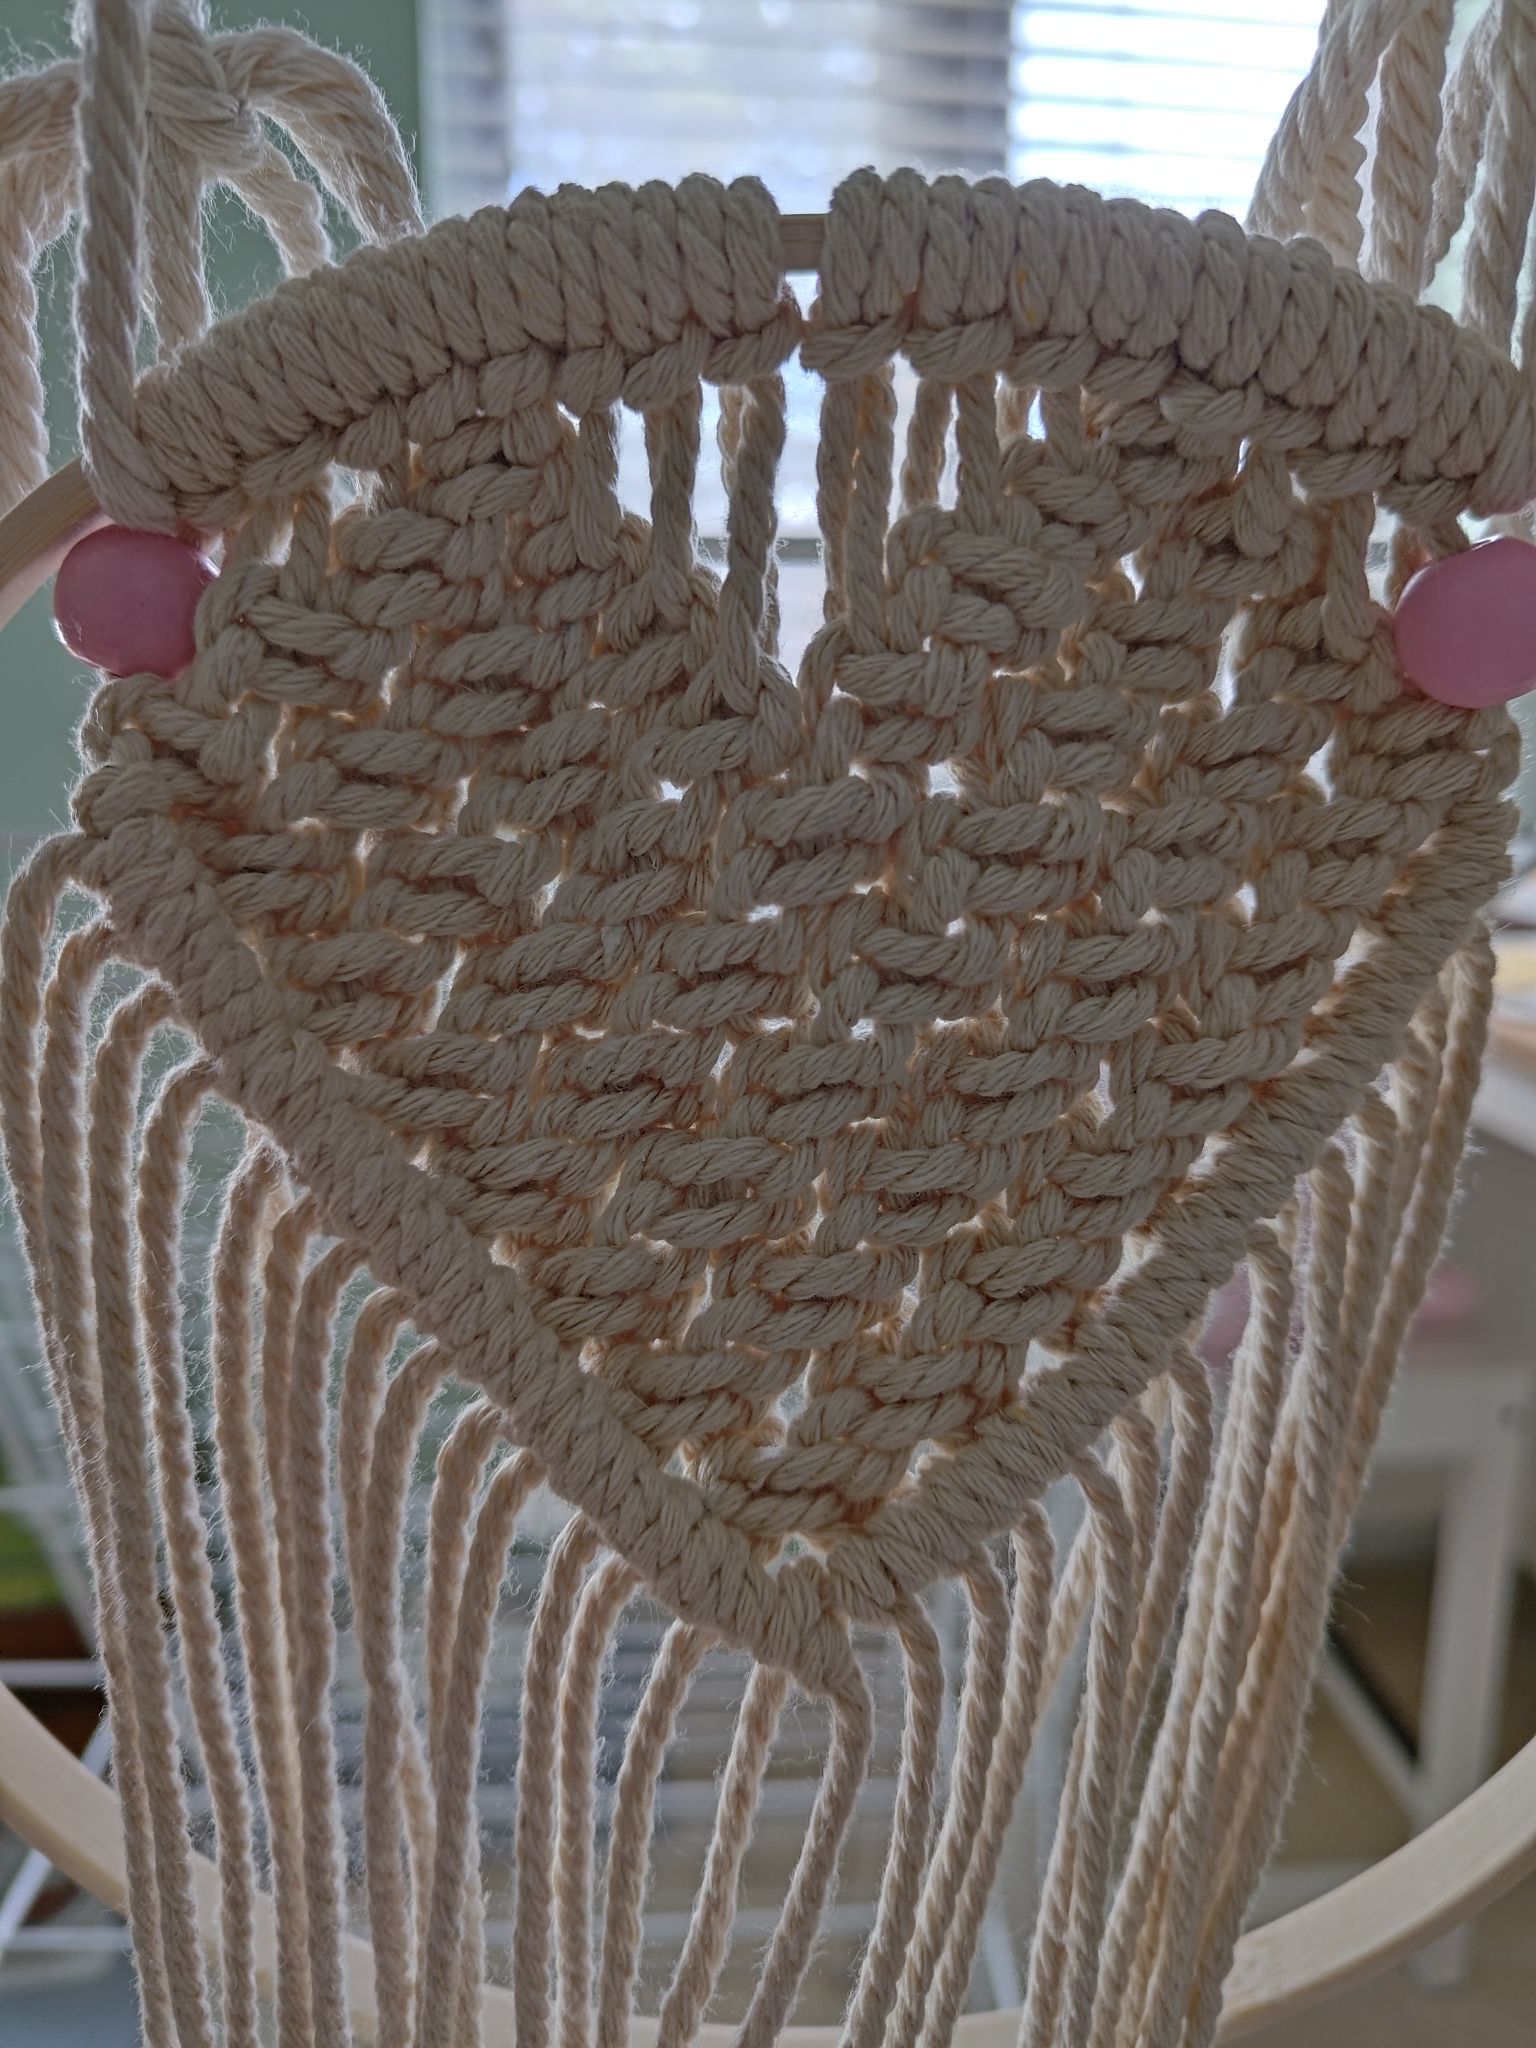
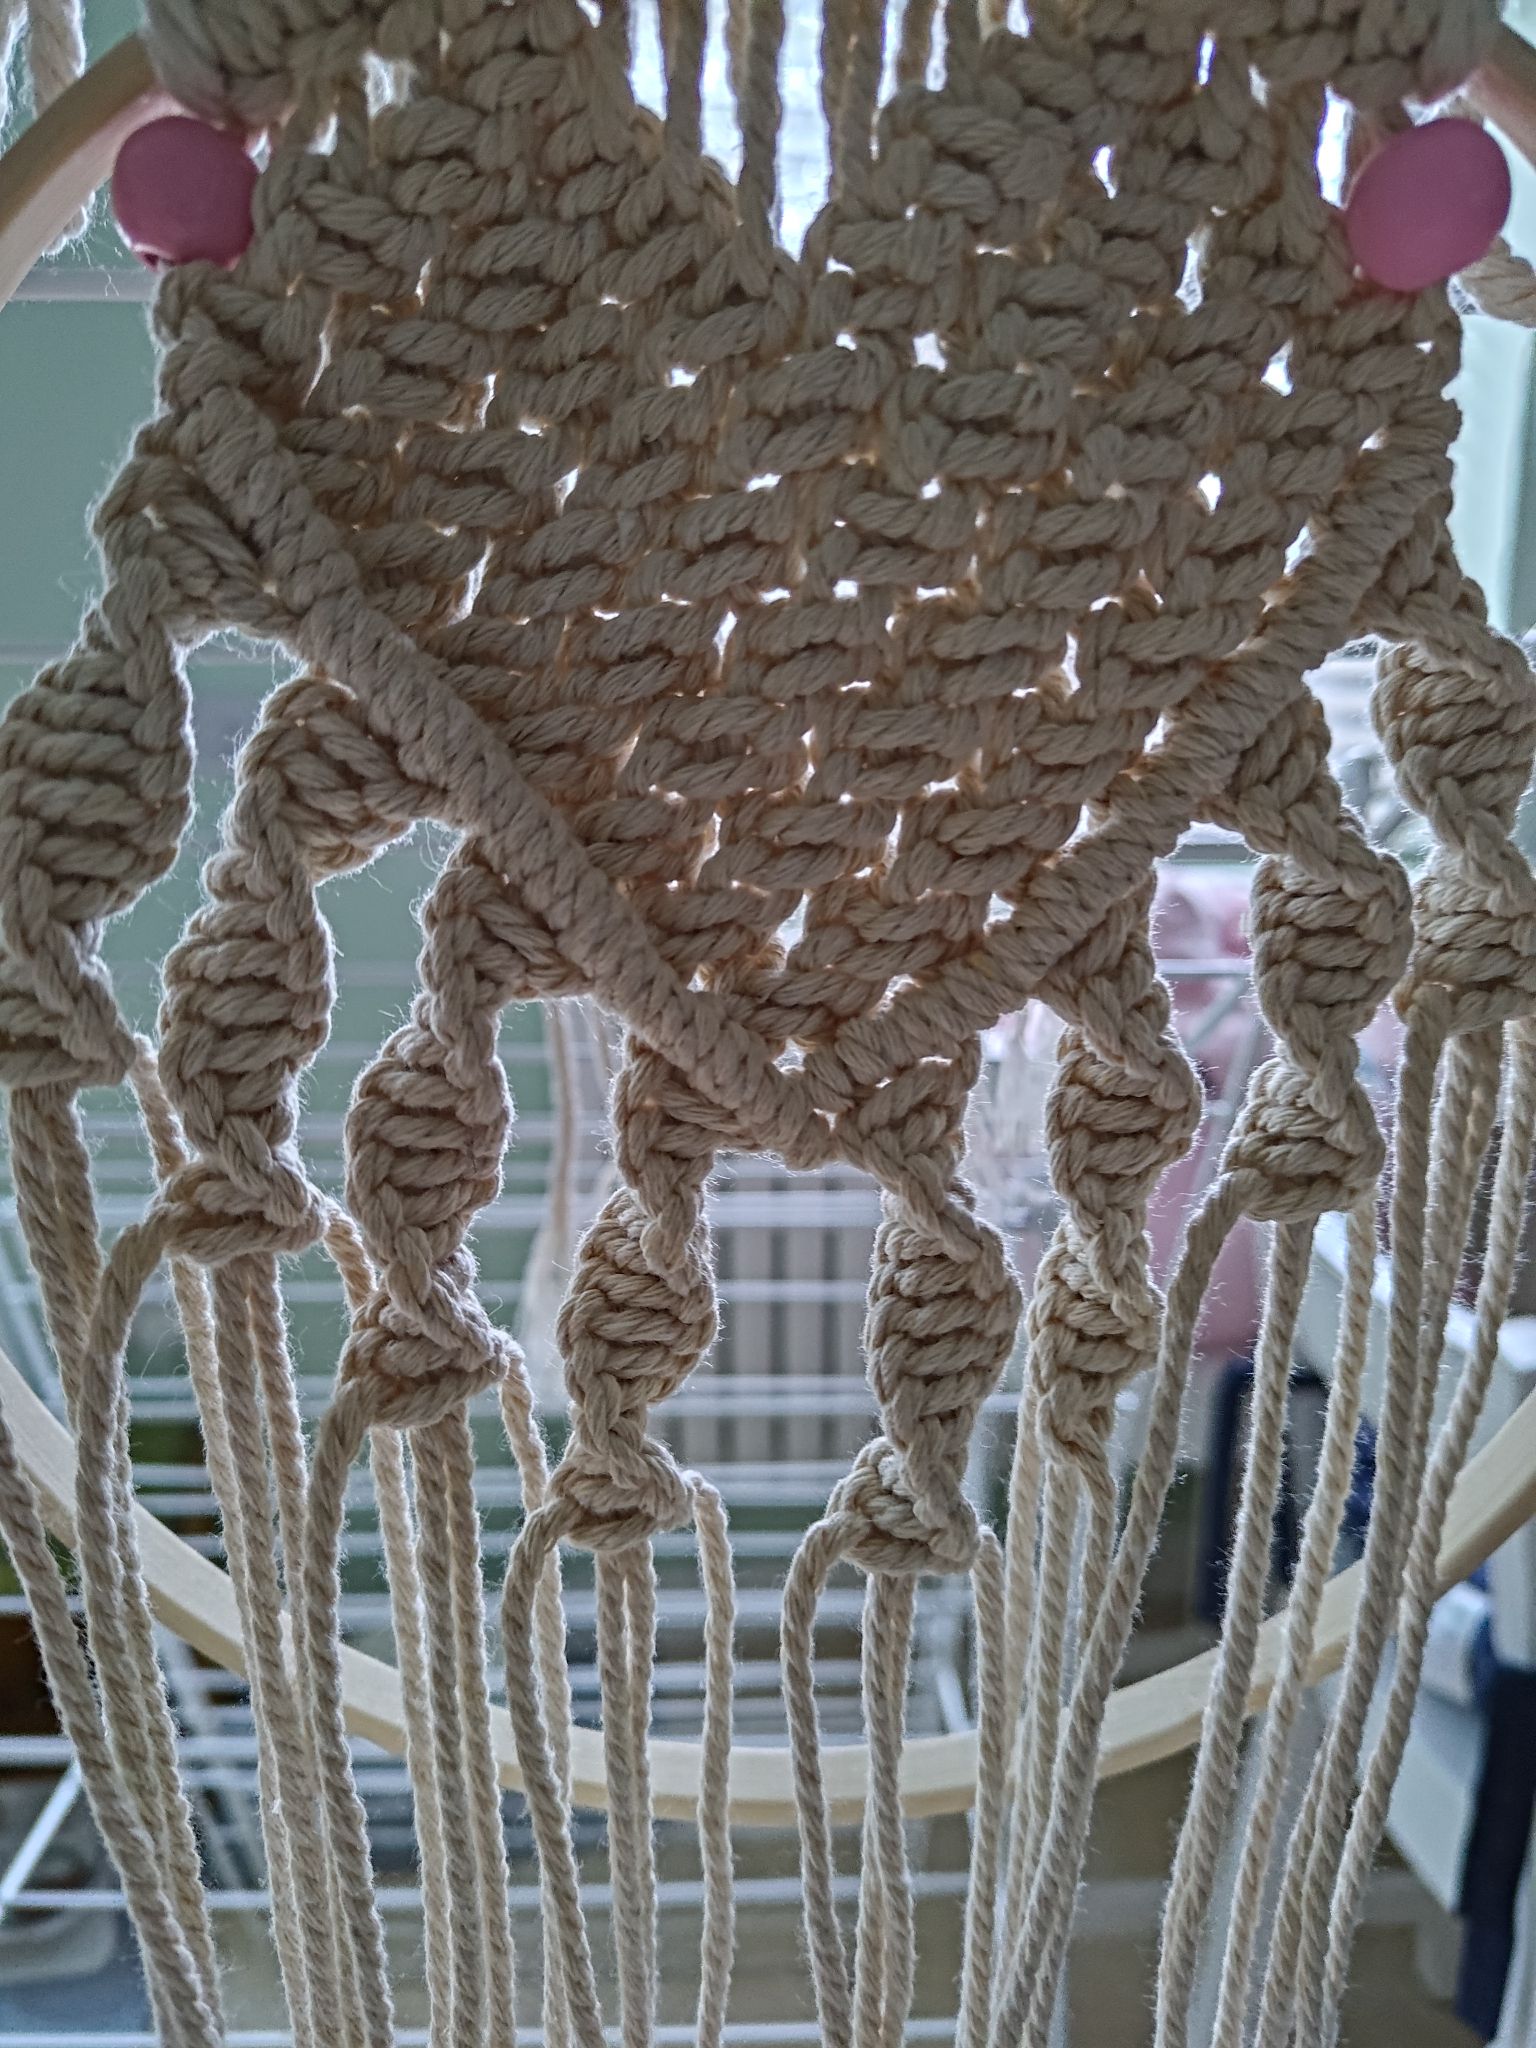
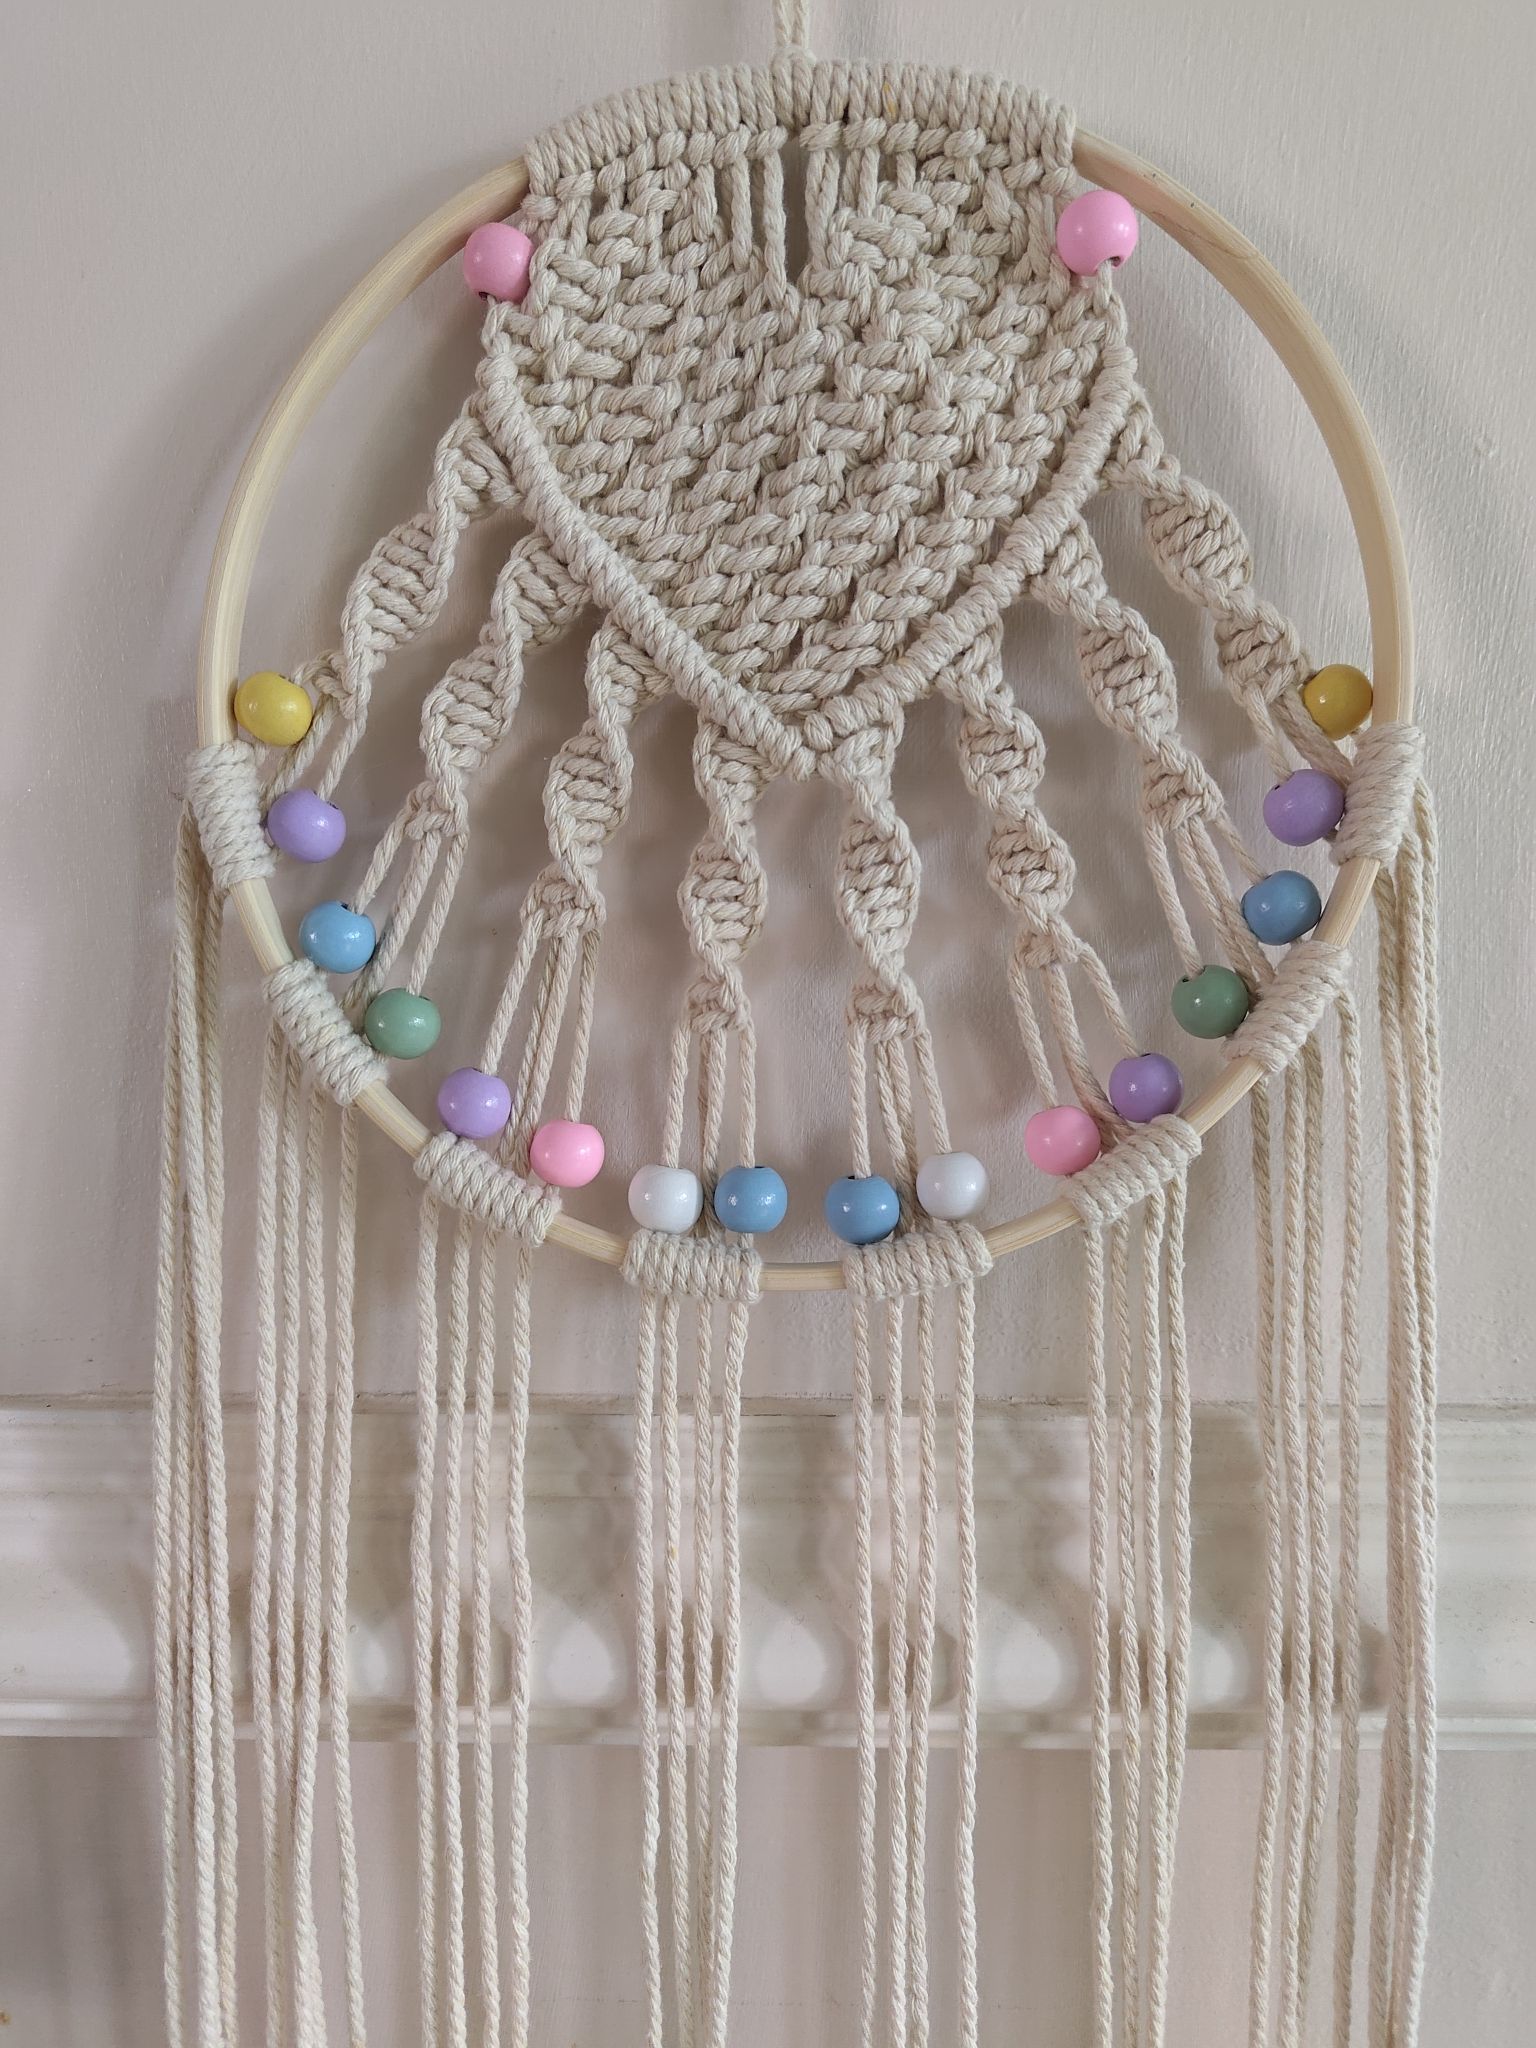
I wanted to slightly change the starting design a bit and incorporate some cute pastel-coloured wooden beads into my design. By adding a few extra rows at the top and lining up the knots, you can turn the original triangular pattern into a heart-shaped pattern. The pattern is easily observable but you may need a ruler to keep things in line, I had to redo this part a few times! I also added some pink beads to fill in the gaps on the sides, but not the centre as I could not thread more than one cord through these beads.
Unfortunately I’m not great at using diagonal half-hitch lines yet, I can only do them when they’re going diagonally downwards! If I knew how to do it the other way, I would had done so at the start so that I could properly outline the design. But it still looks like a heart overall! There was a bit of a gap in the middle of the heart as I was not able to line up the knots here very well, but when I add the hanging cord at the end it can somewhat be excused.
I added the same number of spiral knots after finishing the heart pattern and there was a little bit of length left. My pattern finished lower since I made a larger heart shape, so I could not create the 30 or so knots suggested in the book, so instead I threaded a few colourful beads in a symmetrical pattern before attaching them to the wooden hoop. I chose 16 cords and had six different colours of beads to use – not the best number to work with as it isn’t exactly divisible, so I used certain colours more than others.
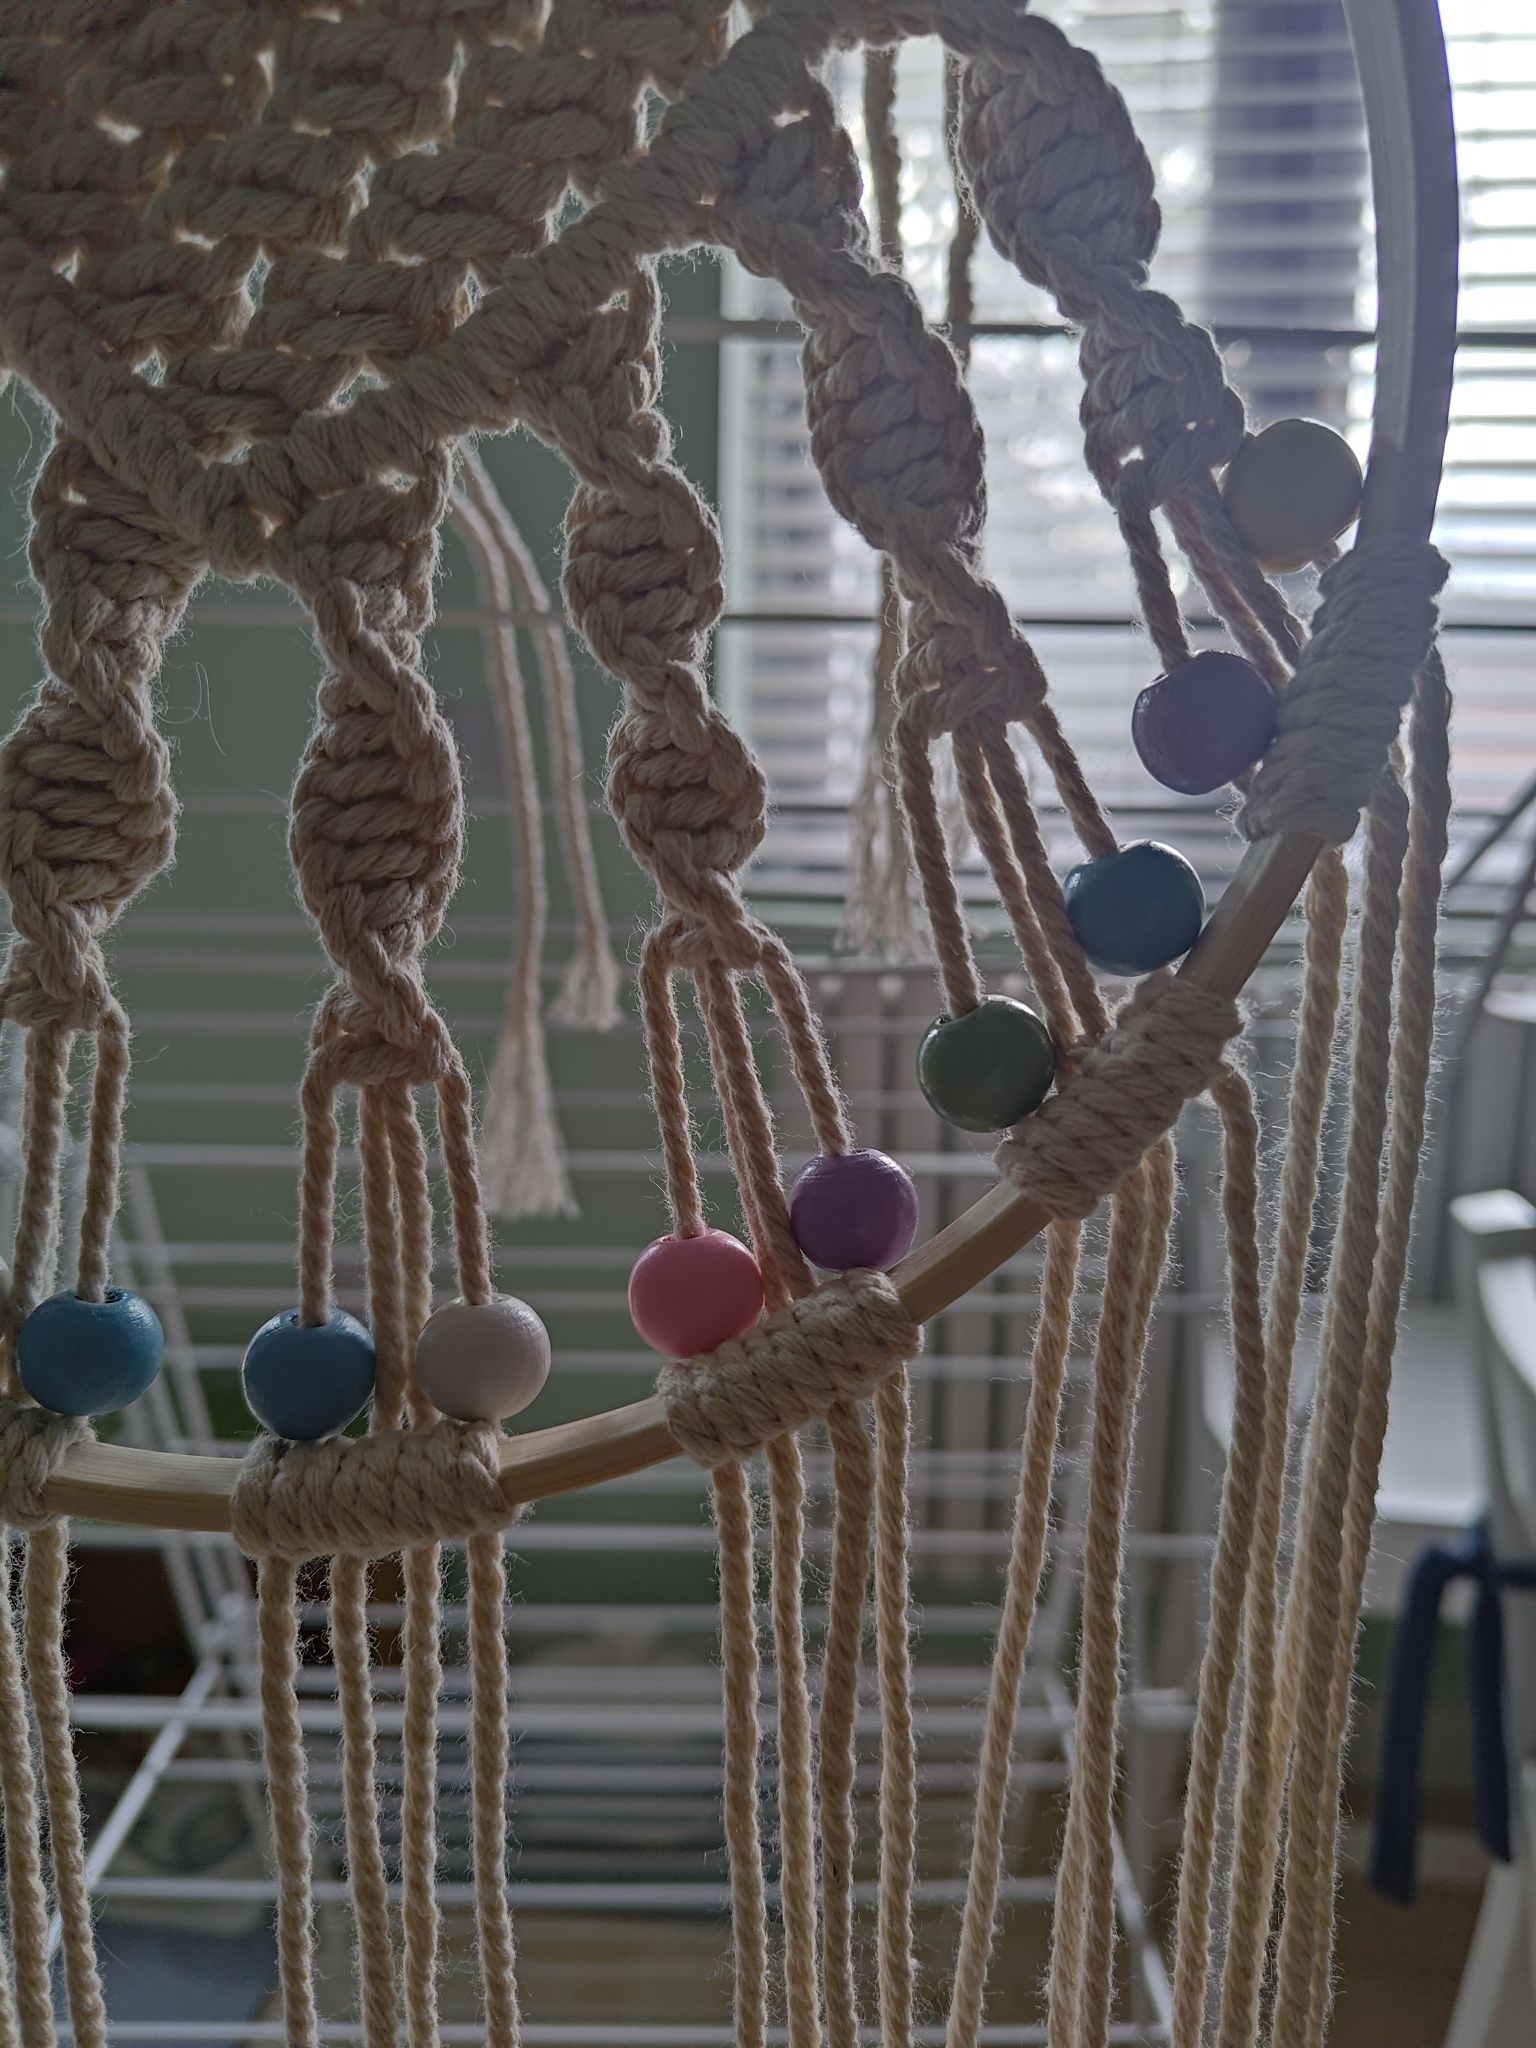
Because of the way the cords on the leftmost and rightmost groups hung from the hoop, I decided to finish the dreamcatcher by simply leaving all cords hanging and cutting the ends off in a straight line. I took the shortest cord and cut all the other cords to match the length and removed any frayed parts.
I personally thought that because I added a bit of colour to the main hoop, the finish could be left plain. I could have added more beads to the ends, but I thought that the dreamcatcher would start to look too busy.

Quite interesting to see the two side by side! Version one measures about 40cm at the longest part, but version two measures about 72cm long. I have the two hanging in the living room to open kitchen area at the moment – there aren’t that many free hooks on the walls at the moment, but my preference is to move the short one somewhere else.
So here is my version two of the dreamcatcher finished! I’d like to use more beads in my macramé work, but these ones can only have one cord going through. You can get larger beads with wider holes – the hanging plant holder that I made previously could thread four wide cords! Hopefully I will find some in craft sales, there tend to be a few in the Christmas run-up as it is a busy period for any crafter!
Materials used:
– 0.25mm cream cord
– 20cm wooden hoop
– Wooden beads in pastel colours
Tools used:
– Scissors
– Measuring tape
