
Let’s start the year with a new model from the Tomoko Fuse book “Kusudama Origami – Hana Kiriko“! This time I picked out something a bit more difficult and something I would not normally make.
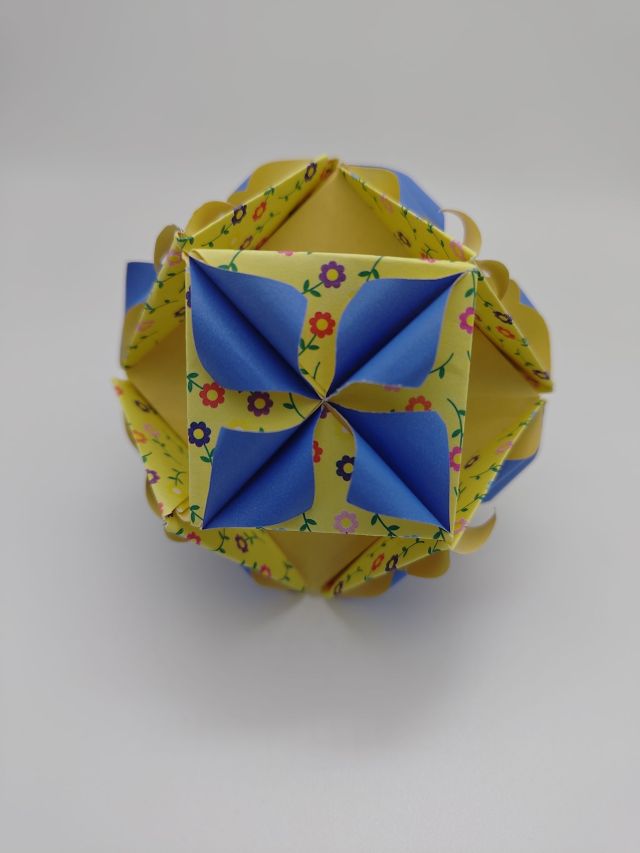
This model’s name is “Maki Hanabishi” (巻き花菱). 巻き or “Maki” refers to a rolled-up thing like cloth or a scroll. 花菱 or “Hanabishi” is a flower-shaped family crest of sorts. So it appears to be referring to the appearance of the faces on the model.
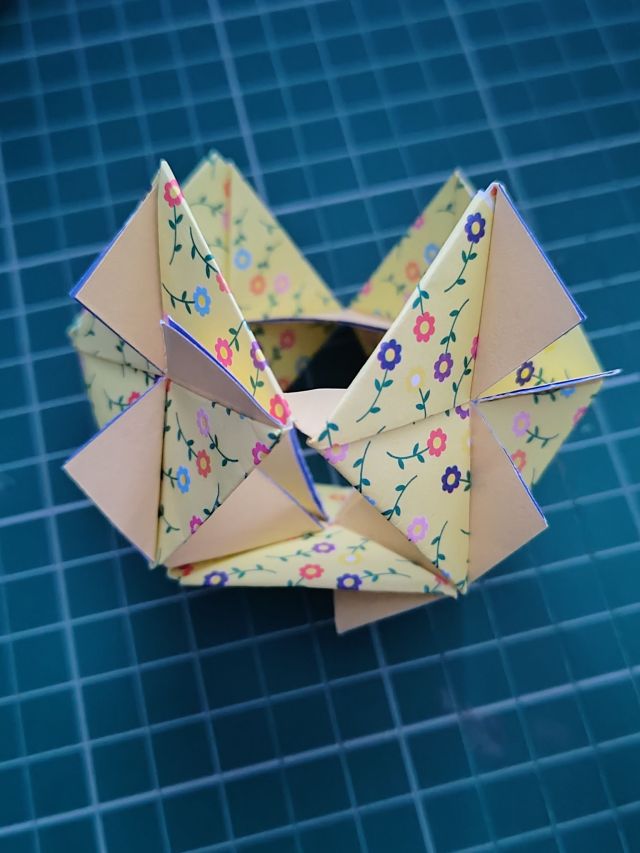
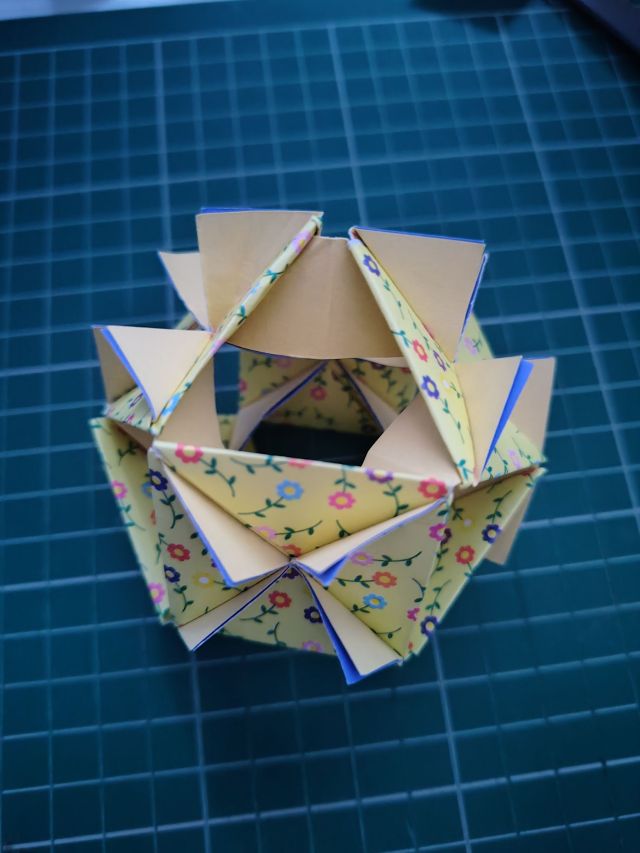
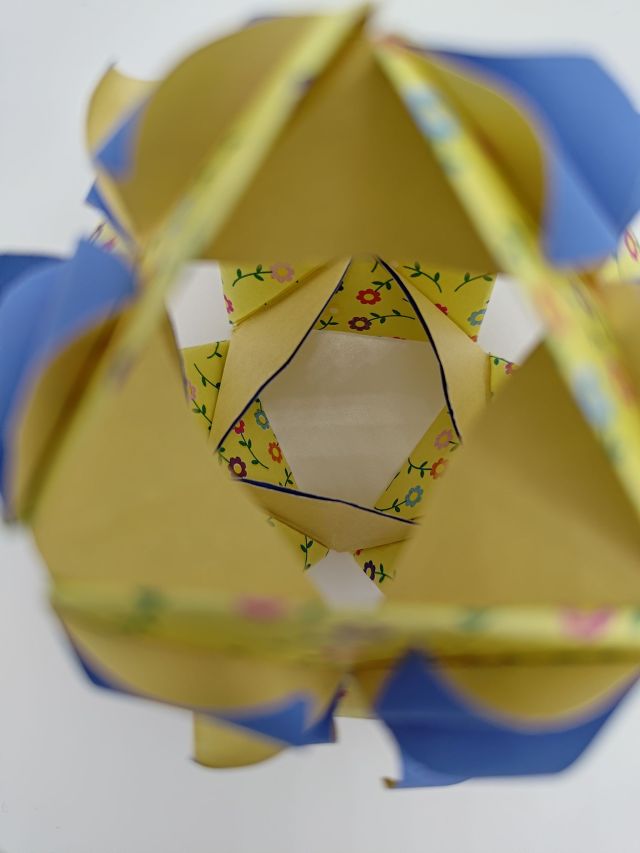
This model is pretty unusual because it is hollow in the middle and looks just like a wireframe. There appear to be two ways to shape the flower crest at the end, but building the general model is the same. You can also build a small stand for it too! I will just be doing the model by itself, because it really did end up being difficult to make by the end of it. I also had no plans to string it up for hanging like I usually do, because you would be able to see the string going through the centre.

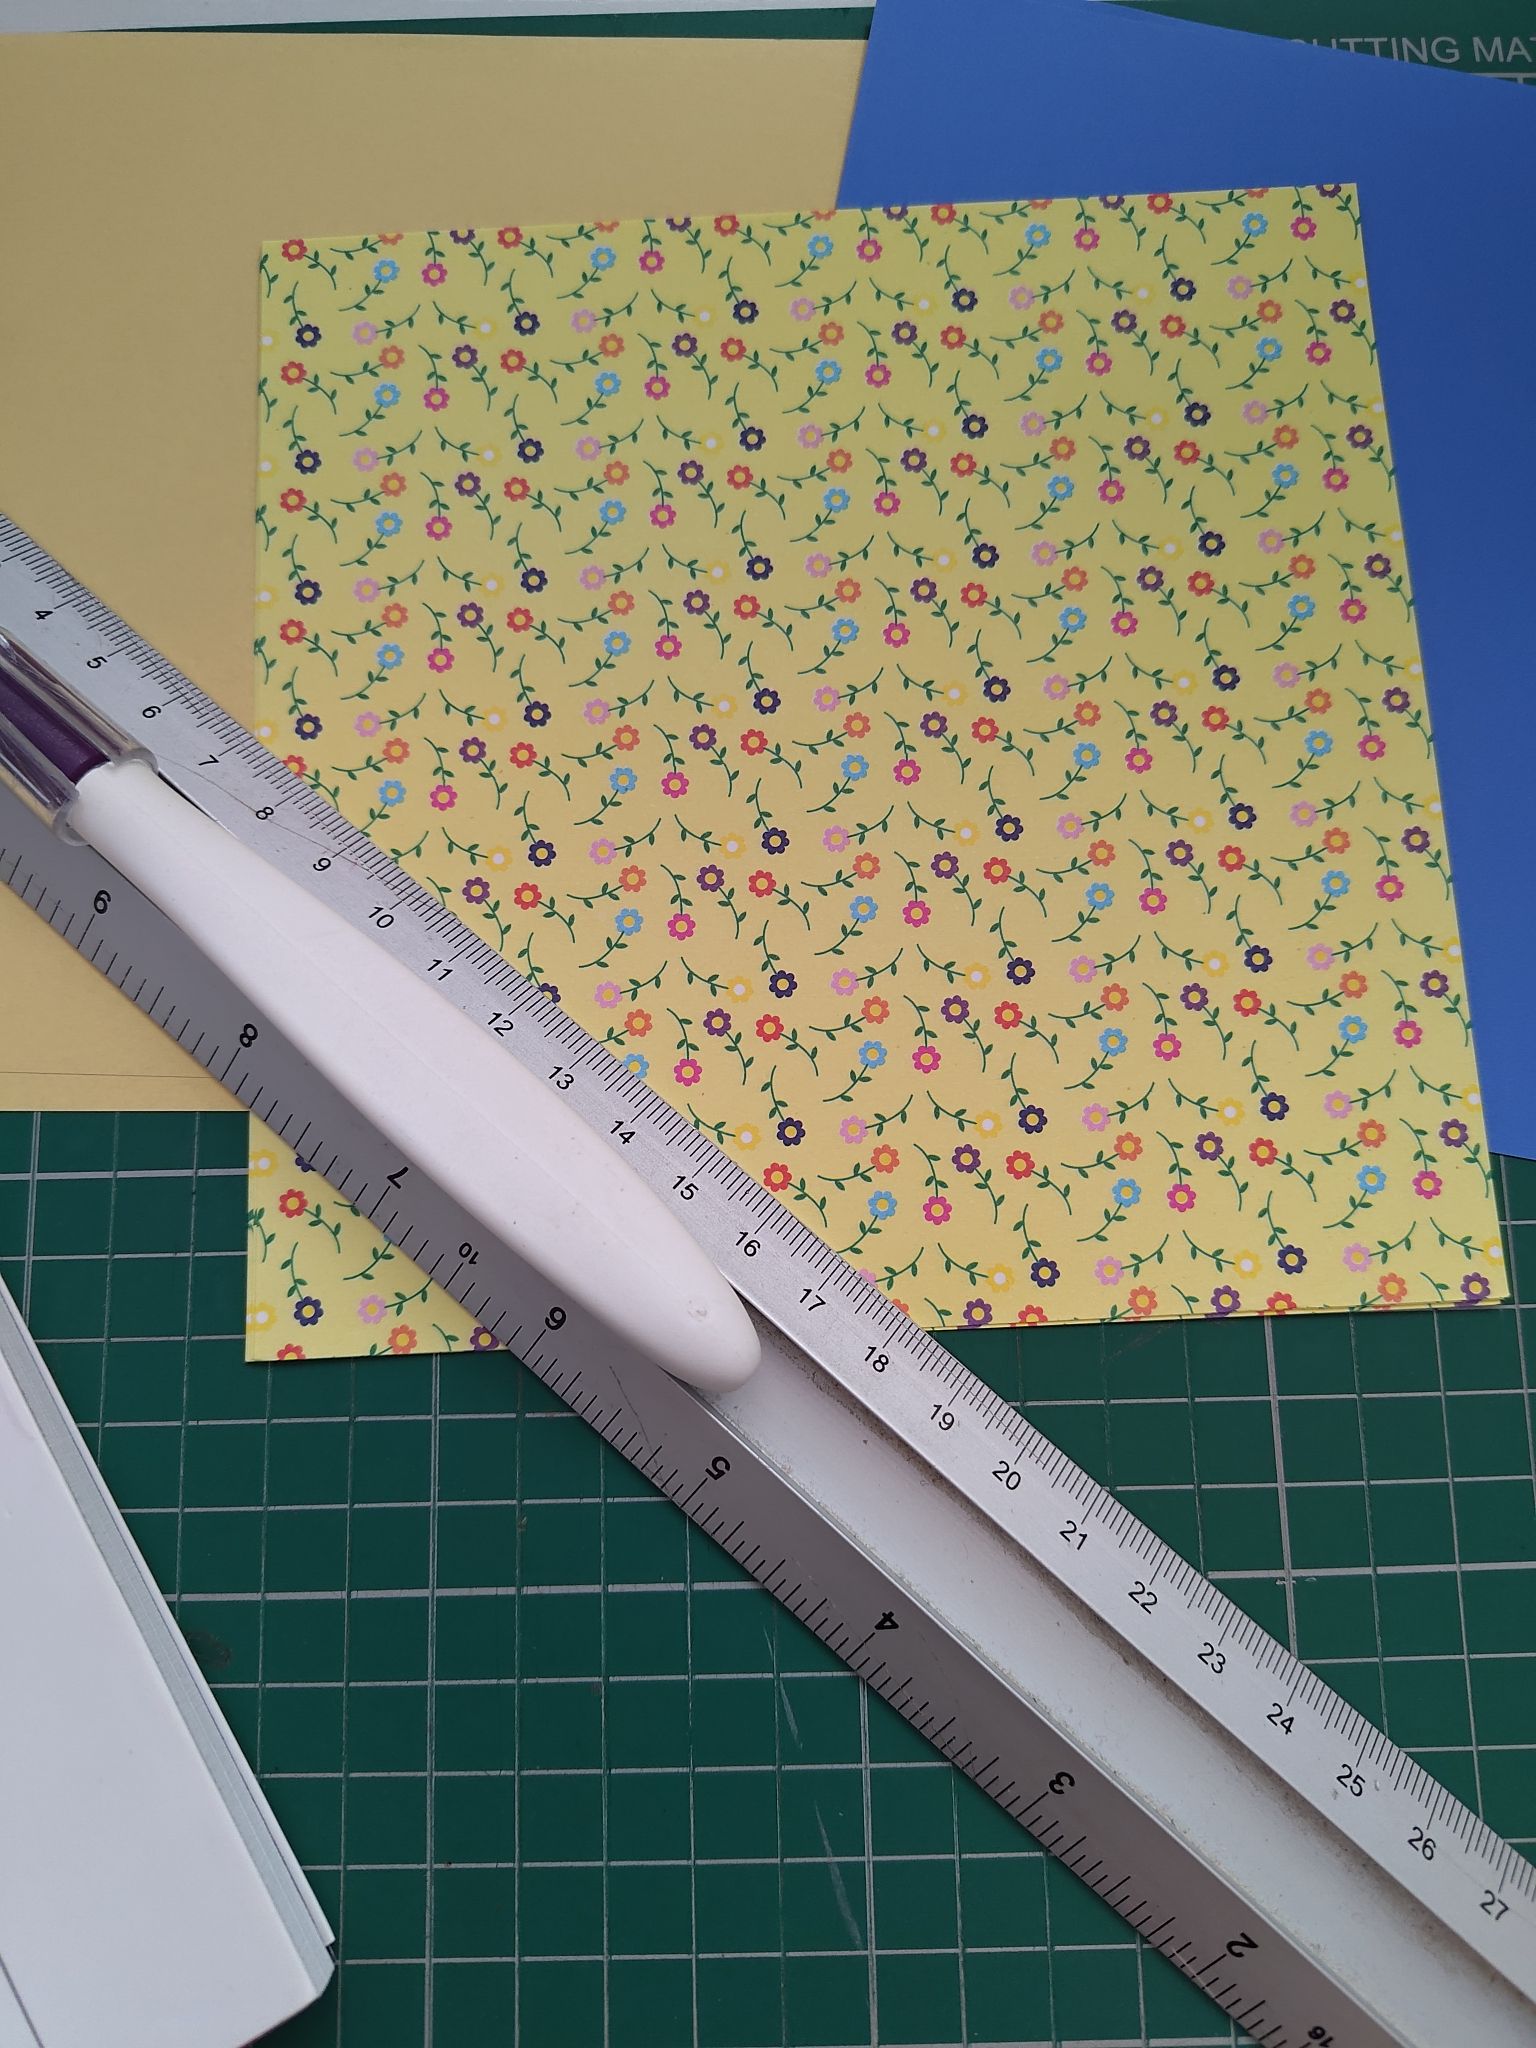
Firstly I needed the assembly bits, since it does not use standard origami paper, and it also uses two types of coloured paper. I had to cut out the required sizes using a craft knife and cutting mat – the book recommends starting with 20cm paper but I usually only have 15cm on hand, and this will prove challenging later! Since you need to cut similarly sized units from this base paper.
I will also be trying to this without glue! Theoretically all kusudama models can be made without glue but I usually use it to help pin the units into place. With lots of small parts, it can get fiddly rearranging the pieces into place, but on the other hand you could easily make a mistake when gluing.
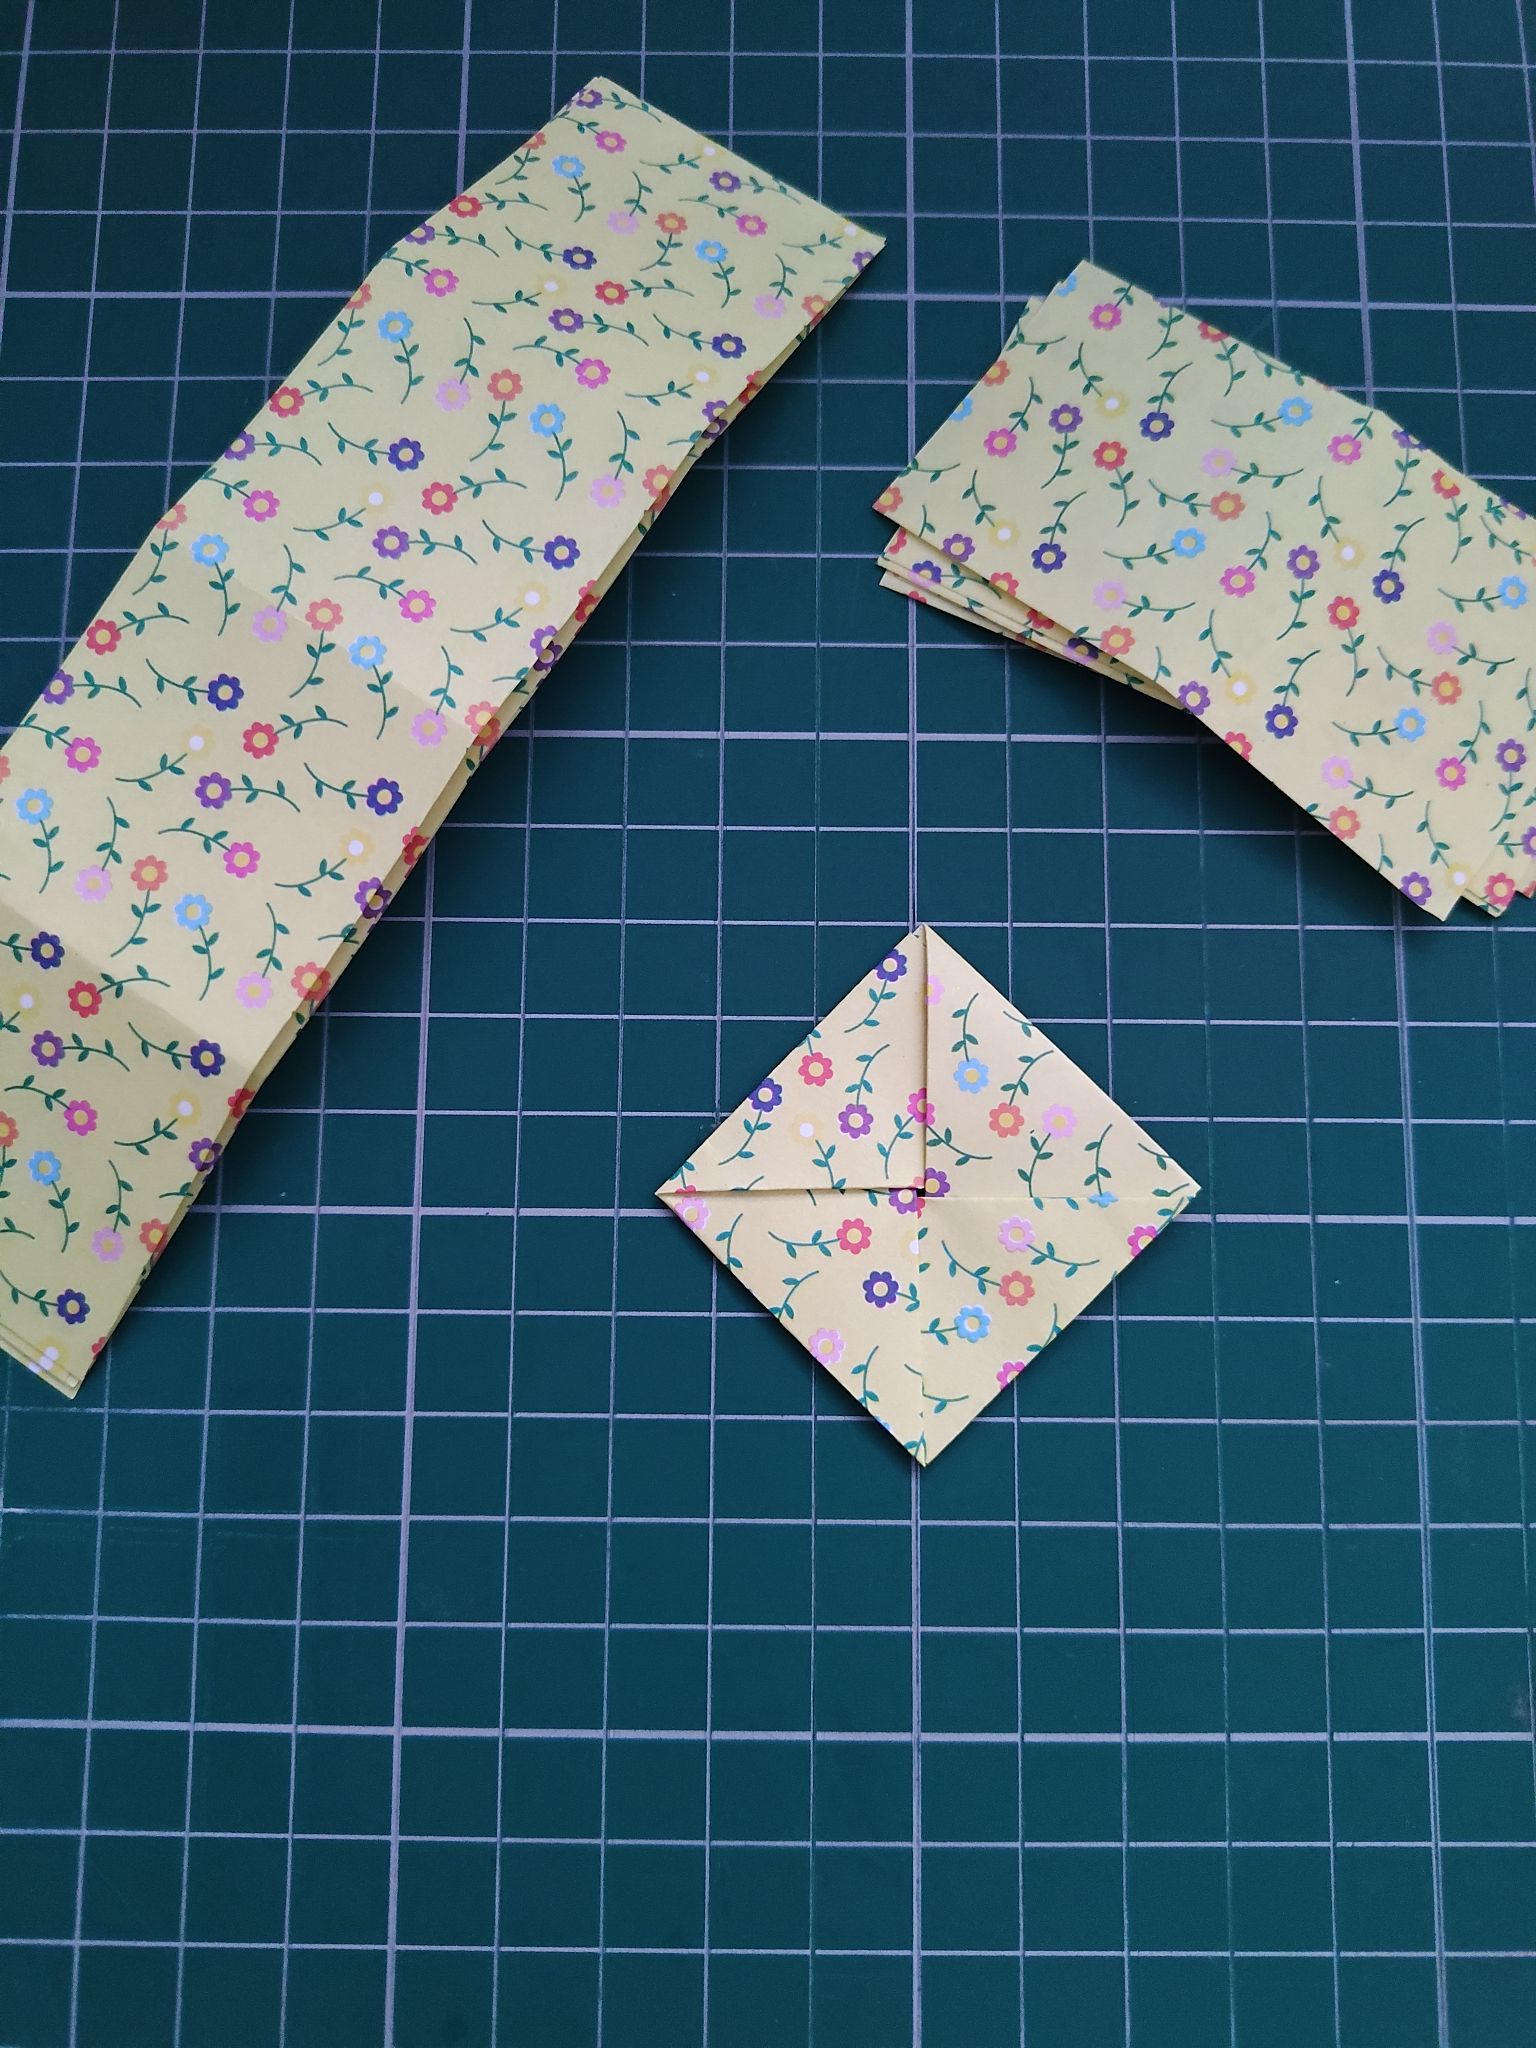
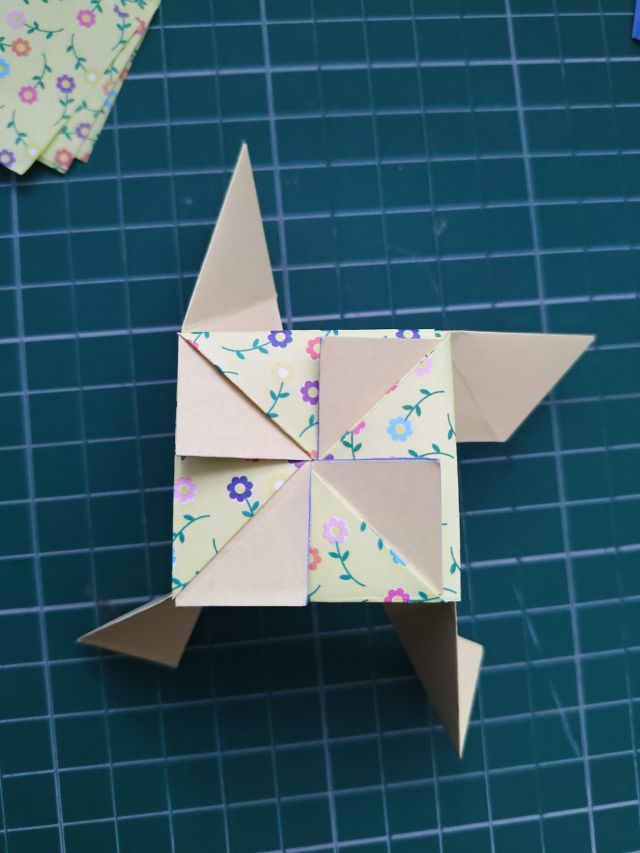
One thing you need is six of the square faces. I made this out of floral-patterned yellow origami paper. You actually need to combine two differently-sized parts together to form a single sturdy square unit for the base faces. It kind of looks like a square coaster.
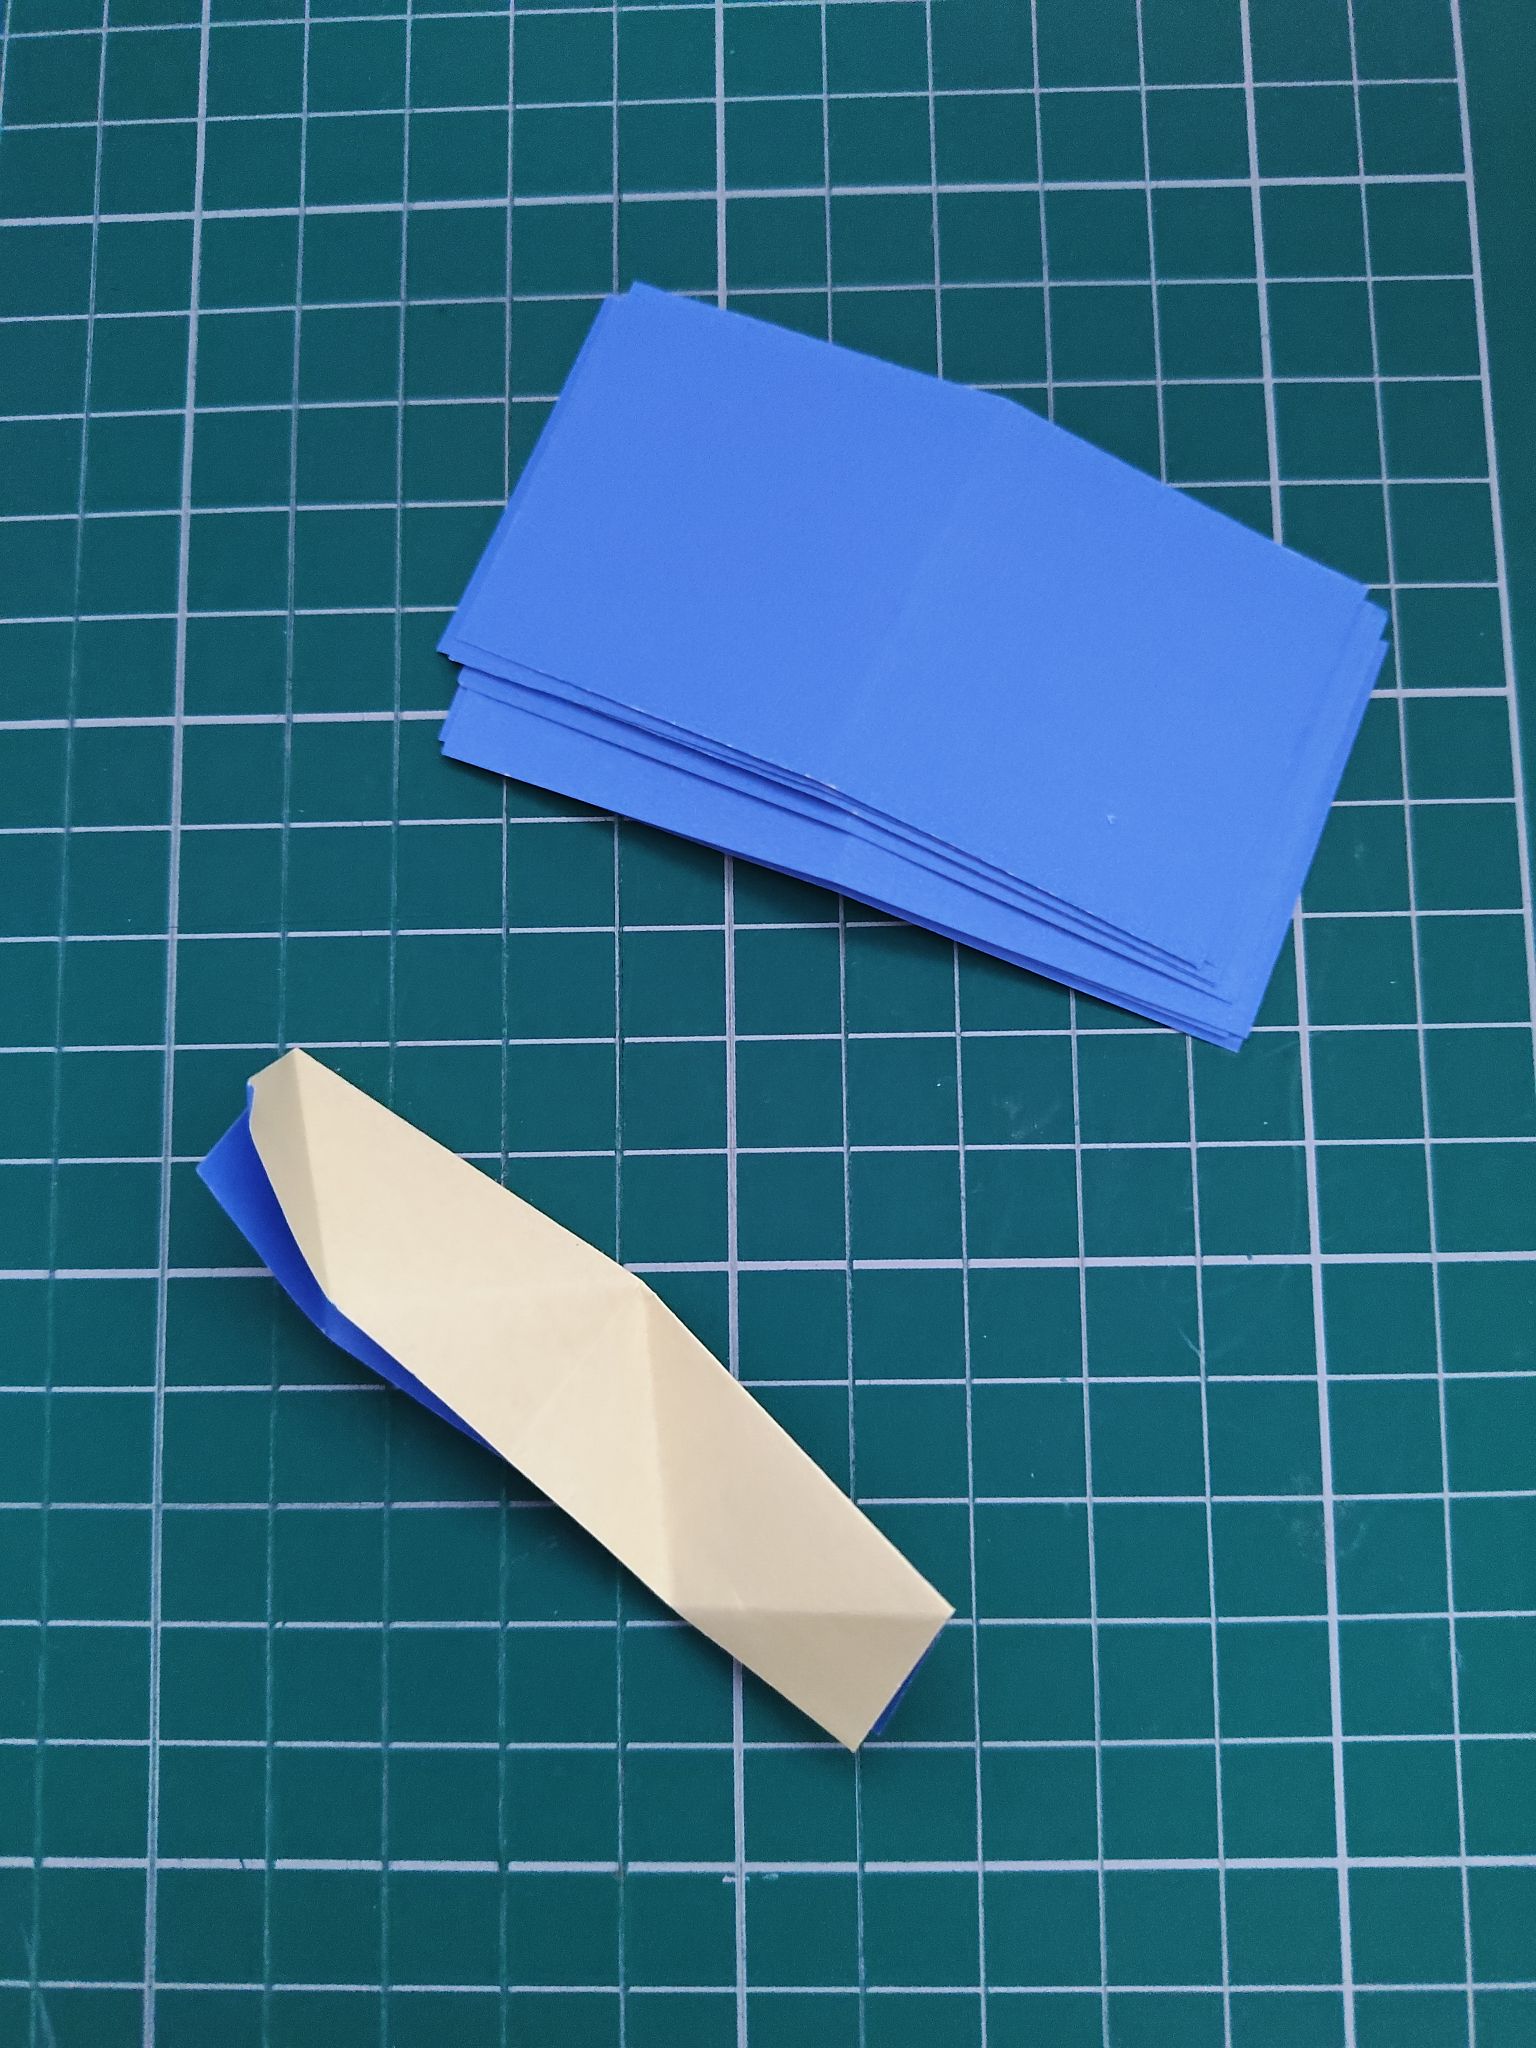
For the other part, you need some long and thin connecting units. I made this out of dual-coloured blue and yellow origami paper. The yellow was a similar shade to the yellow on the floral pattern and the blue was a nice contrast which is why I chose it. Each unit has a bunch of structed folds to help with the connections later.
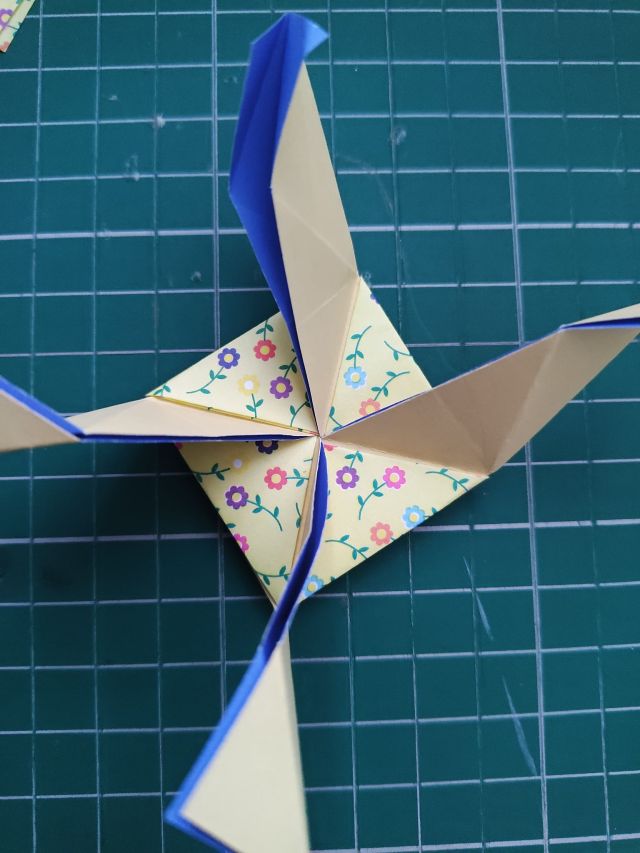
Then comes the fun and equally frustrating part – assembly! Each connecting unit should be able to slide into a pocket of the square unit, with the valley folds lining up with the diagonal. The triangular part at the end shows up on the other side of the square unit! This would be very easy if all the pieces lined up and fit perfectly. Apparently I don’t always cut perfectly down the lines…
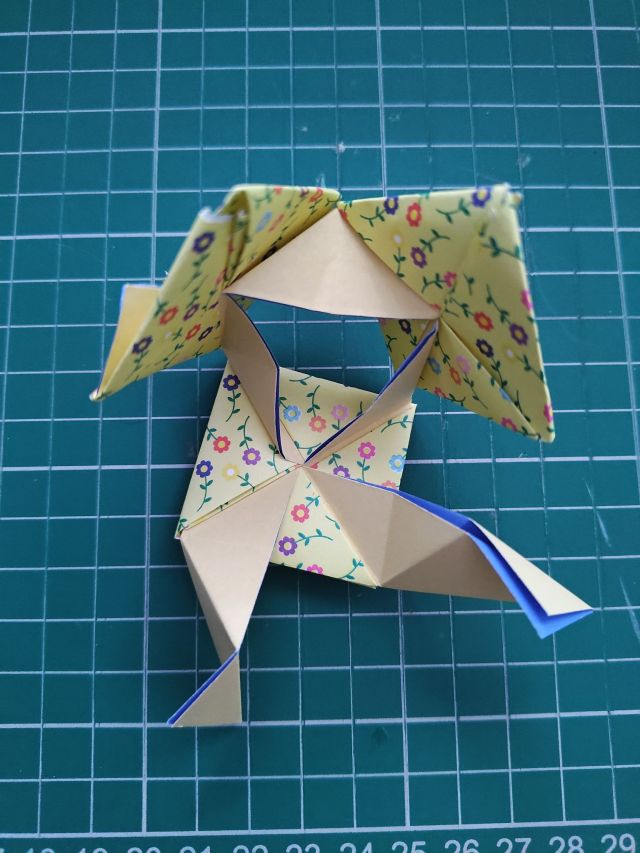
When connecting new square units to the existing one, you sort of have to reverse the orientation to make everything line up properly. When it is connected as intended, all that should be visible is a large triangle shape between the two square units, and the small triangular shapes on the other side of the faces.
By the time I was connecting the fourth square face and above, it got super fiddly and everything almost kept getting undone as I tried to make the connecting units properly fit. This was a problem for my small 15cm square starting size! I’ll have to find out where I can source 20cm origami paper from and keep a stash of it on hand.
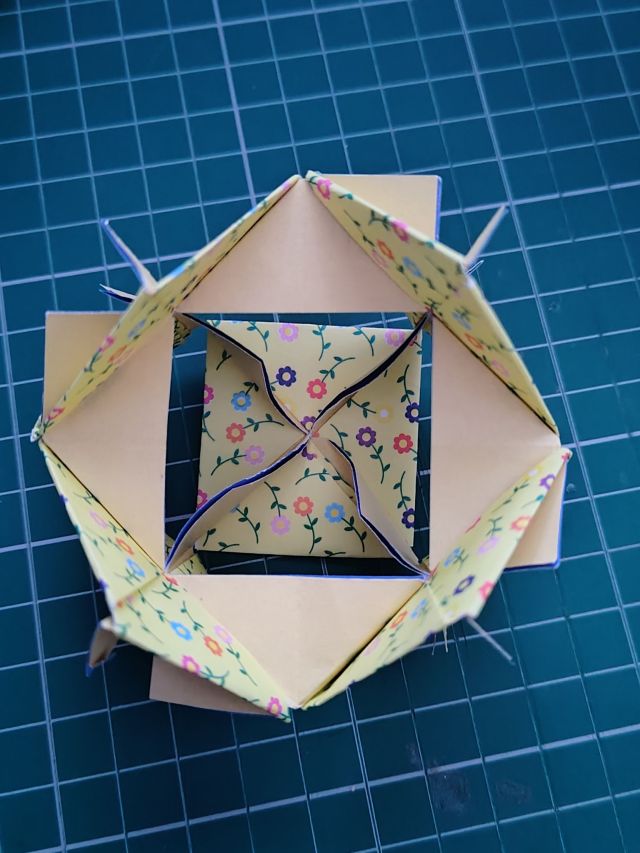
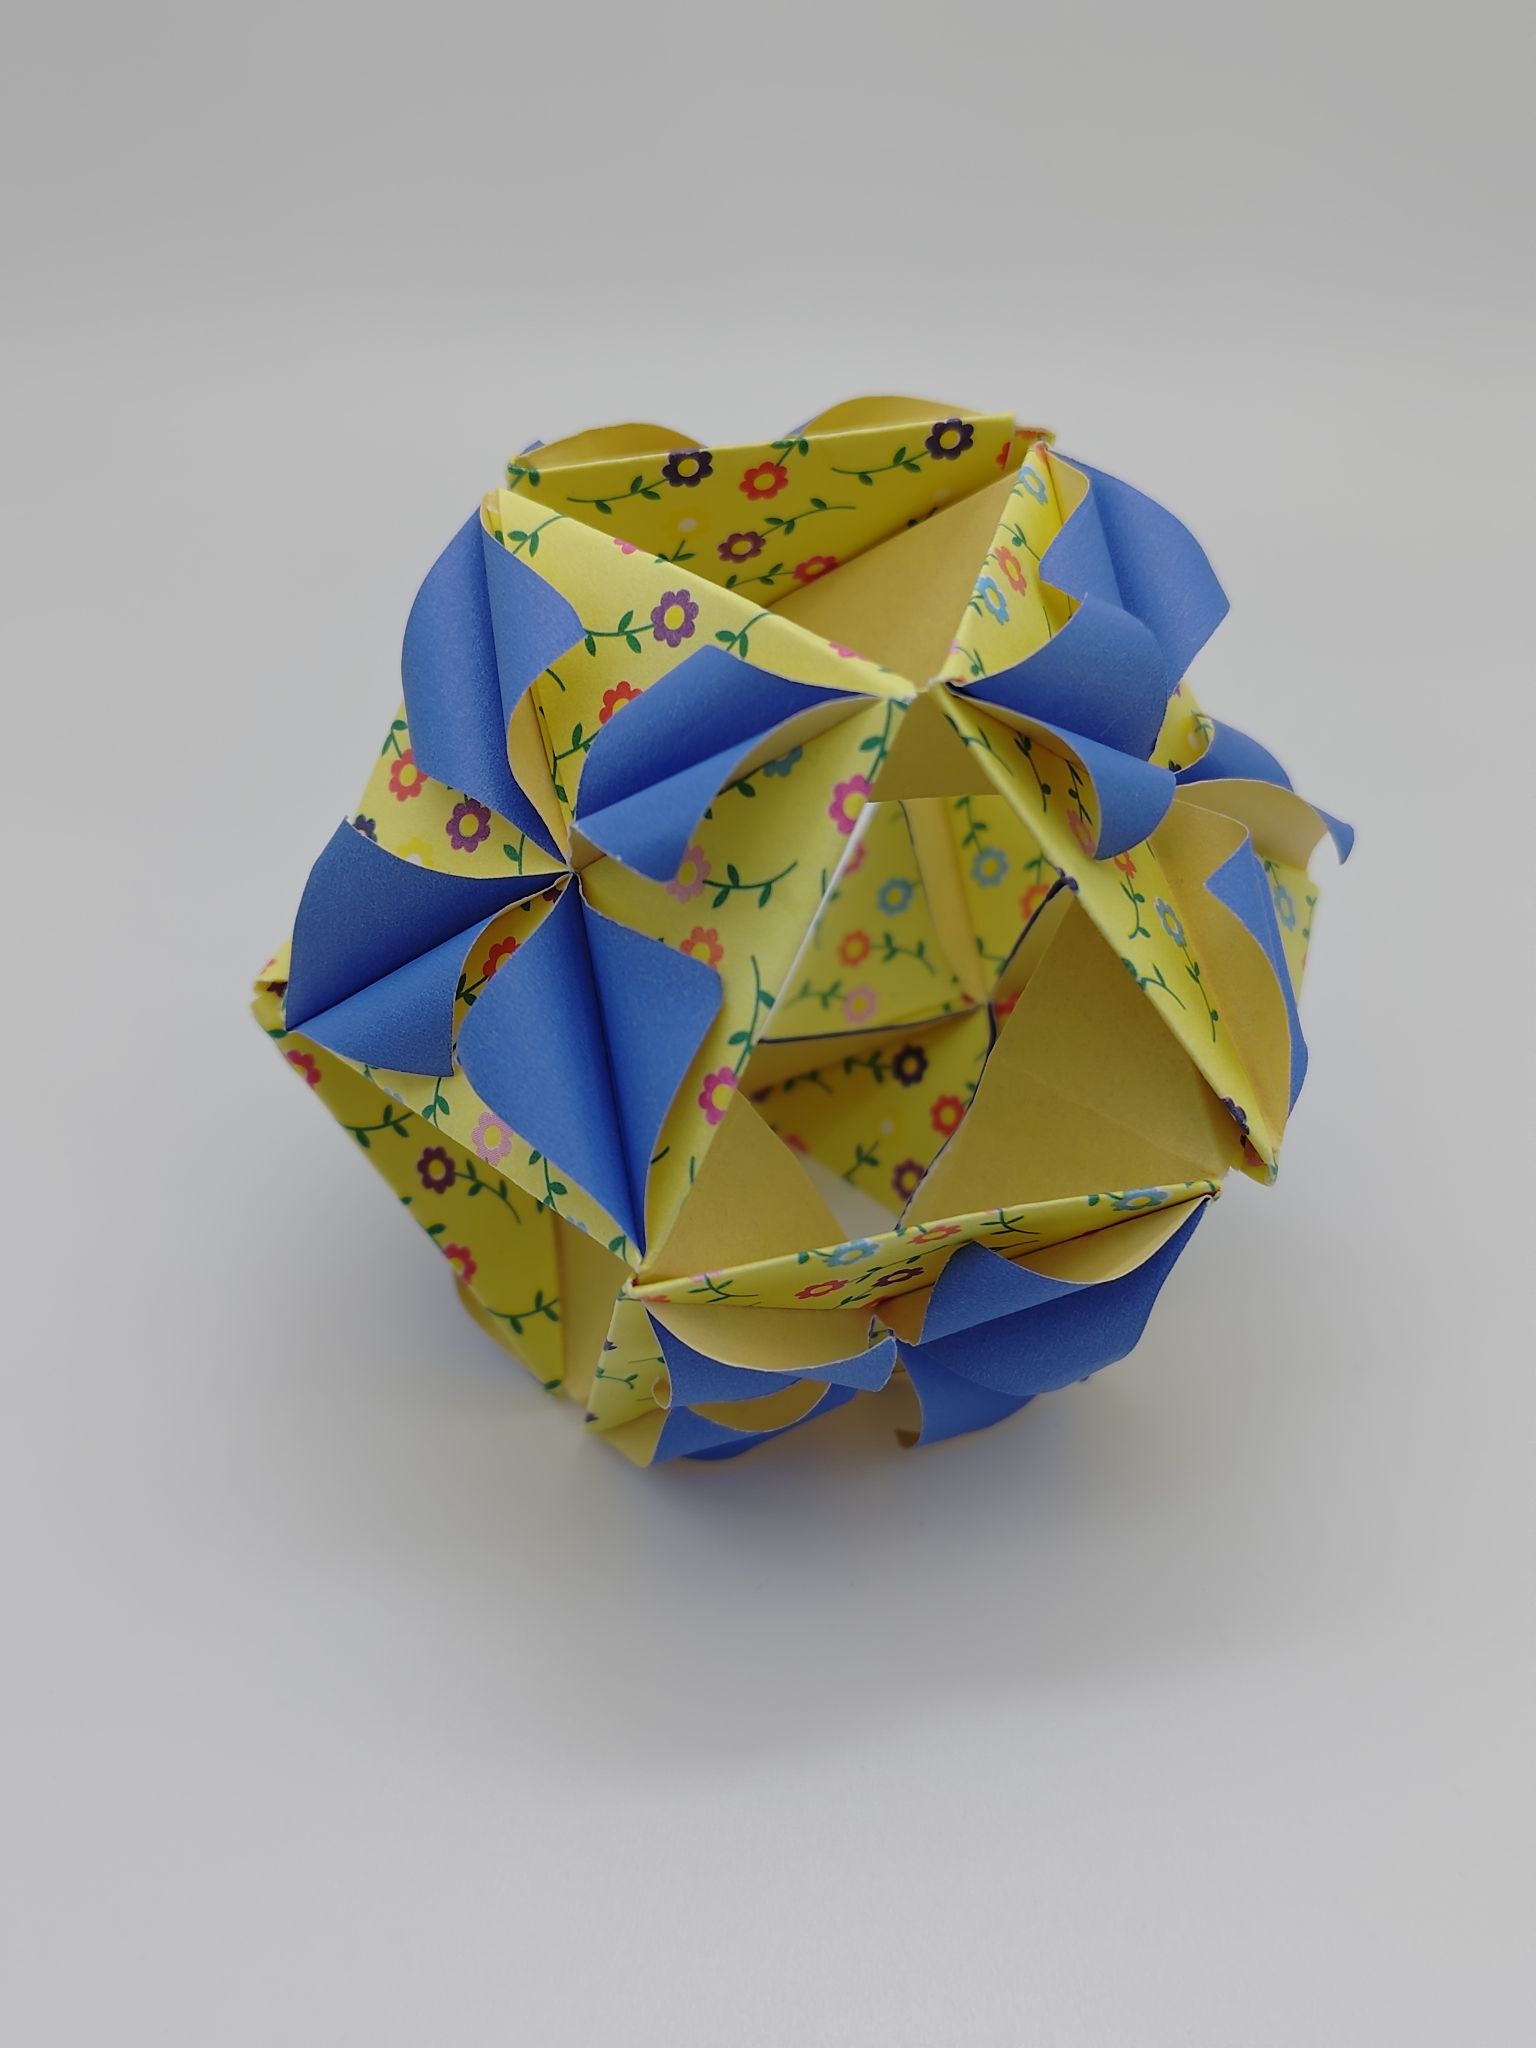
For the “Maki” type crest that I went with, I just had to fold the triangles over to show the dual colour, then use a small thin item to curl them outwards. I always have a bamboo skewer on hand for these sorts of things. It does take a long time though! I tried to take a shortcut by doing multiple at the same time, but it wasn’t holding properly. I had to do each triangle one by one. Six faces, four sets of triangles, two per set… Definitely have some on in the background to keep yourself occupied in the monotony…

It is kind of a fascinating model when completed. My finished model was about 8cm in diameter so it was quite small! It would have been nice if I had used paper that was patterned on one side and had a solid colour on the other for the contrast as shown in the book picture but I don’t have any paper like that. Since I did not build a stand for it, the best way for it to sit on a desk is on an open triangle, so that it doesn’t press against a flower crest.
No watermark because I didn’t really add a personal spin of my own to the model. I just made it as is from the book! It was already complicated enough by itself!
There are a couple of other similar models in the book like this with different crest faces, but I would probably only attempt it again with larger paper!
Materials used:
– 3x 15cm square yellow flower-patterned origami paper
– 2x 15cm square yellow and blue dual-coloured origami paper
Tools used:
– craft knife and cutting mat
– bamboo skewer
