
Hello! It’s been quite hot recently so I’ve been staying indoors during the day whilst the temperature is at its hottest. I also had a bit of free time recently and decided to dig into my Japanese craft haul for a new project to start. Today I’ll be going through this cute beaded penguin charm kit by HOBBIX. There were so many craft kits from this company at the department store so they clearly were a leading brand!

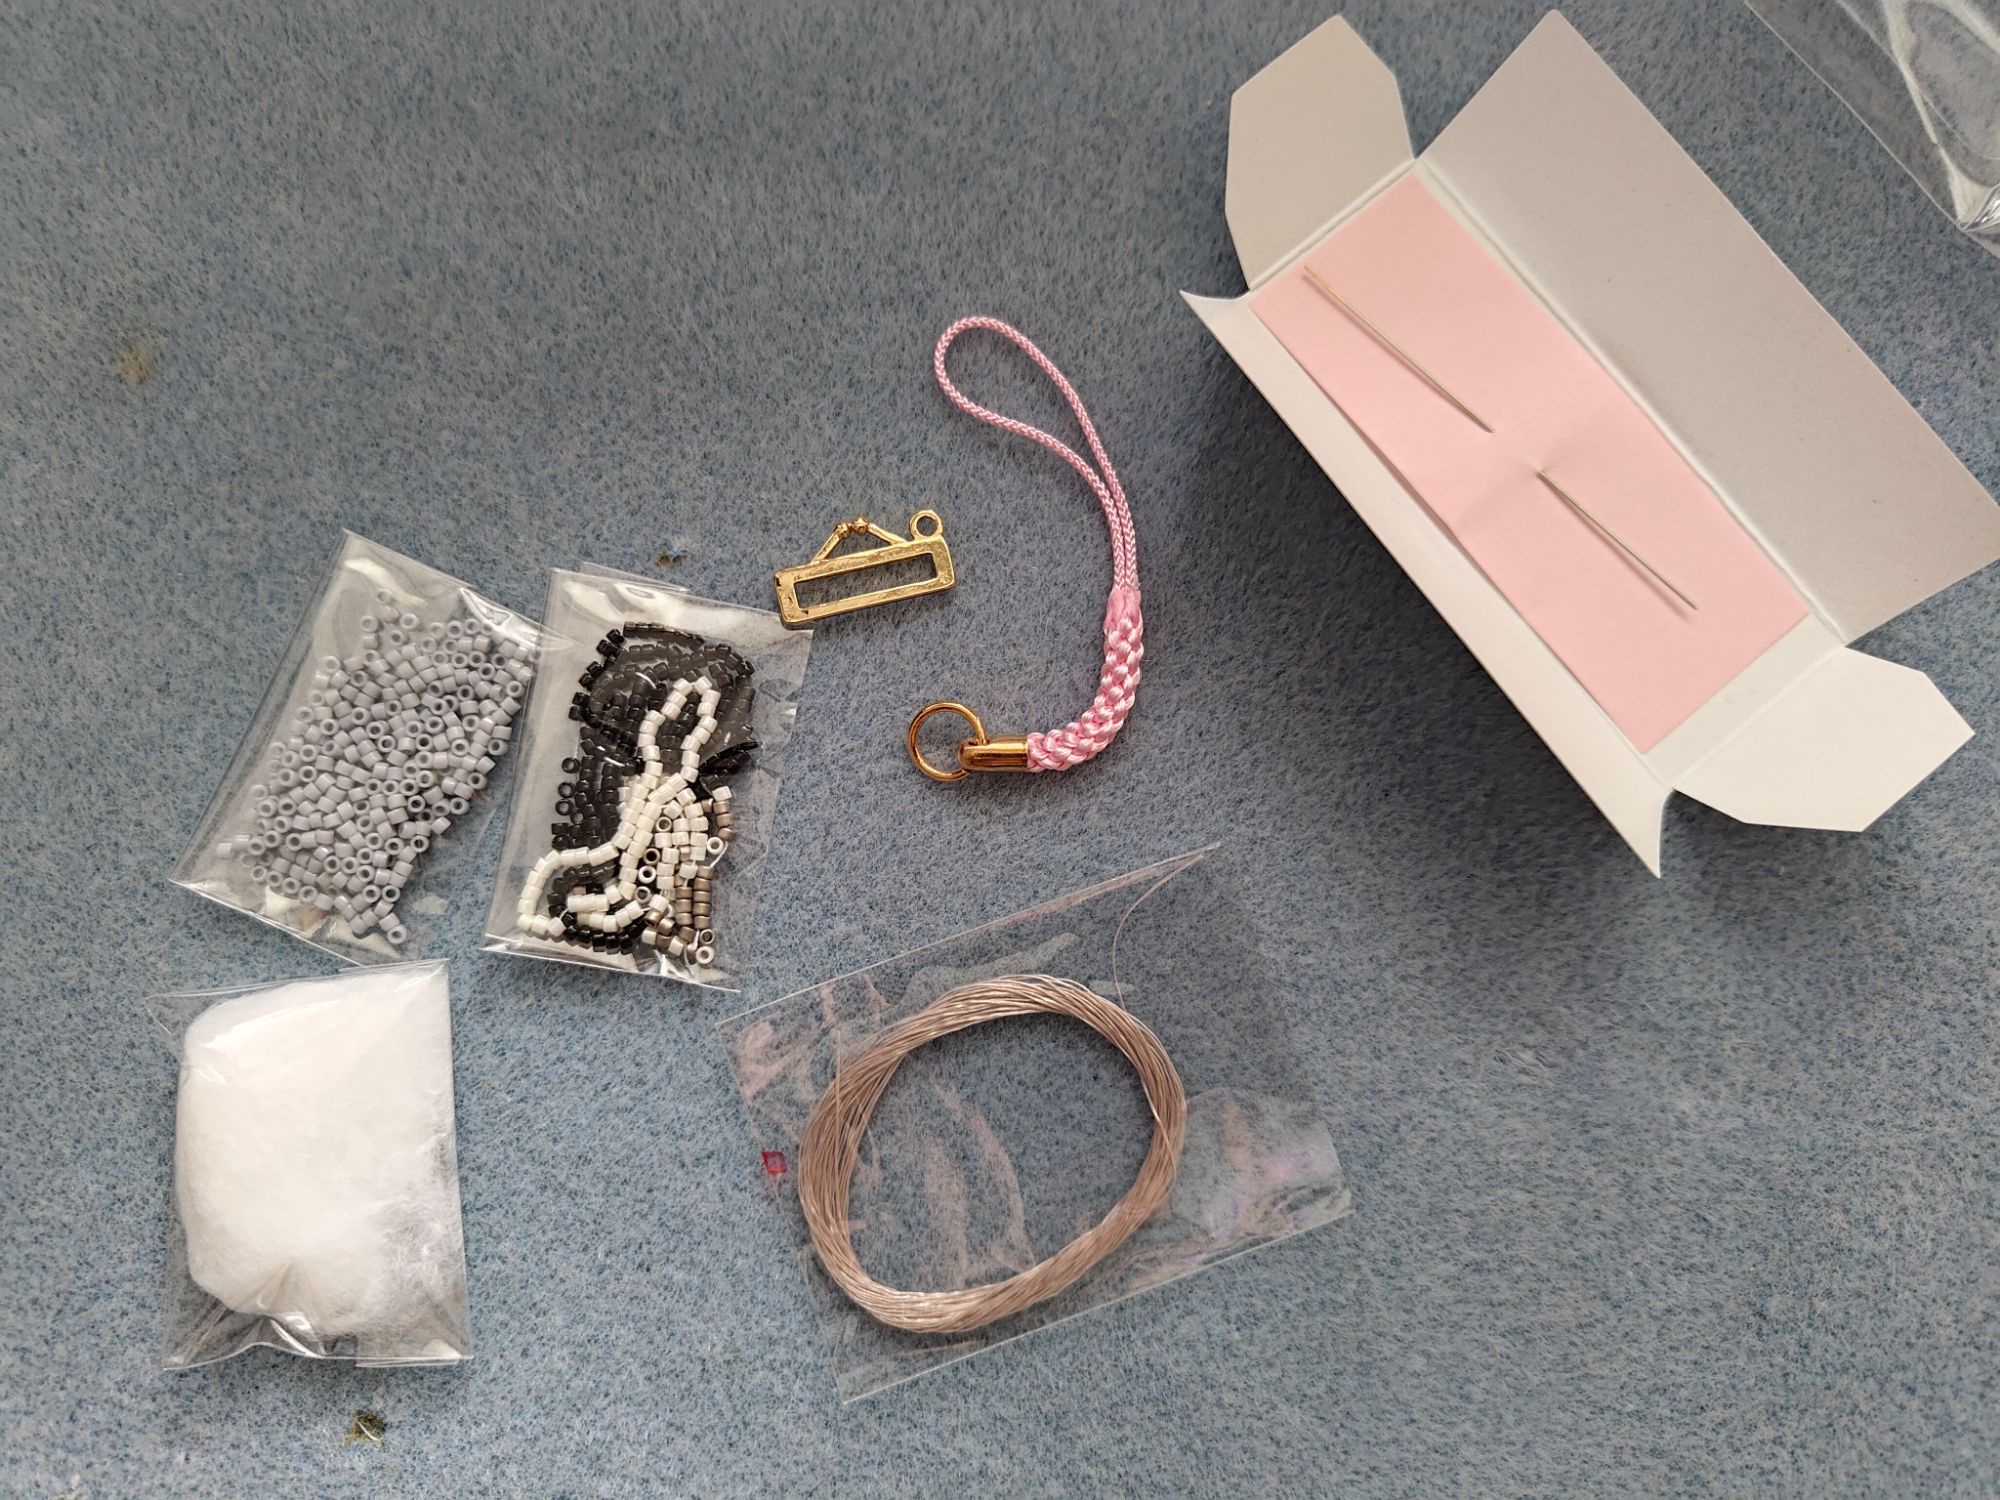
In this kit, all the materials and tools are provided, although owning a bead mat will help with keeping the workspace tidy. The materials provided were TOHO beads in four different colours, beading thread, plushie filler, charm findings, a beading needle and a set of instructions.
Despite the instructions being fully in Japanese (I can only read basics…), it is fairly simple to follow as it just provides a beading pattern to follow and is well laid out. Peyote stitch and brick stitch techniques are used throughout so prior knowledge is helpful. The only issue I ran into was later on when you needed to incorporate more bead colours as one of the greys looked very similar to black on the diagram, which resulted in me unpicking some beads and redoing the steps again!

The other issue I usually have when beading is managing the extremely long thread and trying not to constantly create knots! It didn’t help that the thread colour was very light against my bead mat. It is suggested that you cut the thread into two parts so you can reserve for later.
The first parts are a bit repetitive as you have to make many rows of beads with peyote stitch, but it got easier once I saw the penguin face taking shape. It just made me happy! I have mentioned before but I am always impressed with the uniform size of TOHO beads, which is why I bought some extras in my craft haul.

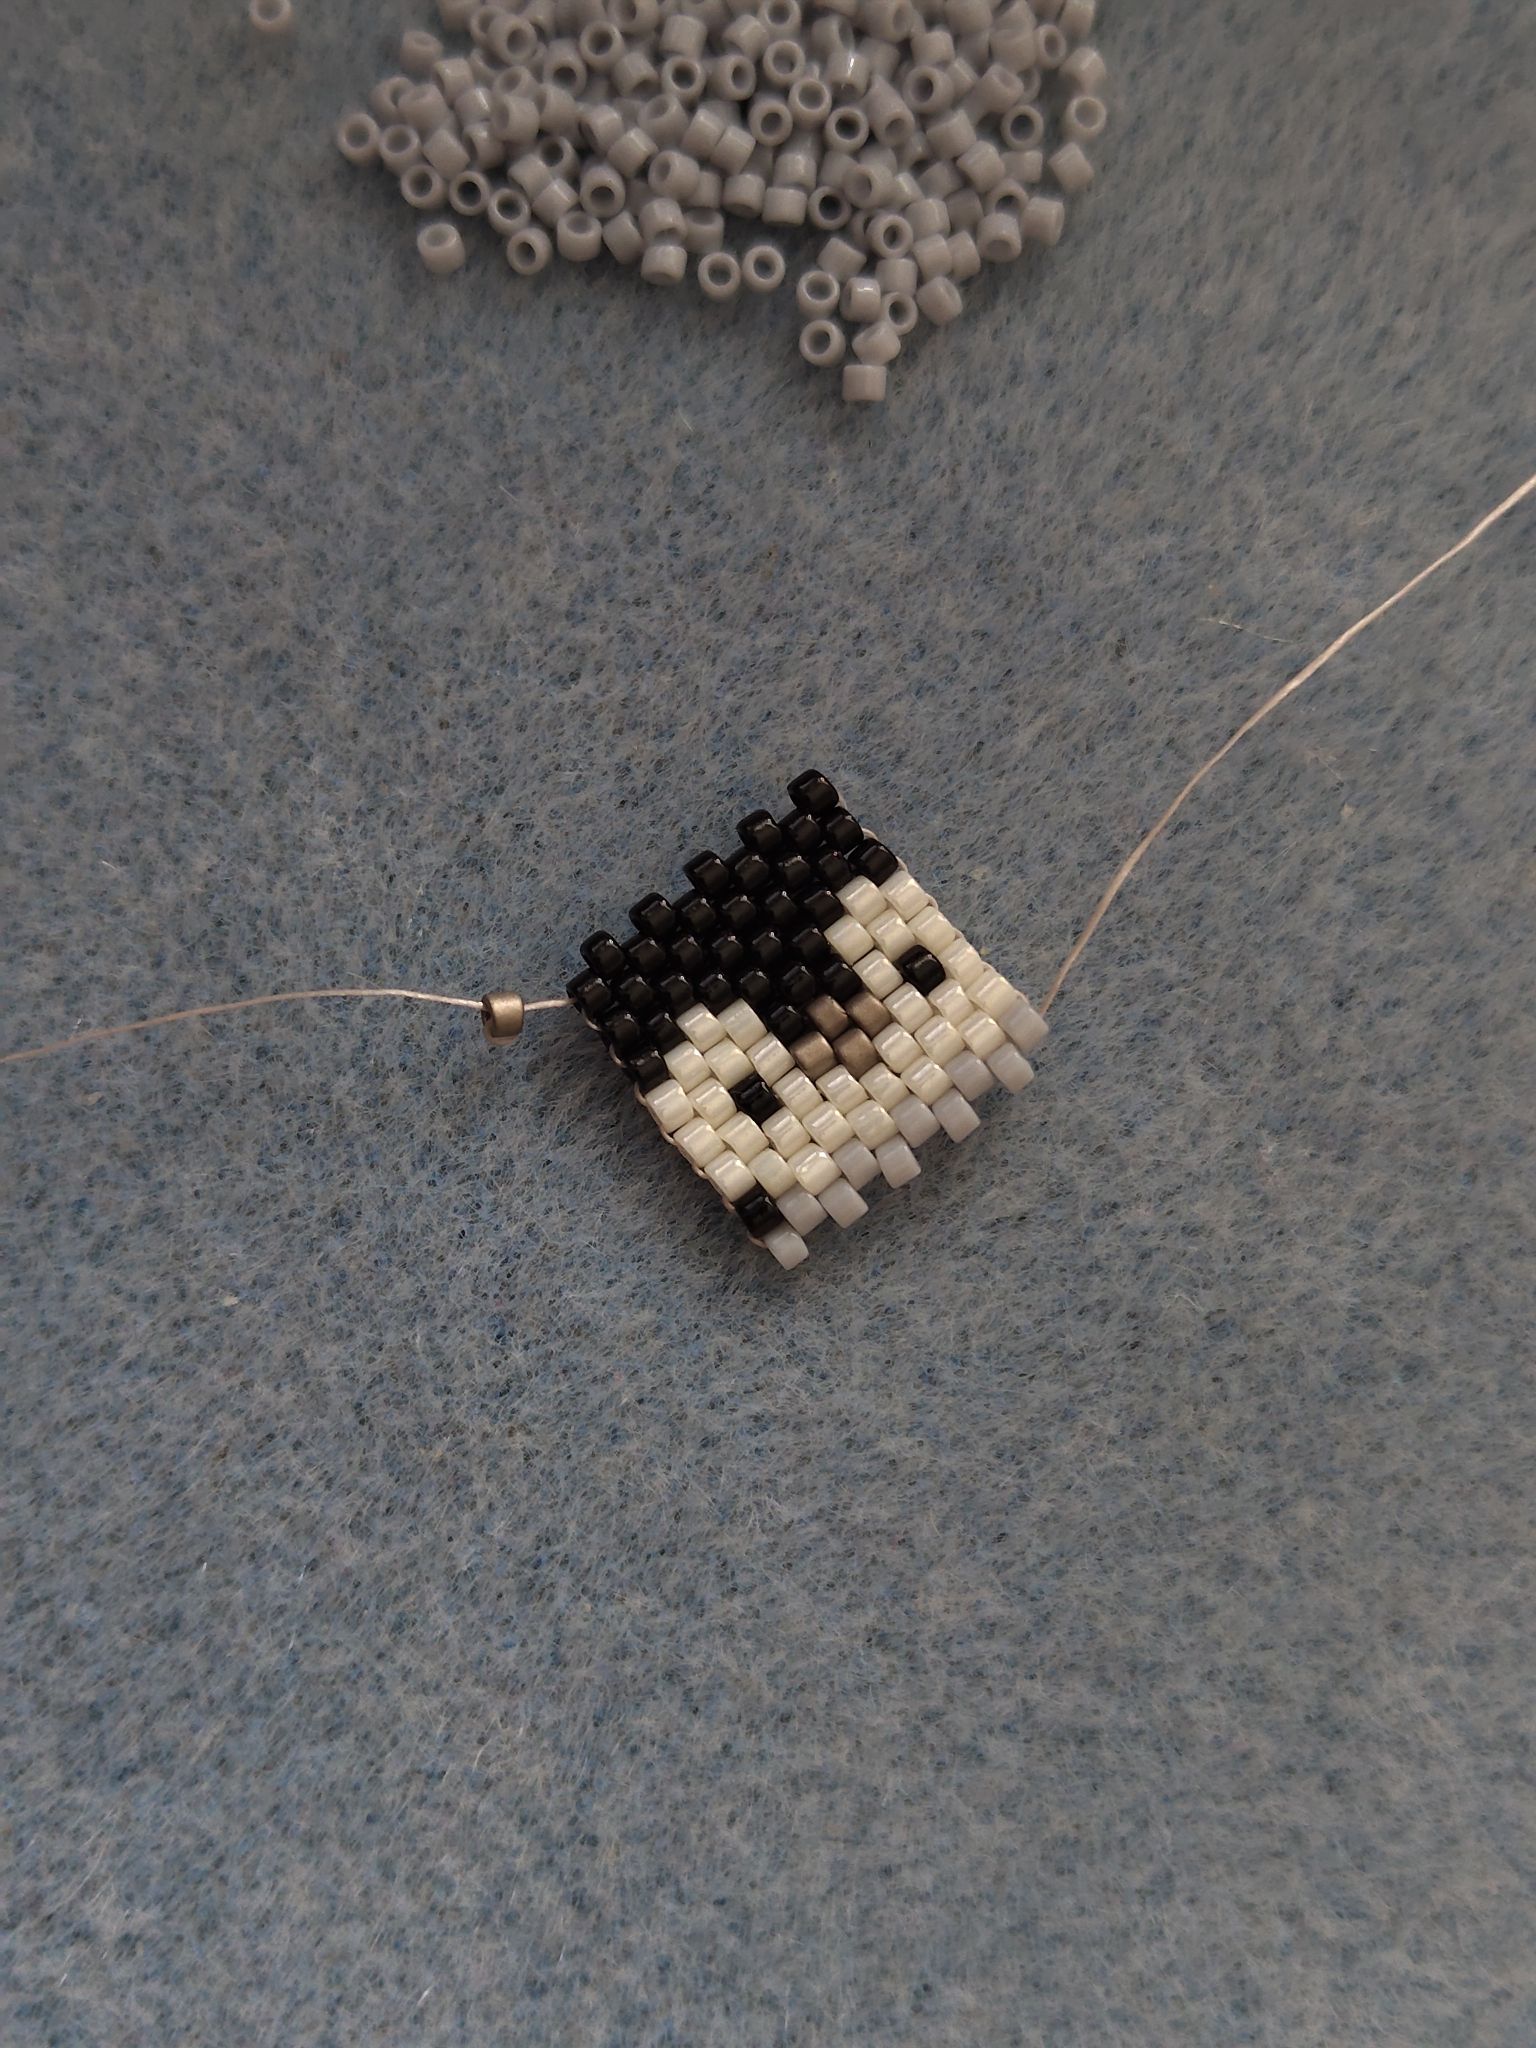
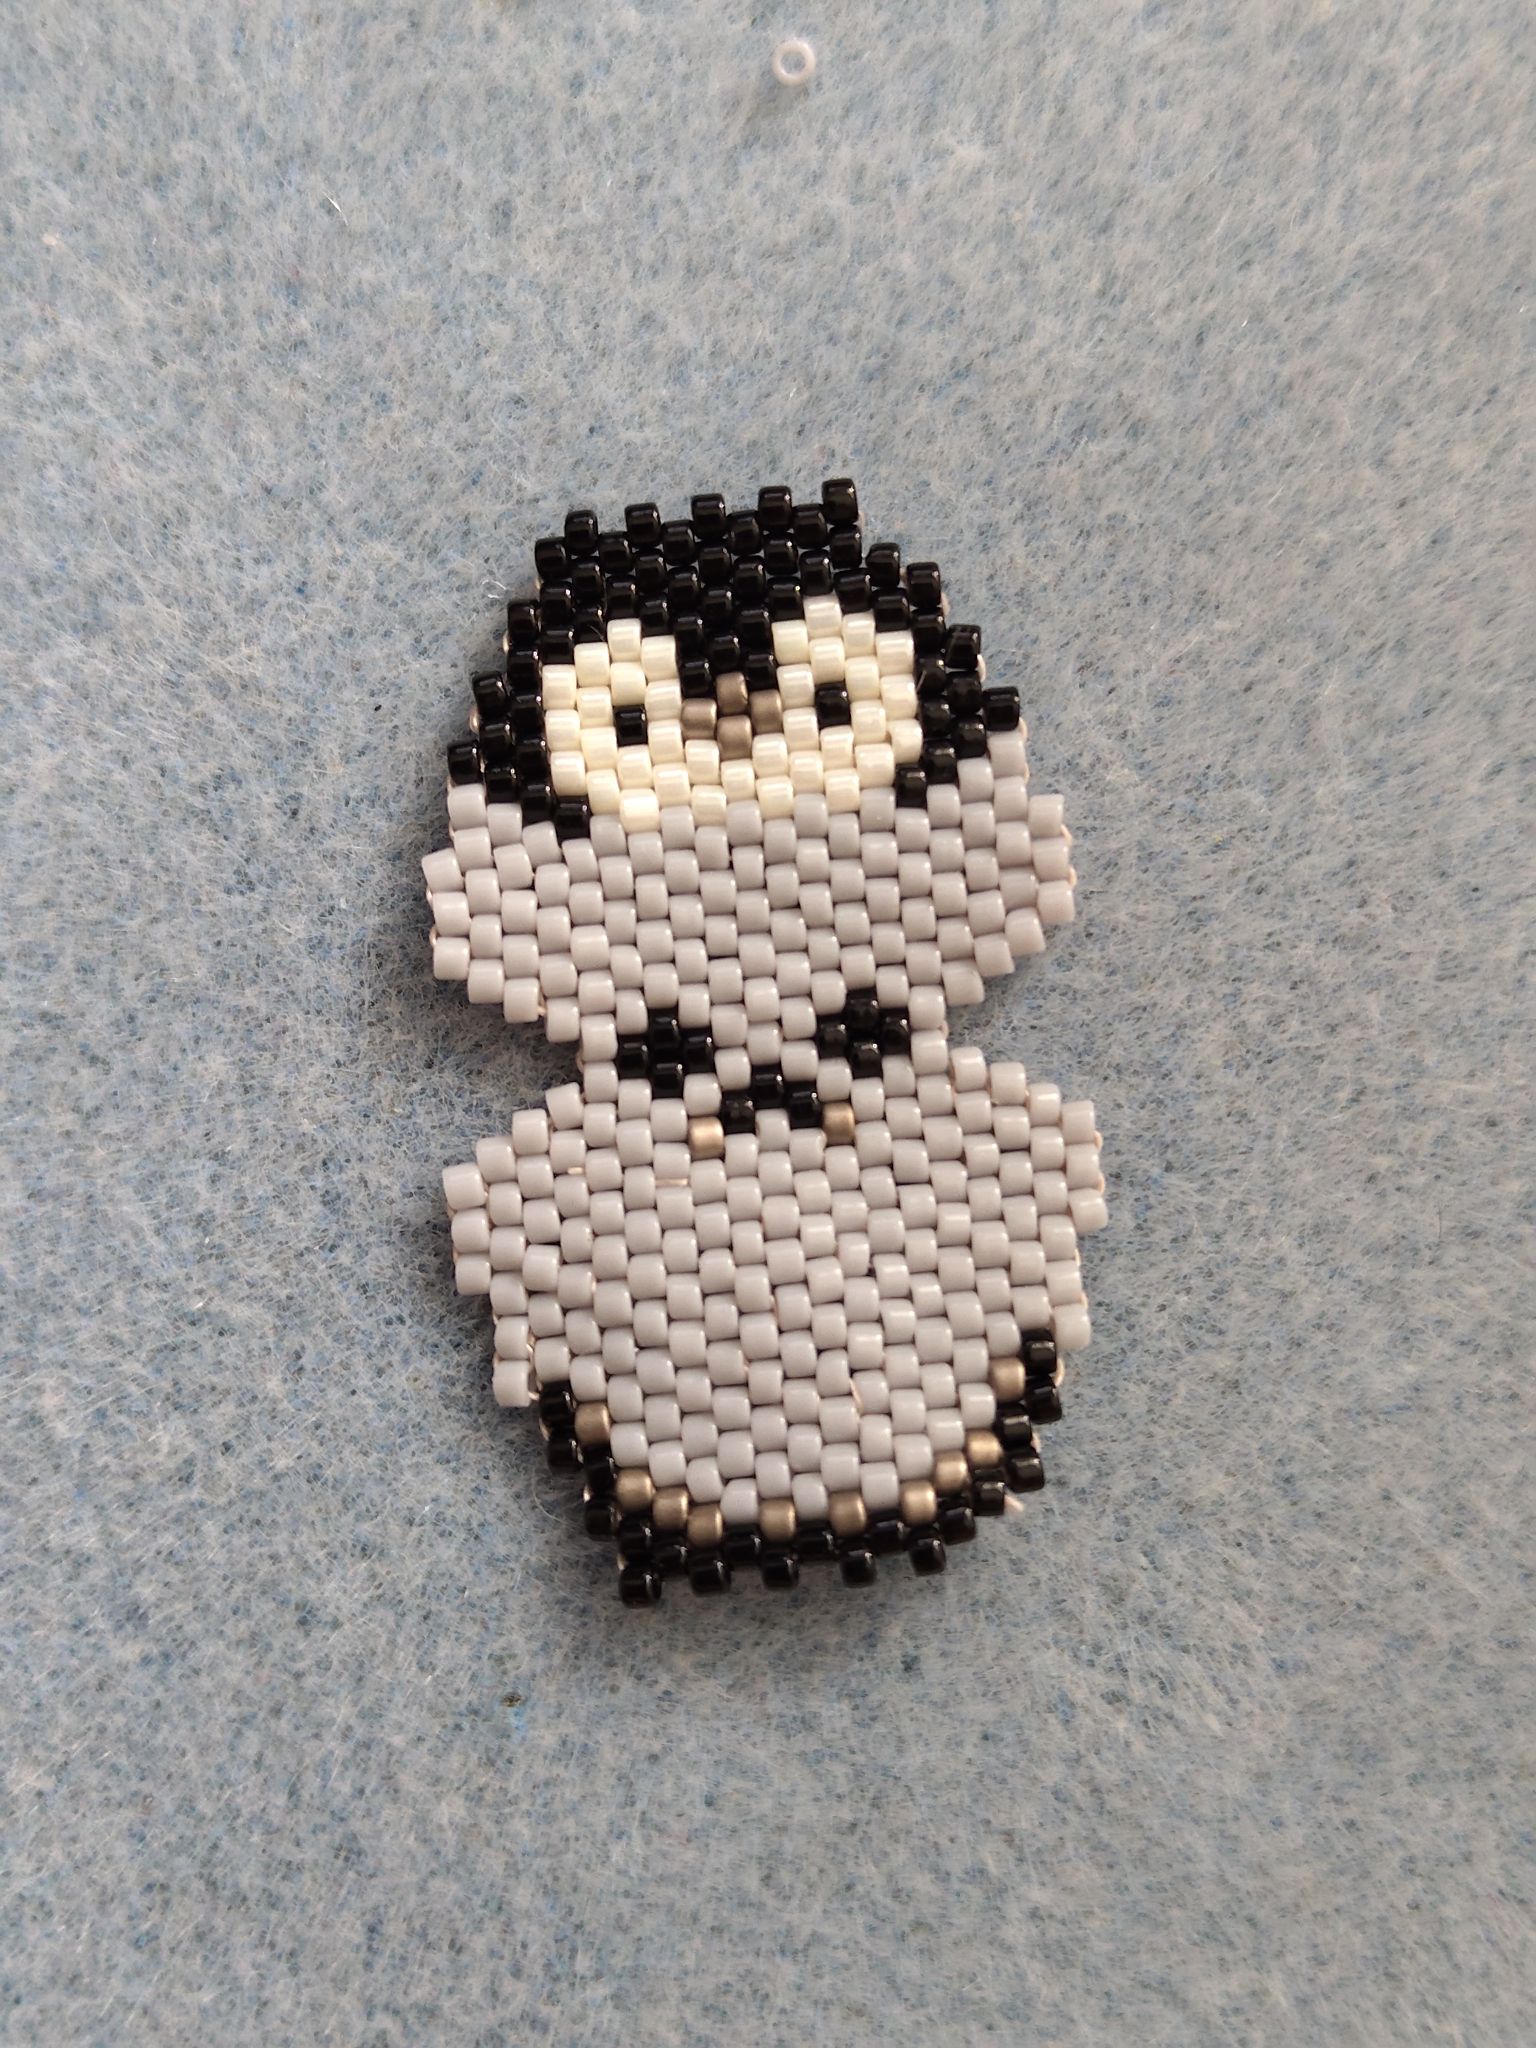
So actually you want to create both the front and the back, attached at the bottom. Since I was using peyote stitch, it was very simple to create the starting point. The poor guy is looking a little thin at the moment, but I’ll add the cute chonkiness to him soon!

At this point I switched to brick stitch to fill out the sides of the penguin. Here, I had to be a little more careful counting the required number of beads on each row as they weren’t evenly decreasing on every row.
You have to complete one side at a time, then process the thread through to the other side and when finishing to secure the thread.

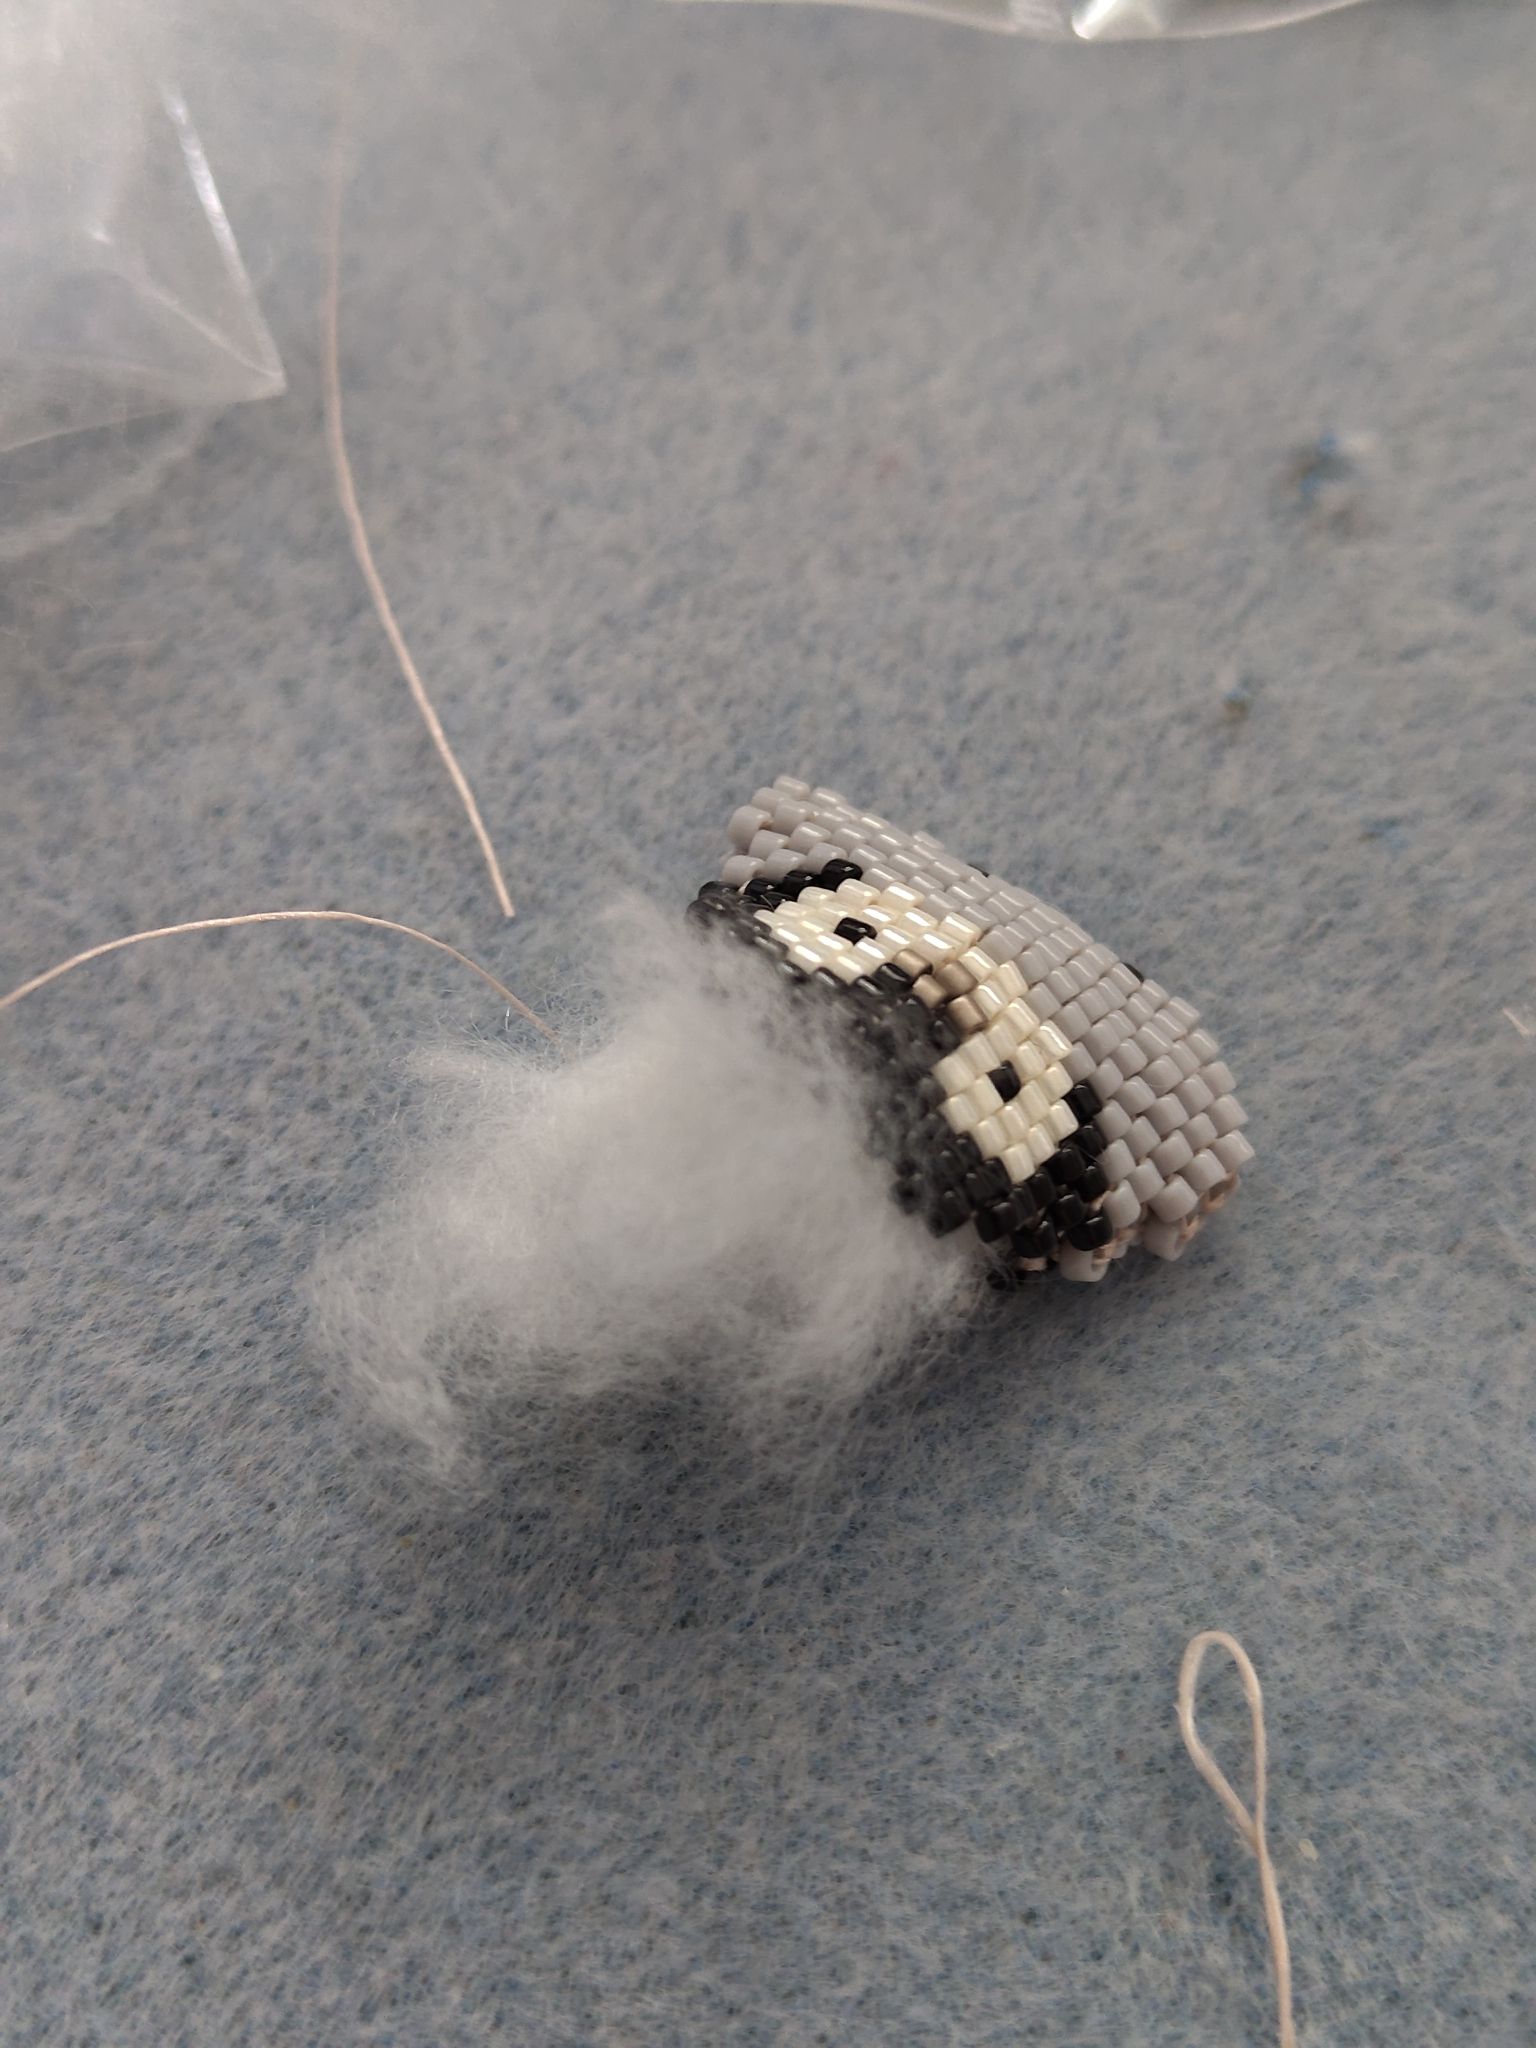
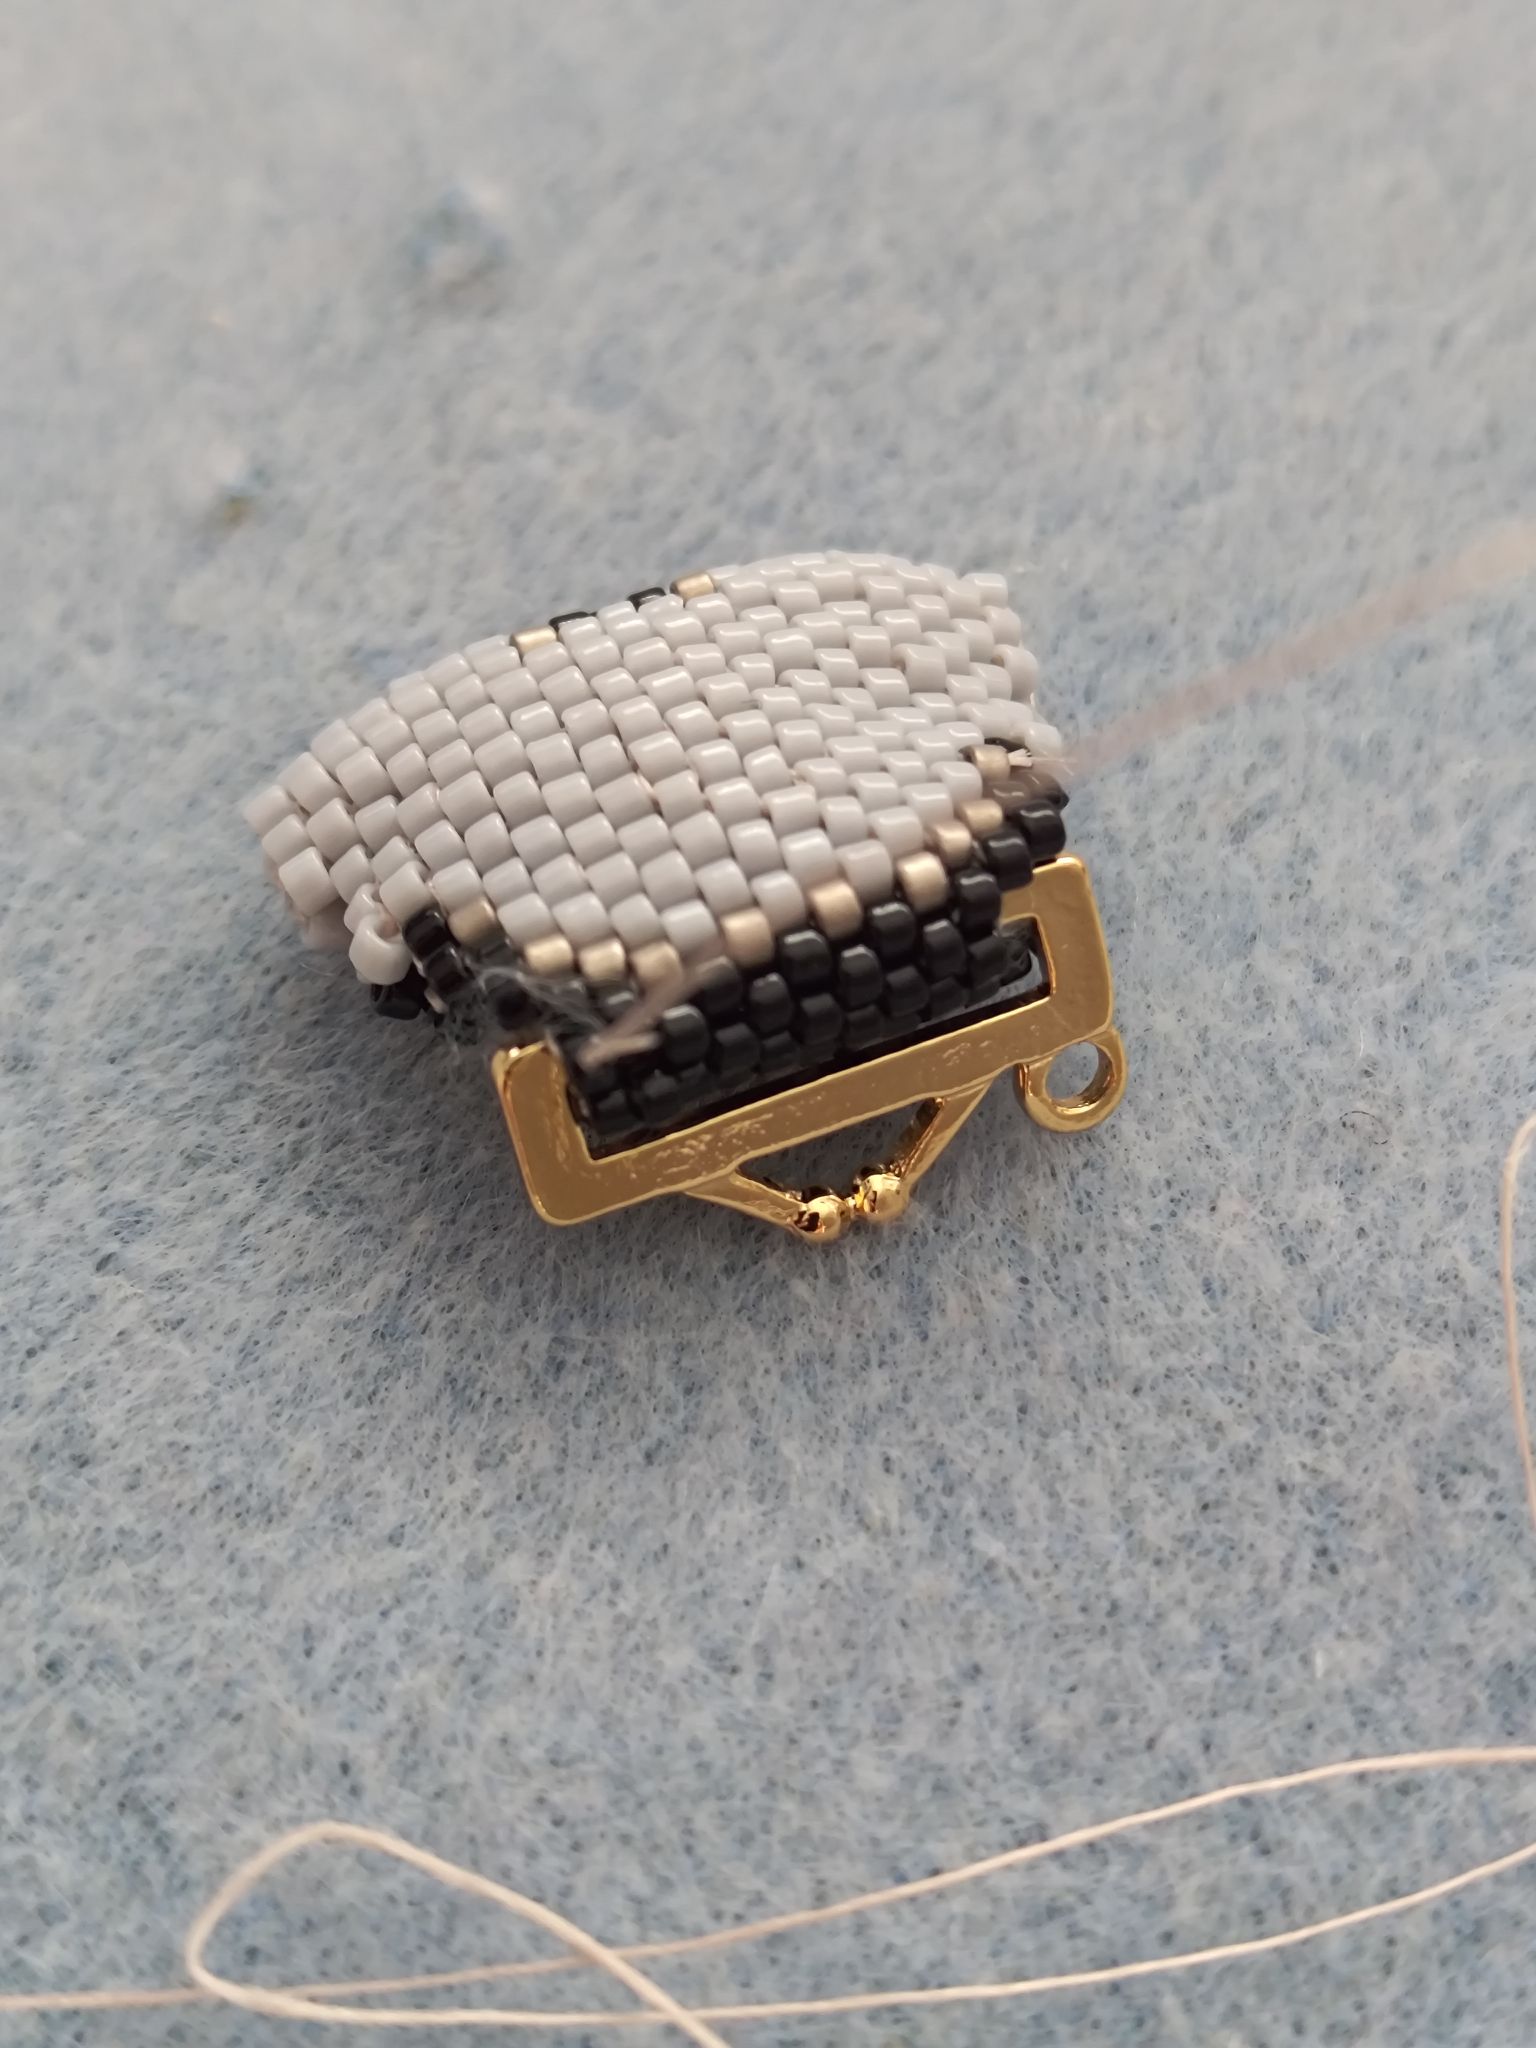
To sew up the penguin, the separate thread from earlier is used to start the new stitch. (I guess you could probably use the same thread to continue, but a single 3-metre length might have been hard to manage.) I joined up the sides of the penguin only half-way as I needed to add the plushie filler to him.
The provided plushie filler was way too much for one penguin! Don’t make the mistake of trying to force the whole lot in, you could break the beading threads. I only added a small amount to add a bit of roundness and squishiness. To finish, the gold charm finding is inserted in the middle and the top of the penguin head is connected through the gap. The charm makes it look like a little coin purse!

I tidied up the remaining materials and still had quite a few leftover. I even discarded some of the beads if they did not look square enough! Also, you can never have enough beading needles.

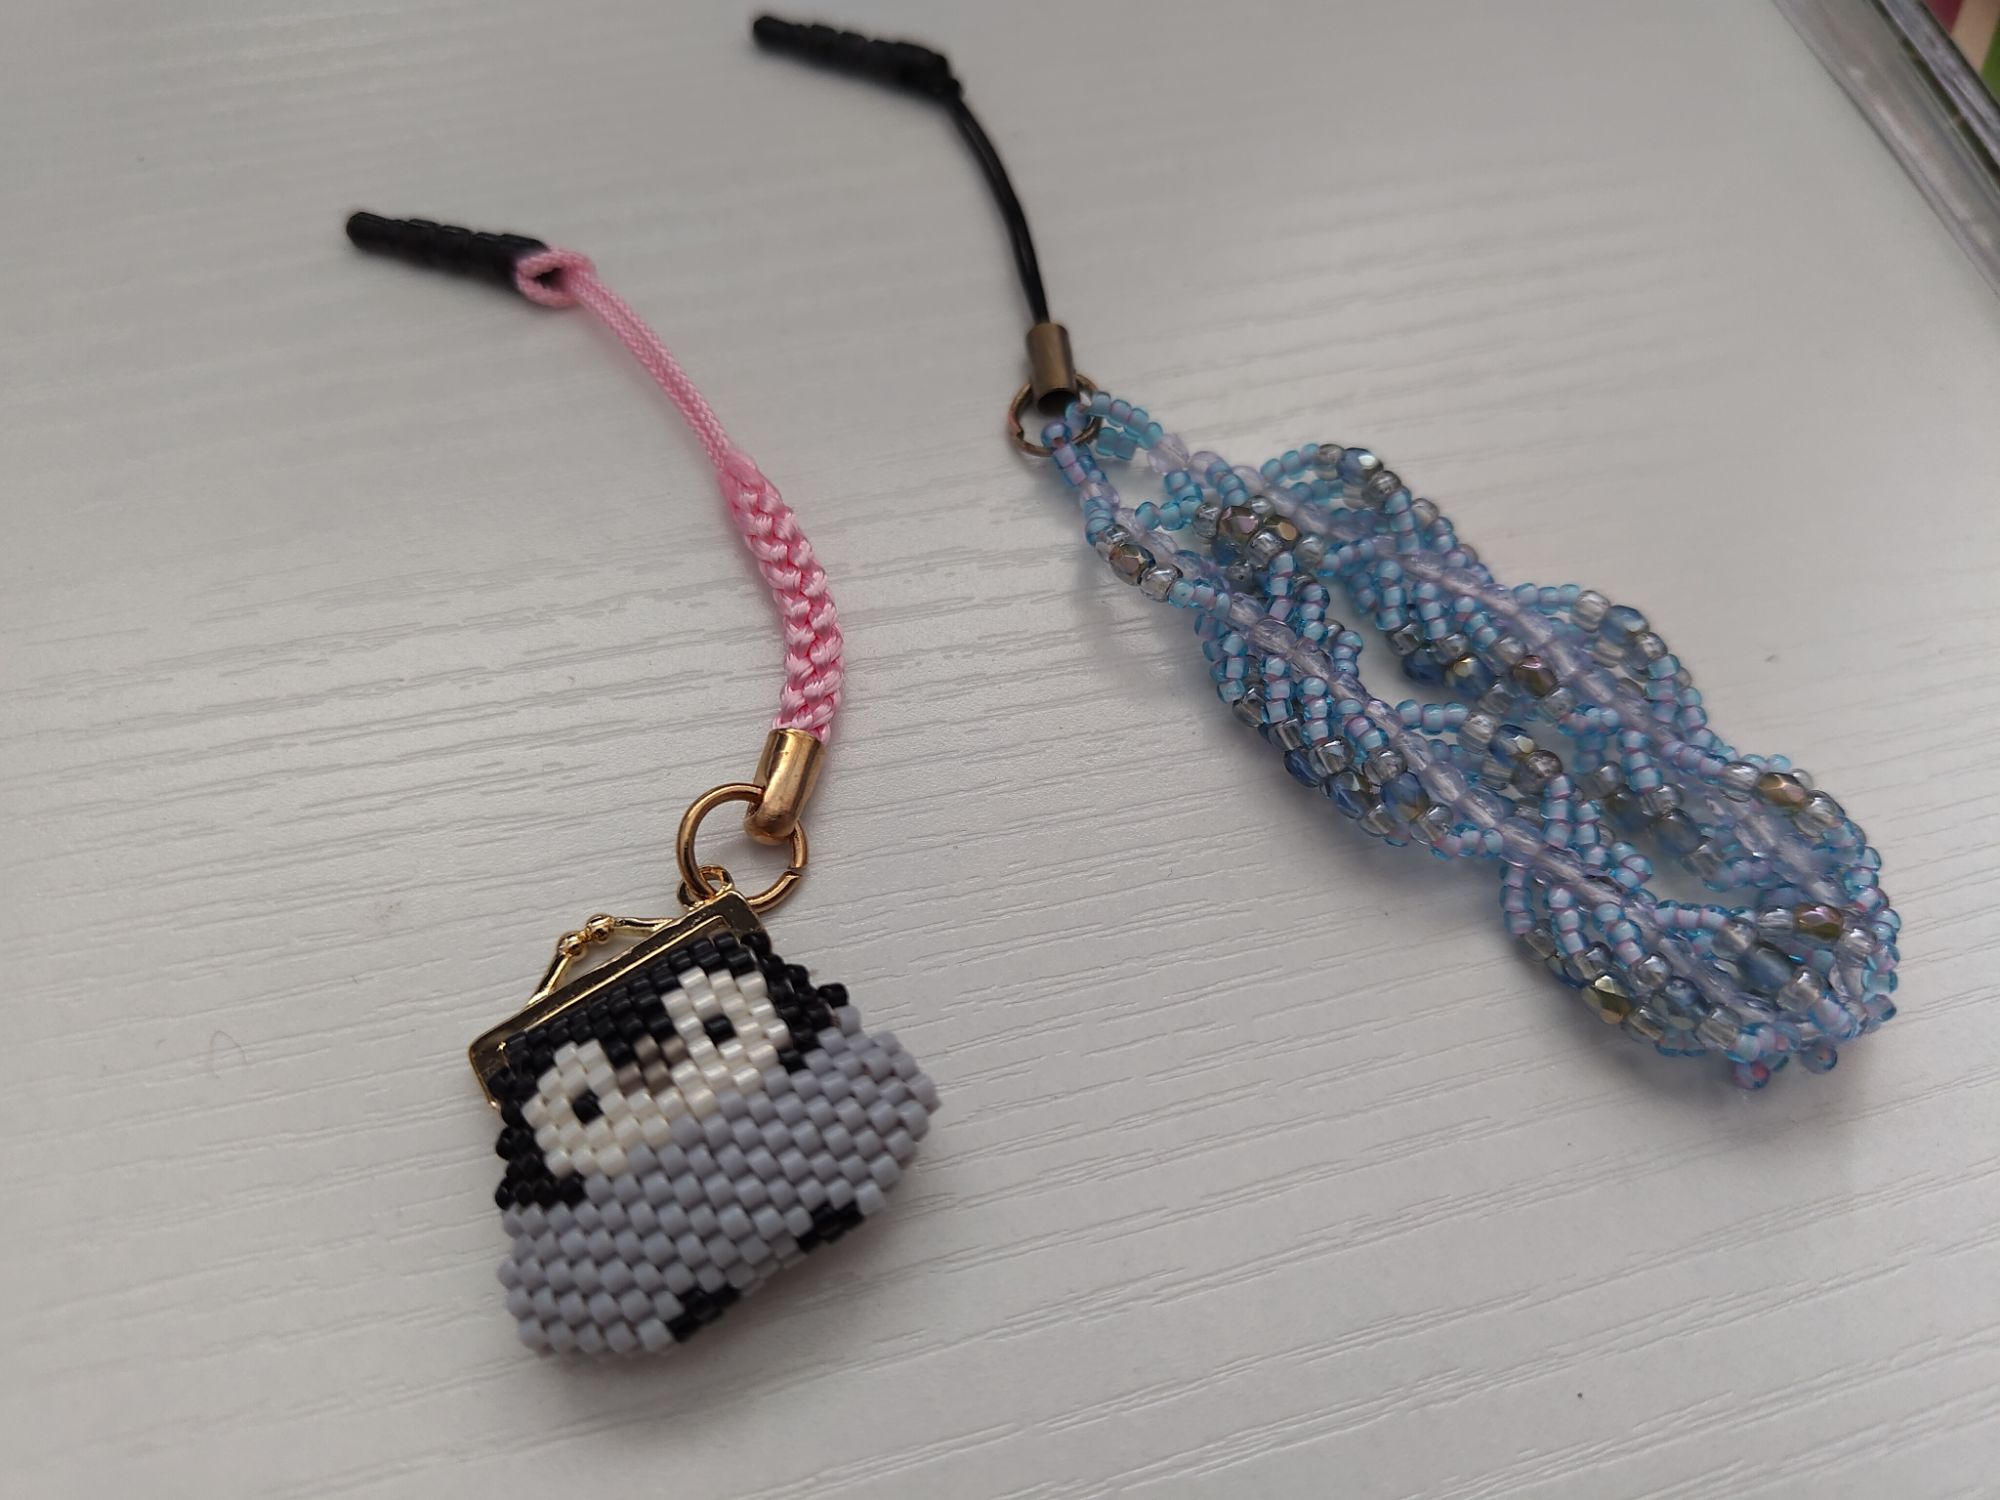
I used my jewellery pliers to open the jump ring and attach the kumihimo cord charm to the loop on the gold charm finding. The charm is complete!

I don’t use charms much except on my phone, so I attached the cord to a dust plug. Now I have three phone charms that I can switch between! (The paopu fruit charm is not pictured below, but was previously featured in the phone strap charms post.)
I’ve had a bit of crafting inspiration recently, so stay tuned for another post this month! I’m a little proud of the next one.
