The follow-up to the Part 1 post where I showed off my bracelet and earrings for a wedding!
What would a fancy event be without an eye-catching hair piece? I will always jump at the chance to use up my ribbon stash. When it comes to hair pieces, a lot of people like to use grosgrain ribbon as it is more durable and sturdy. Satin is quite pretty but its smoothness might not lend itself well to more complicated shapes. Still, I find satin to be generally quite versatile and easy to source, hence why I have so much. I should stock up on some grosgrain when I can though!
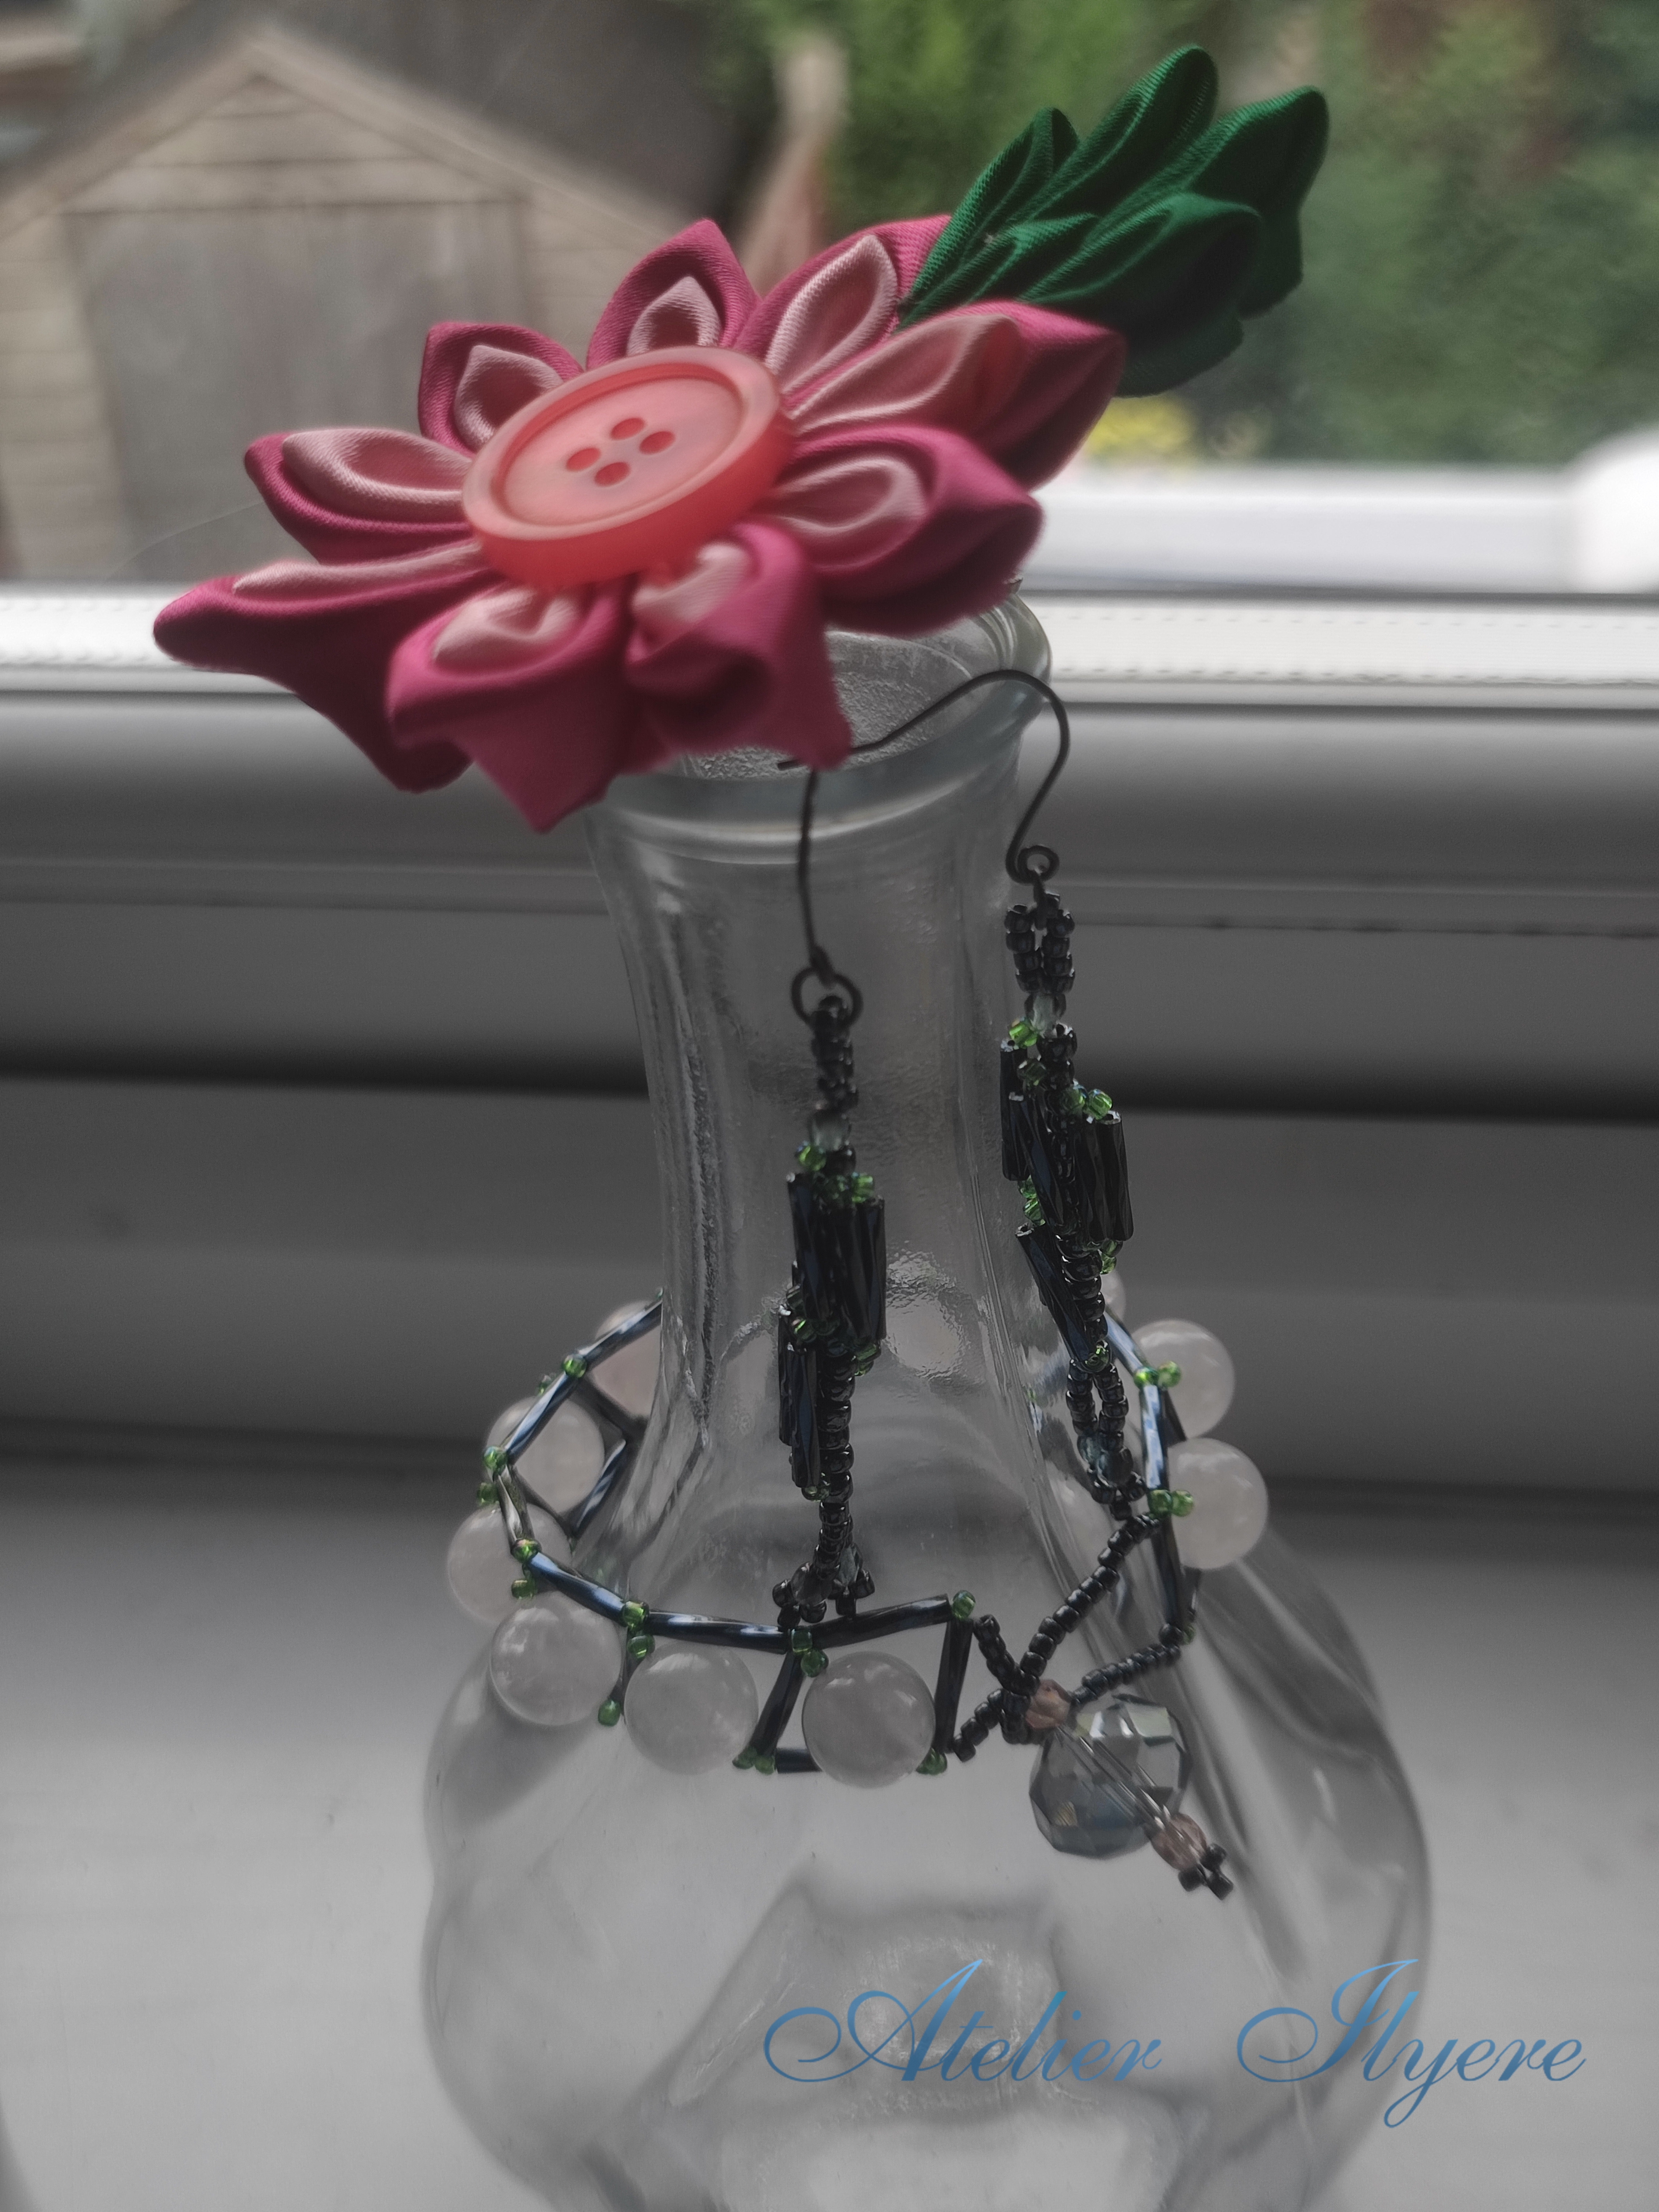
Somehow I had the right colours to match my dress. Shades of hot pink, light pink, and dark green accents! I also got some red out just in case I wanted all the colours represented.

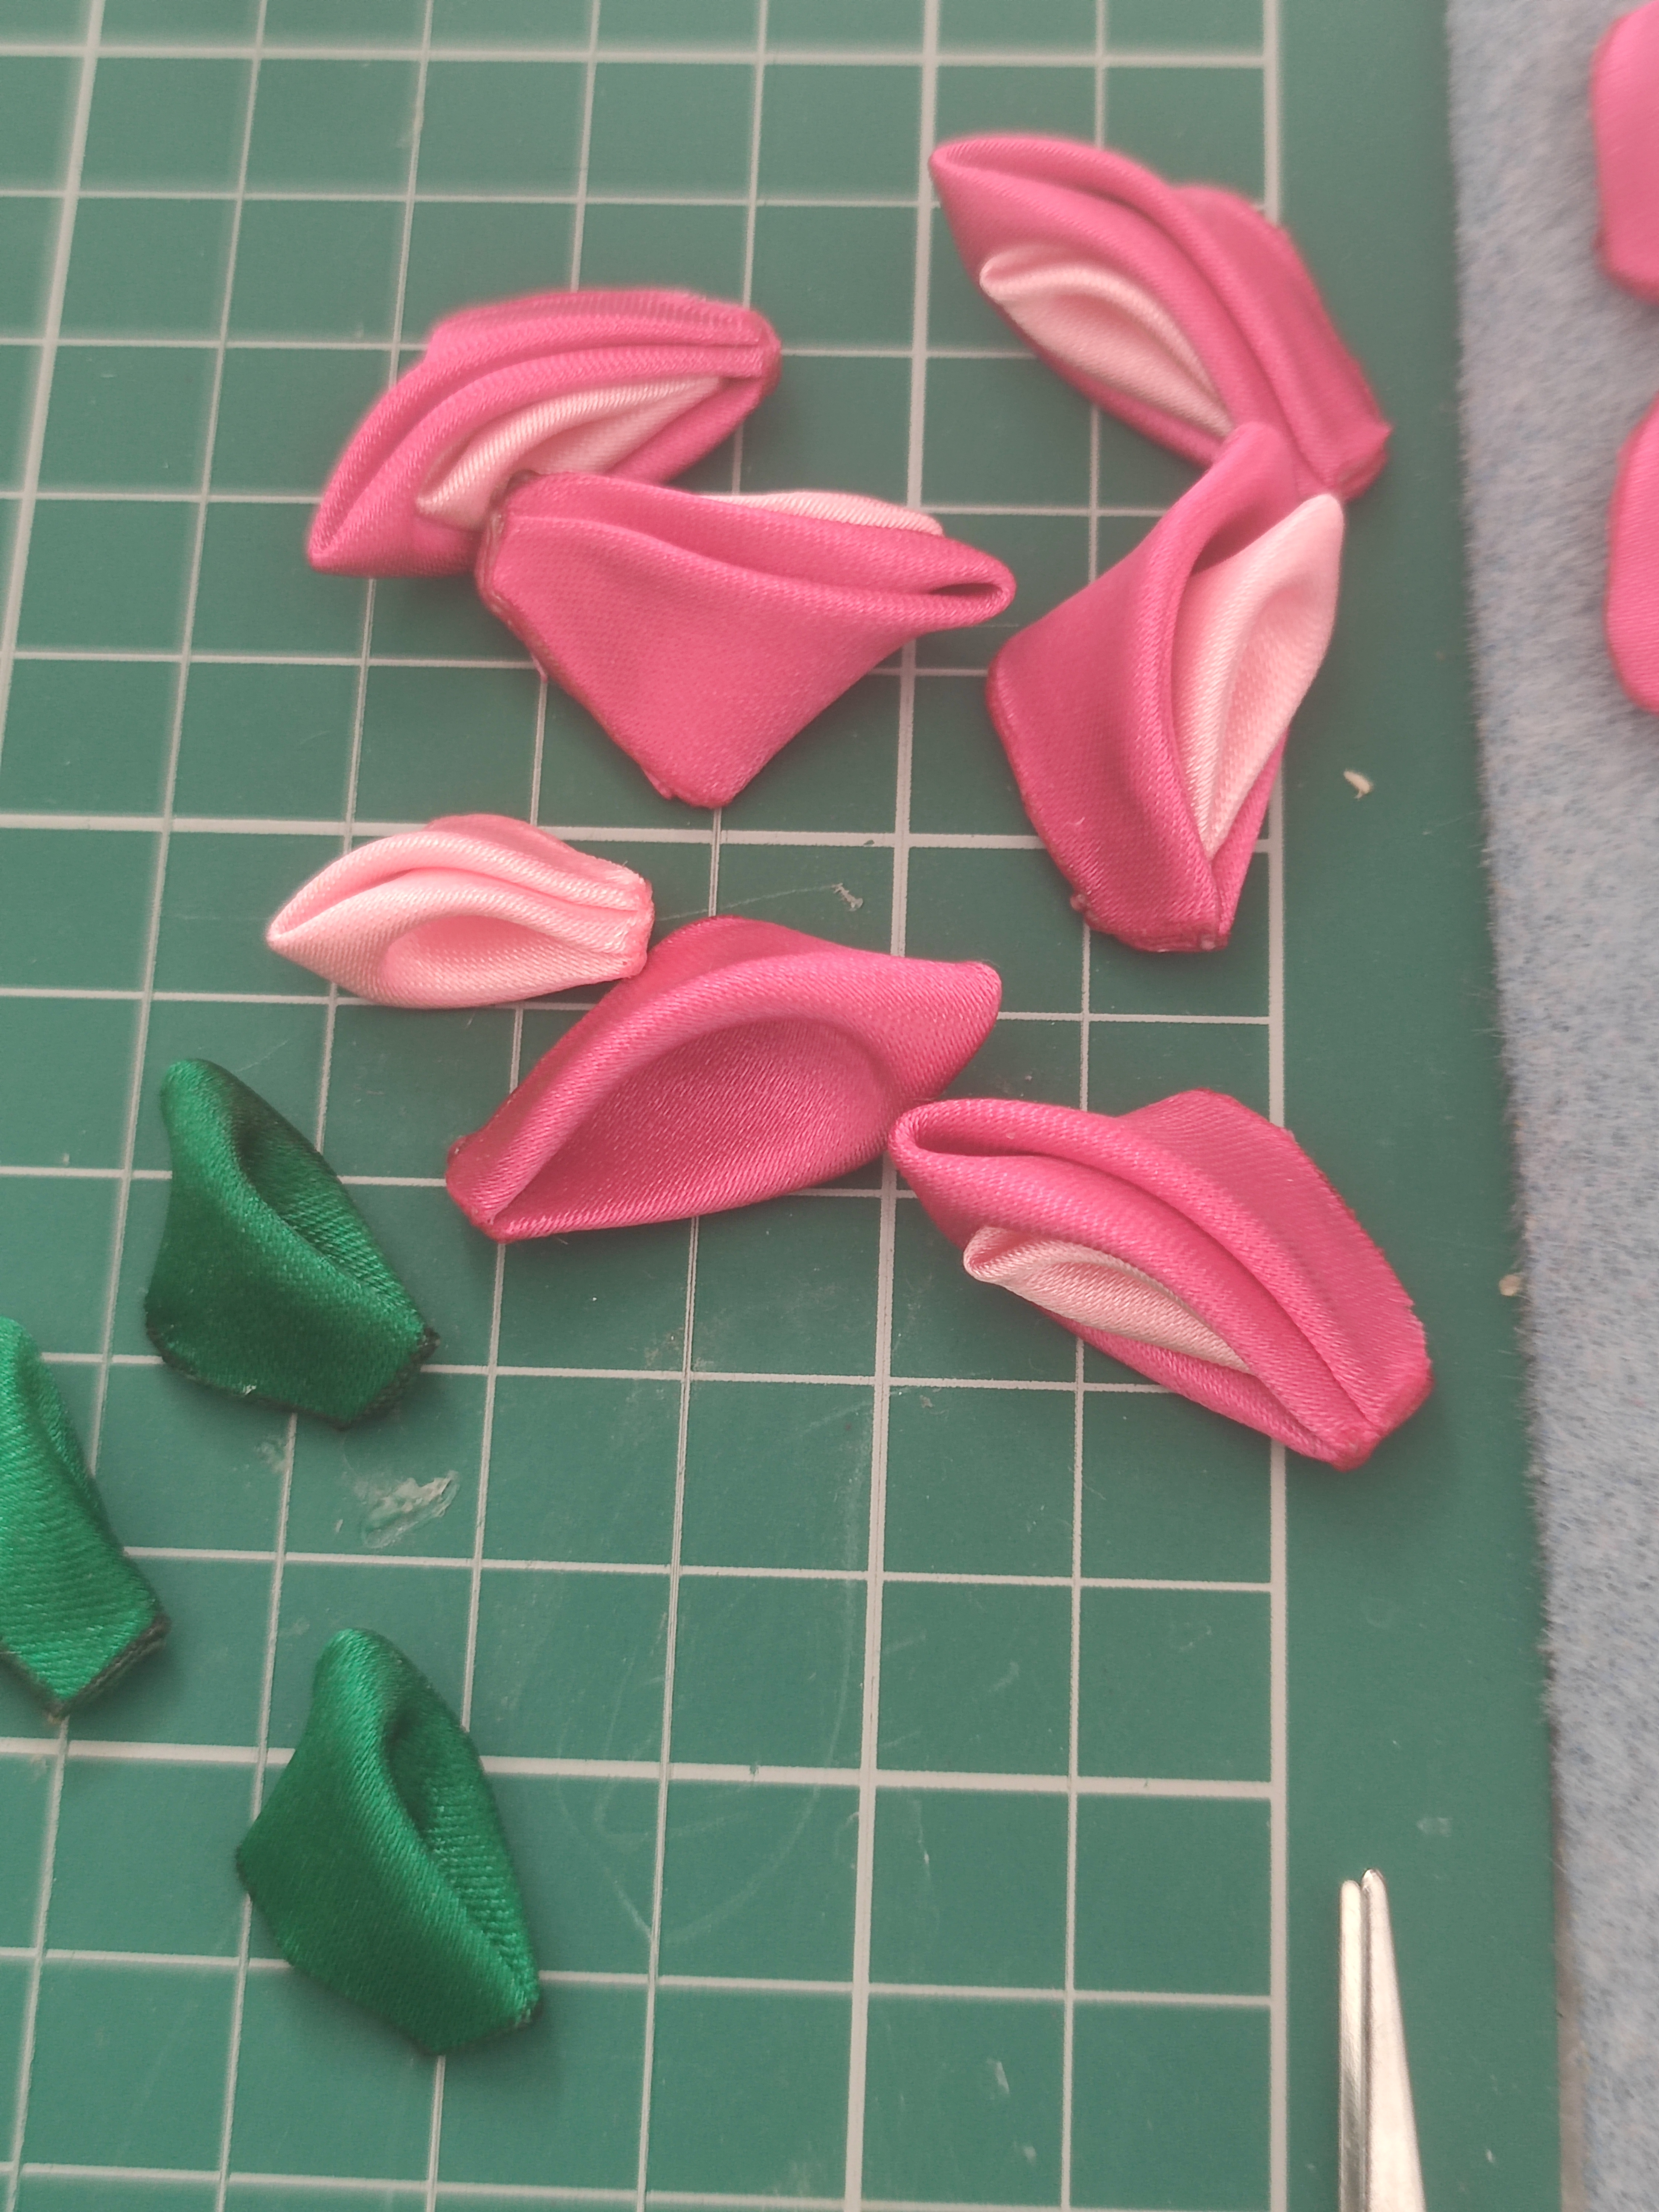
When it comes to satin ribbon, one good method to use with it is tsumami kanzashi – the art of ‘pinching’ or folding fabric. Now the traditional method uses a starch glue to both adhere the petals to the base and stiffen the fabric, but it is quite a specialist product that I don’t own. A basic way to stick the petals together is to use the open flame on a lighter – this burns and melds the fibres of the cut open ends.
I made hot pink and light pink petals separately first, before realising that it would look nicer nested together. I had to use hot glue to secure the light pink petal inside the hot pink petal – it would have been better to use the light to fuse the two together.
I also made some dark green petals in case I wanted to add some leaves.
Ideally you assemble the petals on a base. I cut out a small pink felt disc and hot glued the petals down. With this ribbon size, I could fit nine petals onto the disc.
Because my hair piece was rather large, this left a small gap in the centre and it needed to be covered up. Normally an ornate diamante button would go really well here, but I did not have any! I only had a bowl full of ordinary buttons. It was very important that I chose an appropriate button as a tacky-looking one could ruin the entire thing!
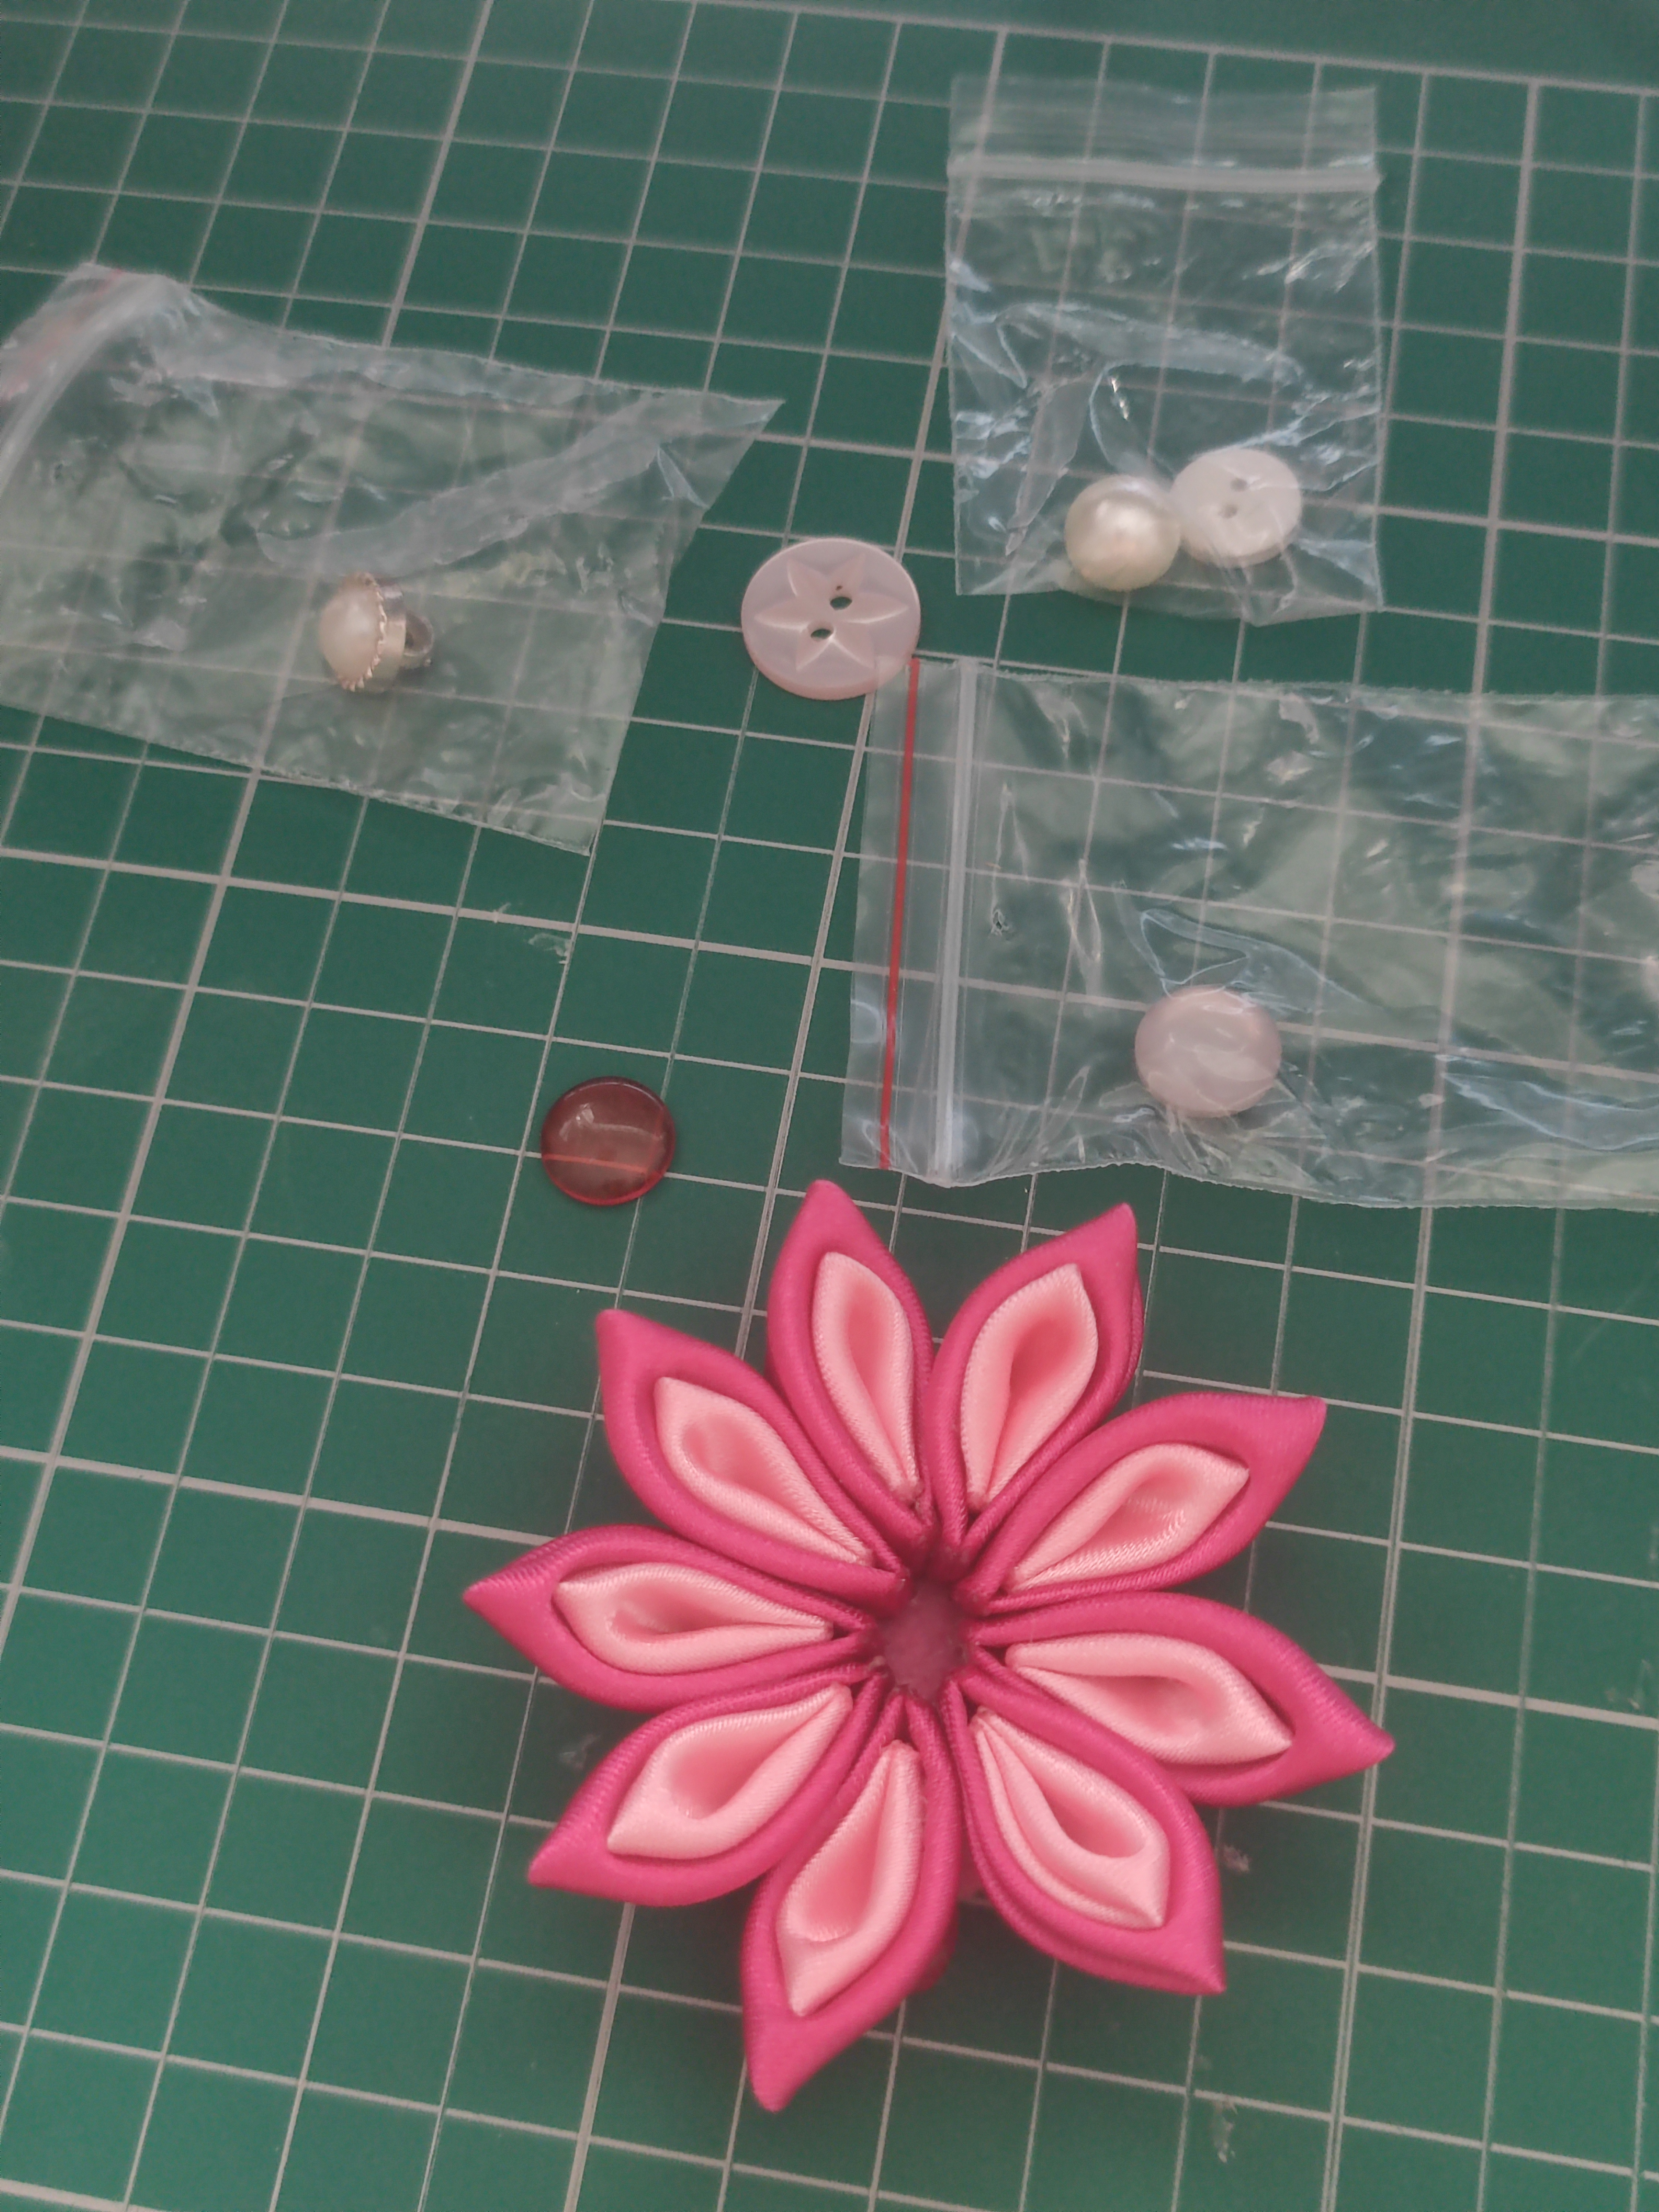
In the end, a larger button was better than an ornate button because it was important to also cover the tips of the light pink centres. I was still experimenting with button sizes here! Pink, or red?
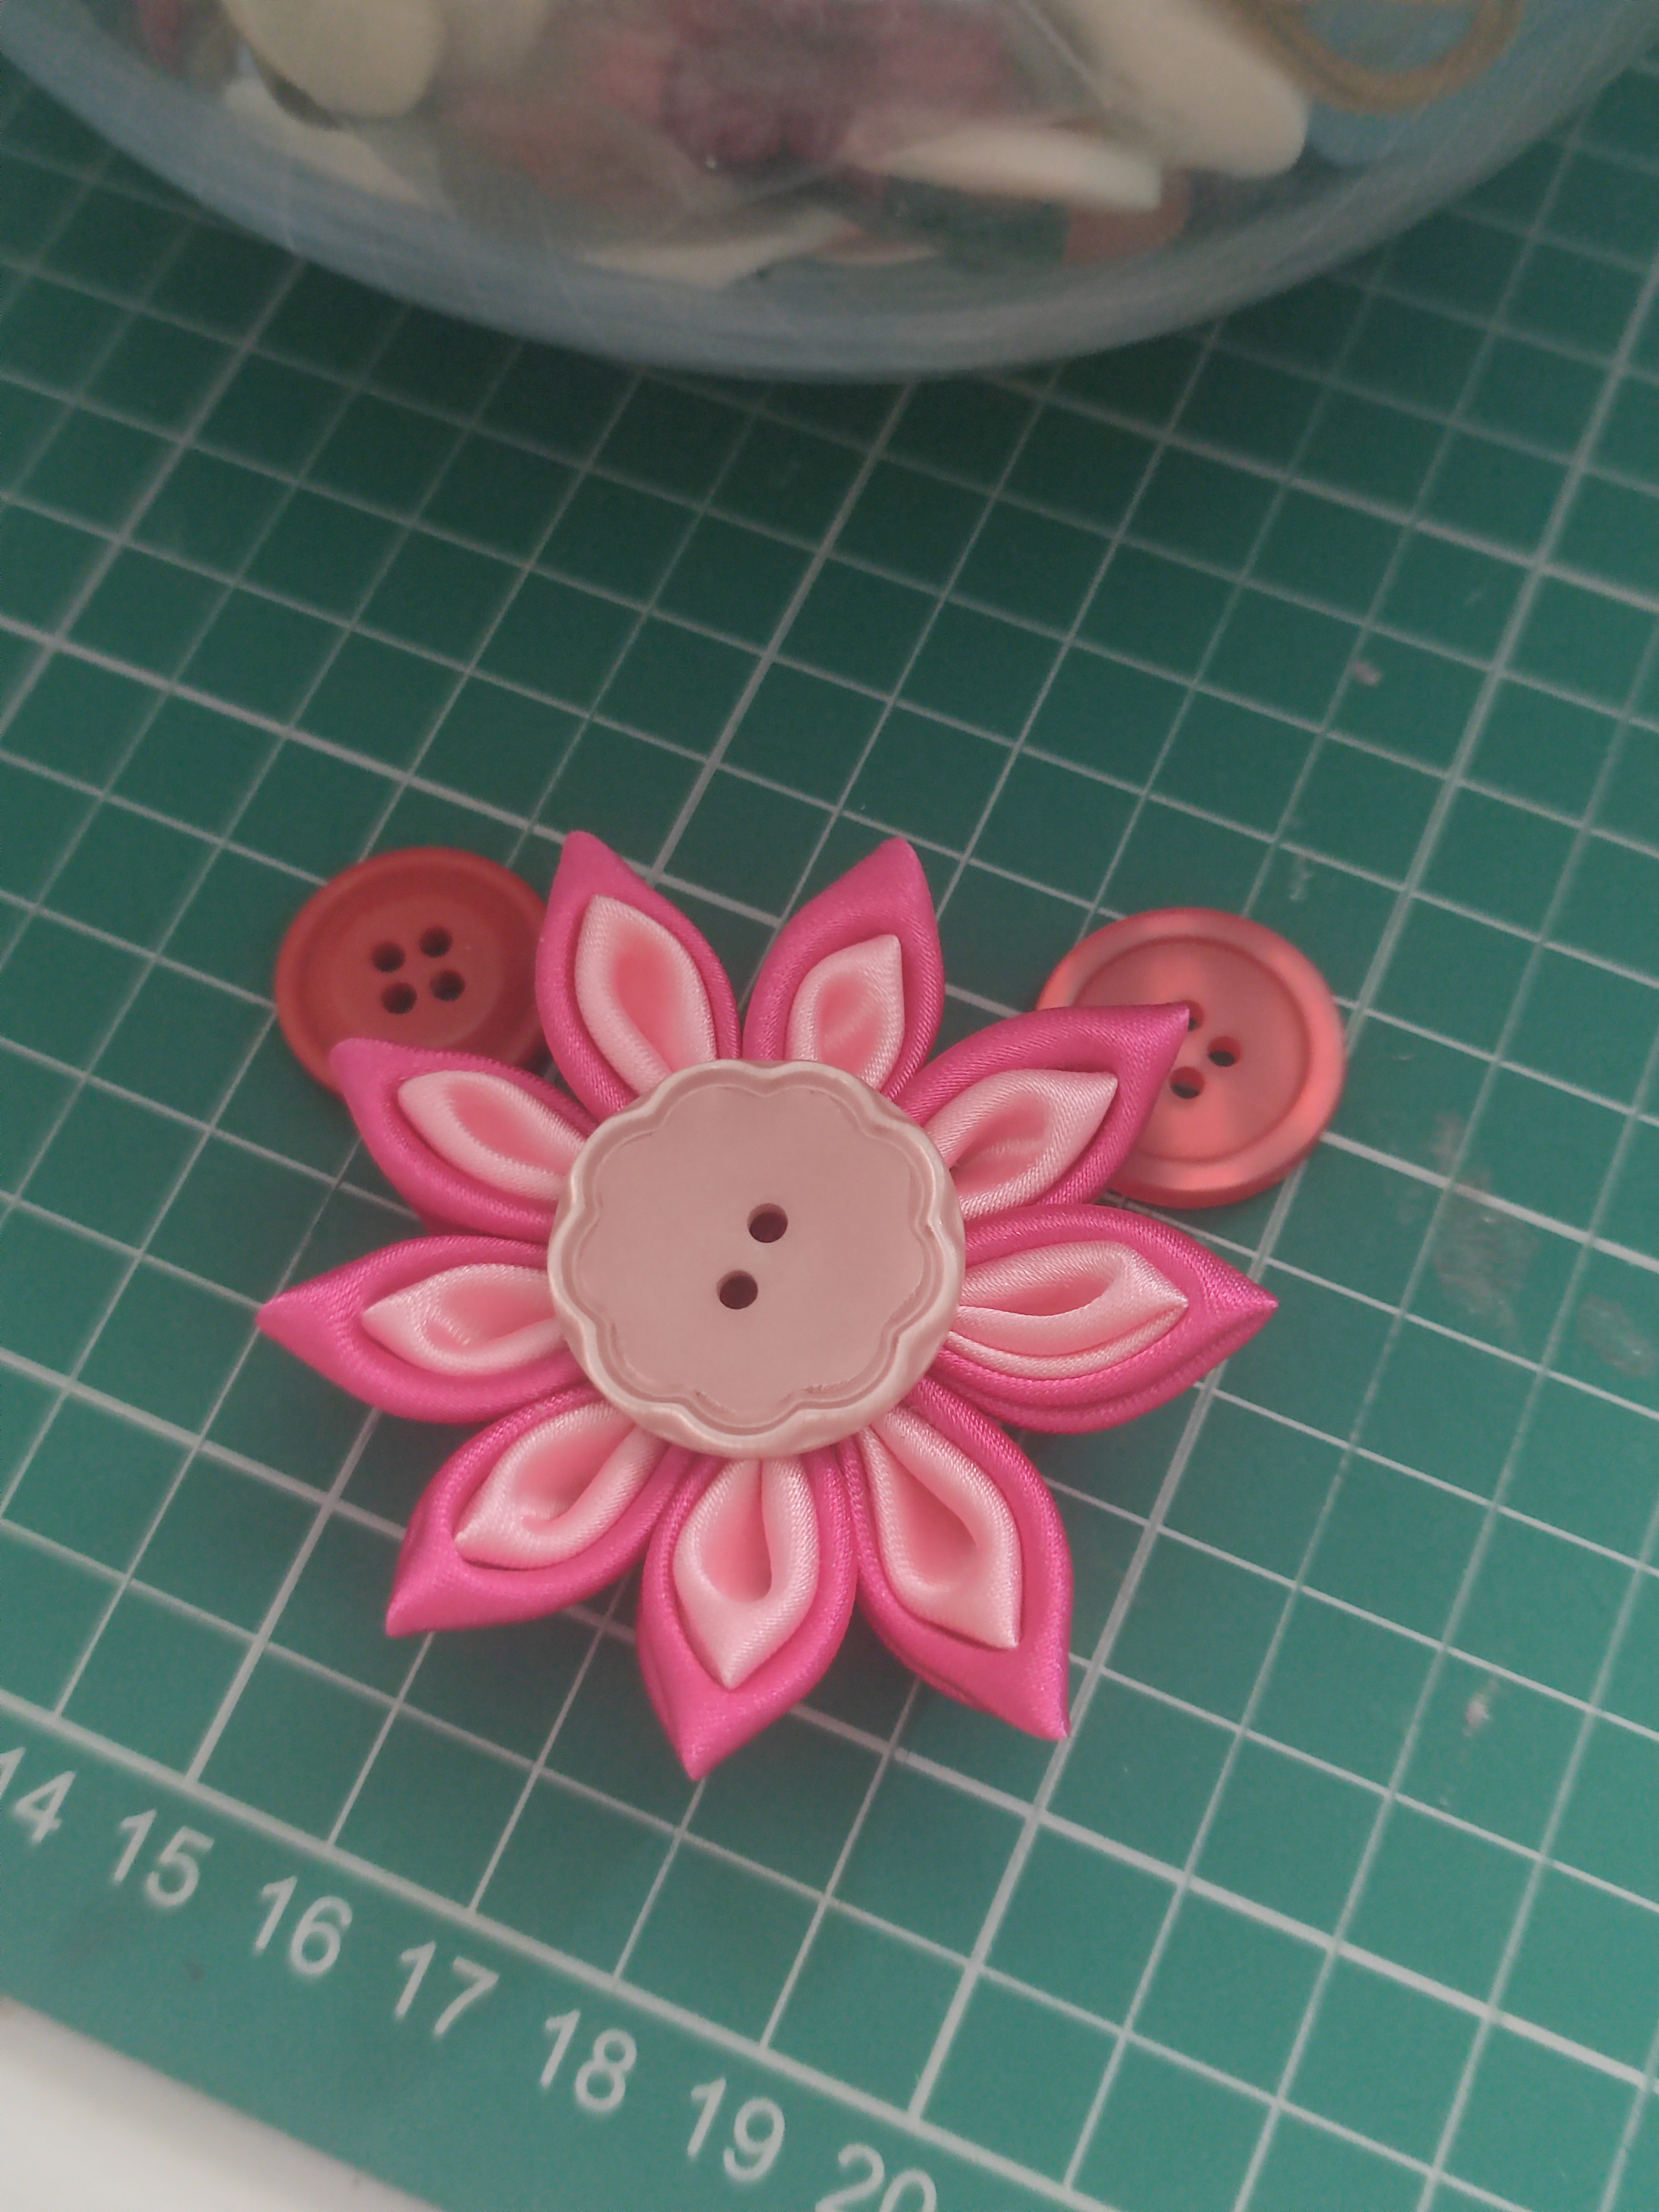
I finally found a button that was in-between red and pink, and just about opaque enough to hide the centre. I securely hot glued it down.
Although I used nine petals total, the way I glued some of it down was a bit wonky, and this left some visible space between two of the petals. I filled this space with some green petals as leaves. I admit it wasn’t the cleanest work because some of the glue is now visible, but it really can only be seen straight on and I’ll be wearing it on the side of my head, so maybe it won’t be too visible?

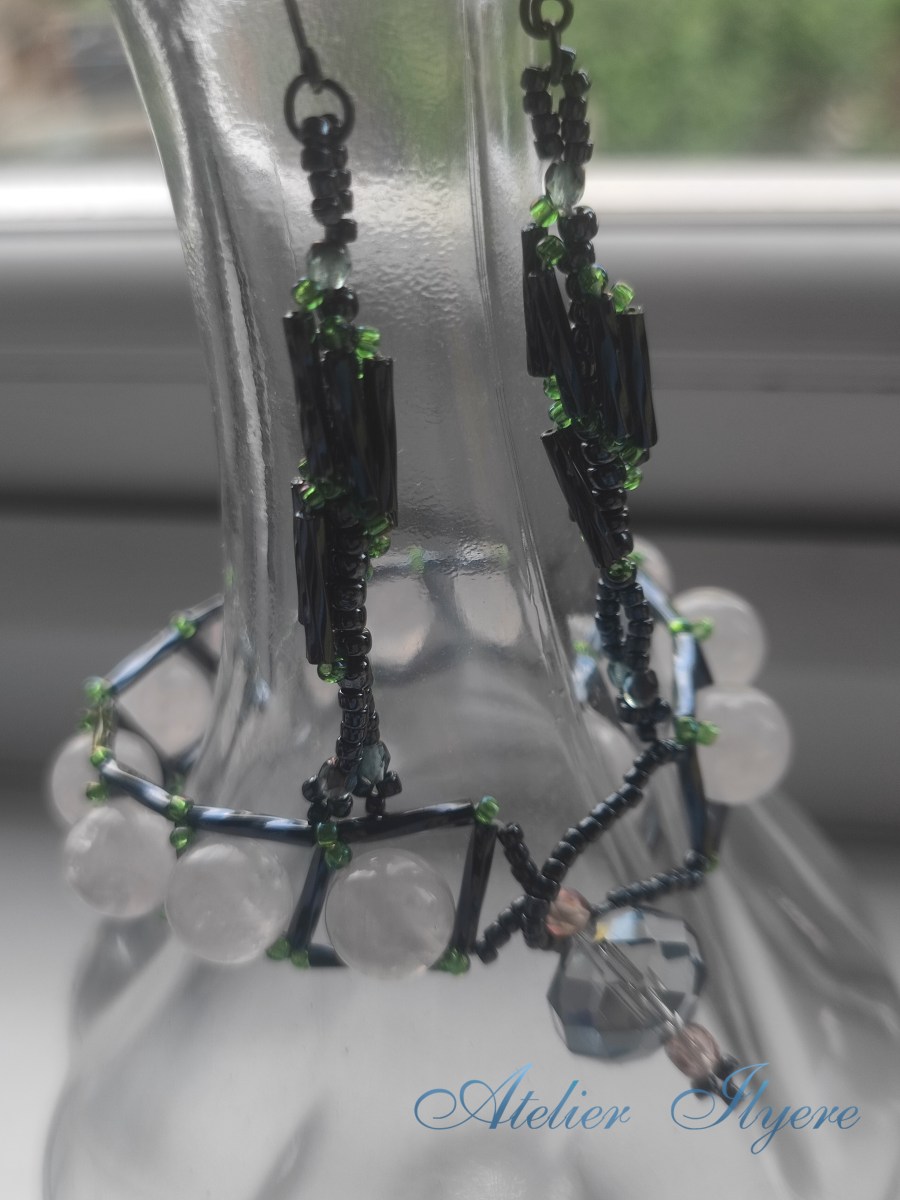
I suppose the three pieces that I made for the wedding are not a proper matching jewellery set, but I did wear all three together. I could definitely wear the hair piece with other outfits, and the earrings have a nice elegance to them, but the bracelet is quite hyper-customised for the dress and might be too difficult to reuse. Still, I had fun making a new jewellery set without having to buy new materials, it has been a while!

Here’s all three parts together, again it does look quite mismatched but I assure you it went well with the dress together!
Materials used:
– 20mm dark pink satin ribbon
– 15mm light pink satin ribbon
– 15mm dark green satin ribbon
– large red button
Tools used:
– scissors
– hot glue gun
– lighter
